
Diving into the world of sourdough baking is a journey of discovery, creativity, and a bit of science. Embarking on this adventure has never been more accessible. This guide aims to demystify the process of creating and maintaining a sourdough starter, making it easy for anyone to become a sourdough aficionado in 2024. From the initial mix to daily feeding routines, let's break down the steps, sprinkle in some essential sourdough terminology, and share tips to ensure your sourdough starter thrives.
Creating Your Sourdough Starter
Jump to:
Day 1: The Beginning
Start with a clean jar, mixing ½ cup of unbleached all-purpose or rye flour with ¼ cup of warm water. This mixture should sit for 24 hours, beginning the fermentation process that’s crucial for developing your starter.
Day 2: Signs of Life
You’ll notice small bubbles, indicating that the yeast is starting to activate. Add another ½ cup of flour and ¼ cup of water, and let it sit for another 24 hours.
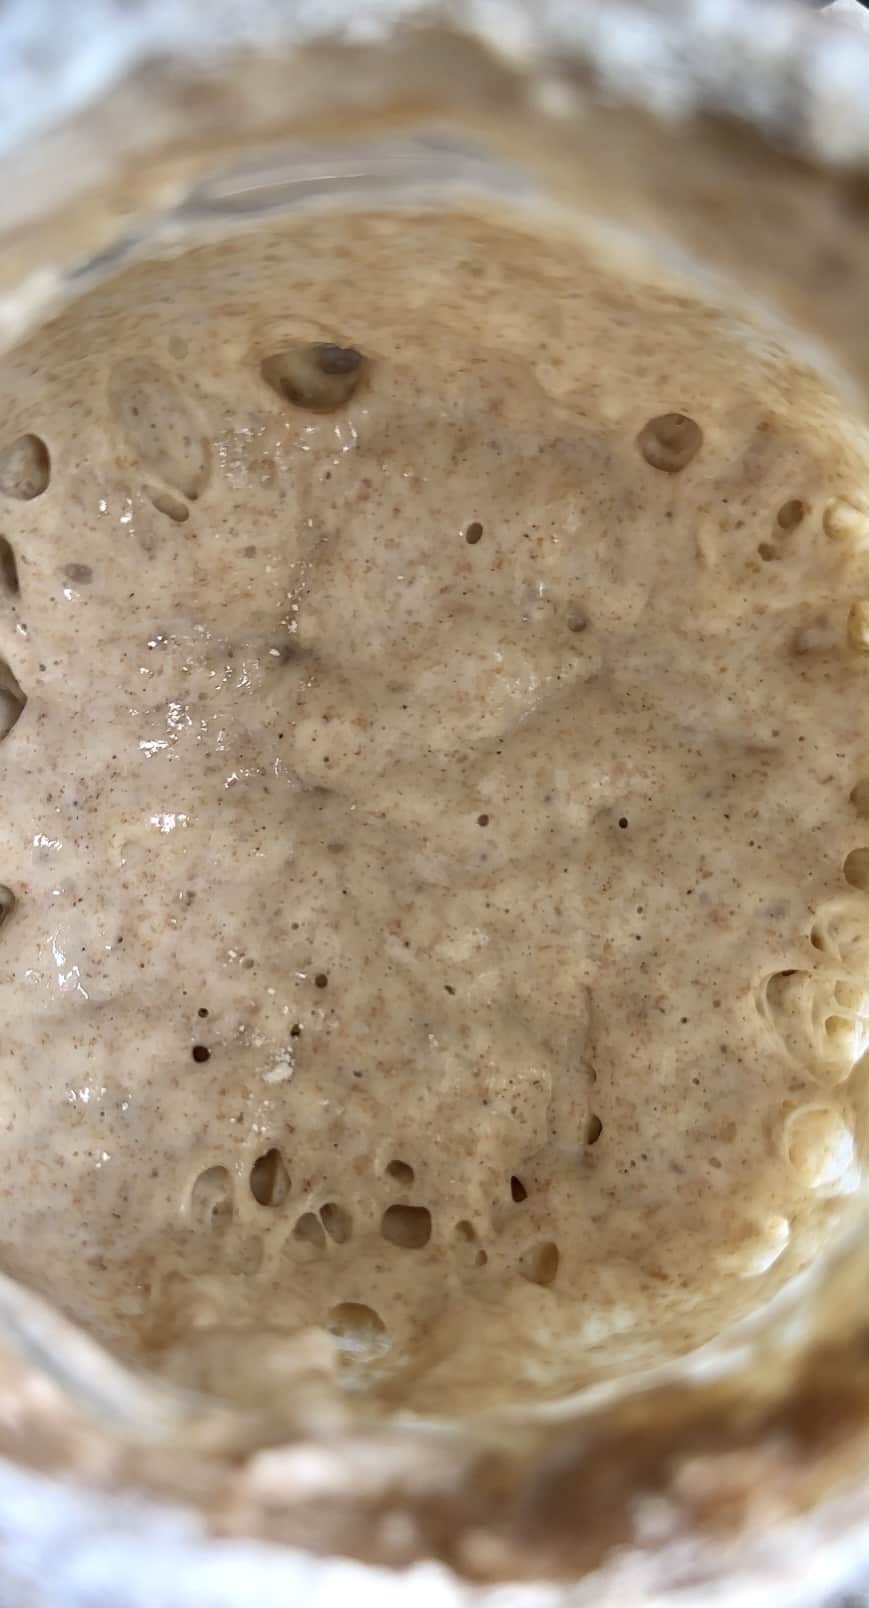
Day 3 to 6: The Funky Phase
By Day 3, the starter will emit a strong, funky smell-a sign that the yeast is feeding and growing. Continue the process of discarding half the starter and feeding it with flour and water. By Day 5 or 6, feed it once more and let it rest for 24 hours.
Day 7 and Beyond: Active Starter
After about a week, your starter will become active, doubling in size and bubbling up with a pleasant, yeasty aroma. This might take a bit longer, so be patient and continue the feeding routine as necessary.
Maintaining Your Sourdough Starter
Once your starter is active, regular maintenance is key to keep it healthy. Here's how:
- Daily Feeding: If kept at room temperature, feed your starter daily with 2:1 ratio flour and water (ex. ½ cup flour, ¼ cup water, or 1:1 by weight 60g flour, 60g water). This keeps the yeast happy and ready for baking.
- Refrigeration: For less frequent bakers, store your starter in the fridge and feed it once a week. Before baking, take it out, let it reach room temperature, and feed it to reactivate.
- Discard Use: Instead of throwing away the discard, use it in pancakes, waffles, or any recipe that could benefit from a tangy flavor.
Sourdough Terminology Decoded
- Starter: A fermented mixture of flour and water containing wild yeast and bacteria that act as natural leavening agents.
- Feed: The process of adding flour and water to your starter to keep the yeast active.
- Discard: The portion of your starter that's removed before feeding to prevent it from becoming overly acidic.
- Levain: A portion of the active starter mixed with flour and water to create a preferment for your sourdough bread.
- Autolyse: A process where flour and water are mixed and rested before adding the starter and salt, helping gluten development and hydration.
- Bulk Fermentation: The first rise of your dough, where it doubles in size and develops flavor.
- Proofing: The final rise of the shaped dough before baking.
Tips for Sourdough Success
- Flour Choice: Alternating between rye and all-purpose flour can introduce different flavors and nutrients, enhancing your starter's complexity.
- Hydration Level: Aim for a pancake batter consistency. Adjust with more water or flour as needed.
- Warm Environment: Keeping your starter in a warm spot expedites the fermentation process, especially crucial during the initial stages.
- Intuition: Listen to your starter. It might require more frequent feeding or adjustments in hydration depending on temperature and activity level.
Creating and maintaining a sourdough starter is a rewarding experience, blending art and science in the pursuit of the perfect loaf. By following this simplified process and embracing the tips and terms outlined here, you’re well on your way to mastering the art of sourdough baking. Remember, sourdough is as much about the journey as it is about the delicious, tangy bread you'll create. Welcome to the world of sourdough baking-where every loaf tells the story of patience, care, and culinary exploration.
Recipe Card

The easiest way to make sourdough starter at home!
EMAIL THIS RECIPE
Enter your email and I’ll send this directly to you.
Plus you’ll get new recipes from me every week!
Ingredients
- All purpose or rye flour
- Water
Instructions
- Day 1: In a clean jar, add ½ cup unbleached all purpose or rye flour, and ¼ cup warm water. Mix well. Let sit for 24 hours.
- Day 2: Your starter should have some small bubbles. Once again add in ½ cup all purpose or rye flour, and ¼ cup warm water, mix and let sit for 24 hours.
- Day 3: On day 3, your starter should smell really funky. Pour out about half of your starter (just eyeball this), then once again add in ½ cup all purpose or rye flour and ¼ cup warm water. This time you're going to let it sit for 2-3 days, to let that yeast really feed and start to grow.
- Day 5 or 6: Once again discard (pour out) ½ of your starter, then feed (add in) with ½ cup all purpose or rye flour, and ¼ cup warm water. Mix well and let sit for 24 hours.
- Day 7: At this point, your starter will start to become active. It may take more than 7 days (mine took about 10), but just repeat day 5 (sometimes not feeding for 2 days) until your starter doubles in size a few hours after your feed it, and it's bubbly with a pleasant, yeasty smell.
Want To Save This Recipe?
Share your email & we'll send it over! PLUS, you'll get new recipes from us weekly
Hi Minoo! Just a quick couple of questions, can you keep the discard for other recipes and will you be creating and sharing any discard recipes? Thank you
Hi Liz! Definitely keep your discard once your sourdough is active — it’s perfect for pancakes, waffles, muffins, all kinds of things. Just keep it in the fridge and use it regularly. And I’m working on sharing more discard recipes because I know how helpful those are!
I have always wanted a simple, straightforward recipe for a sourdough starter. I have never attempted one but I will now that I found your recipe. I have been exploring your website now for over an hour and I am excited to try so many of your recipes! Thank you so much for creating this website, and I plan to share it on social media. I know a lot of people who are wanting to get away from preservatives and processed foods and you have made it so simple to do that! Thank you!
Hi Sara!! Wow this is the nicest comment ever. This is the goal and mission I have for the recipes that I share so it makes me incredibly happy that my mission has resonated with you and that you love the recipes!!! Please let me know how it goes and send over some bread pics too (:
What size jar should I use quart or larger
quart should work just fine!
I’m wondering if I can use both flours in my starter? Alternate between them when I feed it?
Hi, I would like to make the rye bread starter. Just one inquiry if I may, do you stir when you add the additional ingredients?
Thanks
Do you recommend any certain flour?
Do I use regular tap water or filtered and can I use unbleached organic bread flour (Bob’s Red Mill)???
Hi Carolyn! You can absolutely use bobs red mill, that’s a great flour. And honestly I use tap water and I’ve never had an issue!