
Creating restaurant-quality bread bowls at home isn’t just possible… It’s easy with this 4-ingredient bread bowl recipe.

If you’ve ever enjoyed soup in a bread bowl at Panera but hesitated to try making them yourself, this recipe will change your mind. With just four basic ingredients, minimal hands-on time, and no special equipment, you’ll create bread bowls that are crusty on the outside, soft on the inside, and sturdy enough to hold your favorite soup without getting soggy.
Why This Bread Bowl Recipe Works
Jump to:
This recipe skips unnecessary ingredients and complicated techniques while delivering extraordinary results. The dough rises quickly, requires minimal kneading, and transforms into perfectly golden bowls with a rustic appearance that’s ideal for serving soups, stews, and dips.
What makes these bread bowls exceptional is the winning combination of a quick rise and the steam bath method during baking. This creates that signature crisp crust while maintaining a soft, fluffy interior-exactly what you want in a bread bowl.
Minoo’s Pro Tip: For the best crust, don’t skip the water bath during the first part of baking. This creates steam that helps develop that perfect crispy exterior.
Ingredients & Equipment
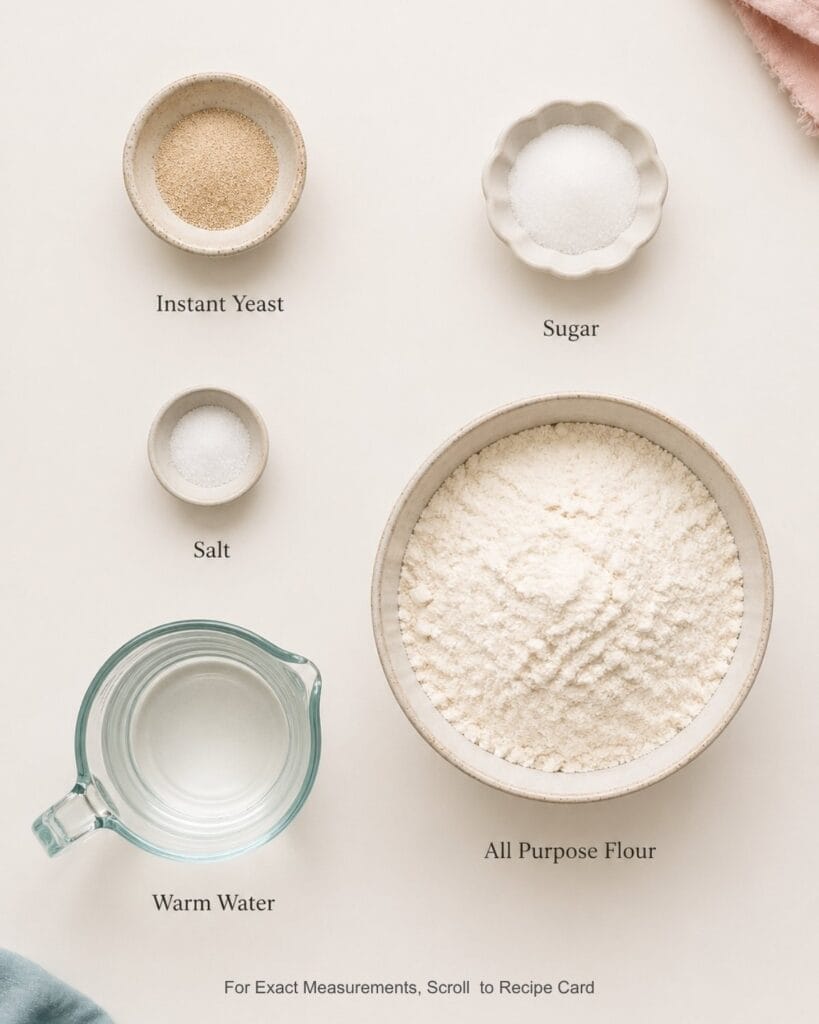
All you need are four basic ingredients for this Bread Bowl Recipe:
- Instant Yeast: The workhorse that makes your dough rise quickly.
- Sugar: Feeds the yeast and adds a subtle sweetness to balance the bread’s flavor.
- Salt: Enhances flavor and helps control the yeast activity.
- All-Purpose Flour: No specialty flours needed! Regular all-purpose flour creates the perfect texture.
Equipment-wise, you’ll just need mixing bowls, a baking sheet, parchment paper, and an additional baking sheet for the water bath.
Minoo’s Pro Tip: If your kitchen is cold, preheat your oven to its lowest setting for 2 minutes, then turn it off and place your covered dough inside with the door slightly ajar. This creates the perfect warm environment for rising.
Step-by-Step Bread Bowl Recipe
1. Mix the Dry Ingredients
Combine flour, yeast, sugar, and salt in a large bowl. Unlike traditional recipes, you don’t need to proof the yeast separately when using instant yeast-another time-saver!

2. Add Water and Form Dough
Pour warm water (about 110-115°F) into the dry ingredients and mix until a shaggy dough forms. The dough will look rough at first, but don’t worry-that’s normal.
Minoo’s Pro Tip: Water temperature matters. Too cool and your dough won’t rise properly, too hot and you’ll kill the yeast. If you don’t have a thermometer, the water should feel warm but not hot to the touch.

3. Knead the Dough
Transfer the dough to a lightly floured surface and knead for 3-5 minutes until smooth. The dough should be slightly sticky but manageable. If it’s too sticky, add flour one tablespoon at a time.

4. First Rise
Place the dough in an oiled bowl, cover with a clean kitchen towel, and let rise for 30 minutes or until roughly doubled in size.

5. Shape the Bowls
Punch down the dough to release air bubbles, then divide into three equal portions. Shape each portion into a smooth ball by pulling the edges toward the bottom and pinching them together.
Minoo’s Pro Tip: To get perfectly round bread bowls, shape each portion by tucking the edges underneath and rotating the dough in your hands, creating surface tension that helps them hold their shape while baking.

6. Second Rise
Place the dough balls on a parchment-lined baking sheet, cover, and let rise for 15 minutes. This shorter second rise prevents the dough from over-proofing while still allowing it to develop.

7. Score and Bake
Score an “X” on top of each bread bowl with a sharp knife. This allows the dough to expand properly during baking. Then bake at 425°F with a water bath on the bottom rack for the first 10 minutes. Remove the water bath and continue baking for another 10 minutes until golden brown.
Minoo’s Pro Tip: Listen for a hollow sound when you tap the bottom of a bread bowl-that’s how you know they’re perfectly baked.

8. Cool and Serve
Let the bread bowls cool slightly before cutting off the tops and hollowing out the insides. Save the removed bread for dipping!

Customization Ideas for This Bread Bowl Recipe
While the classic recipe is delicious as is, here are some ways to customize your bread bowls:
- Add 1 teaspoon of garlic powder to the dough for garlic bread bowls
- Mix in 1 tablespoon of Italian seasoning for herbed bread bowls
- Brush the tops with melted butter and sprinkle with coarse sea salt before baking
- Add ½ cup of shredded cheese to the dough for cheesy bread bowls
Minoo’s Pro Tip: For heartier bread bowls, substitute one cup of all-purpose flour with whole wheat flour. You may need to add an extra tablespoon or two of water as whole wheat flour absorbs more moisture.
Perfect Pairings
This bread bowl recipe is perfect for so many delicious fillings. I personally love filling them with my Cheddar and Broccoli Soup Recipe for a comforting meal that’s impressive enough for guests but simple enough for a weeknight dinner.
They’re also great with:
- Hearty beef stew
- Clam chowder
- Spinach artichoke dip
- Loaded baked potato soup
If you’re looking for a breakfast option, try hollowing out the bread bowl, brushing the inside with butter, cracking an egg inside, and baking until the egg is set.

Troubleshooting Tips
Bread bowls spread out instead of up: Your dough may be too wet. Add a bit more flour next time, or try shaping the dough more tightly.
Bread bowls are too dense: Your yeast might be old, or your water may have been too hot or too cold. Also, avoid adding too much flour during kneading.
Bread bowls crack during baking: Make sure to score the tops properly and create sufficient steam with the water bath.
Minoo’s Pro Tip: If your bread bowls aren’t as crusty as you’d like, spray the inside of your oven with water from a clean spray bottle when you first put the bread in to create extra steam.

Make-Ahead and Storage
These bread bowls can be made ahead of time and stored for later use:
- Same Day: Let cool completely, then store at room temperature in an airtight container for up to 24 hours.
- Freezing: Once completely cool, freeze in airtight containers or freezer bags for up to 1 month. Thaw at room temperature and reheat in a 350°F oven for 5-10 minutes to restore crispness.
Recipe Card

Homemade Bread Bowl Recipe (Better Than Panera)
EMAIL THIS RECIPE
Enter your email and I’ll send this directly to you.
Plus you’ll get new recipes from me every week!
Ingredients
- 1 tablespoon Instant Yeast
- 1 tablespoon Sugar
- 1 teaspoon Salt
- 3 ½ Cups All Purpose Flour
- 1 ½ Cups Warm Water
Instructions
- In a bowl, combine flour, yeast, sugar and salt. Add in warm water and mix until a shaggy dough forms.
- Transfer to a flat surface and knead for 3-5 minutes until you have a smooth dough ball, it should be slightly sticky but if too sticky, add 1 tablespoon flour at a time.
- Place in an oiled bowl and allow to rise for 30 minutes.
- After 30 minutes, punch down your dough and divide into 3 sections. Roll each section into a smooth dough ball and place onto a parchment lined baking sheet.
- Cover and allow to rise for another 15 minutes.
- After 15 minutes, score an X into the top of each bowl, and bake at 425℉. For the first 10 minutes, bake with a water bath (place a baking sheet filled with boiled water on the bottom rack of your oven). After 10 minutes, remove the water bath, move your bowls to the bottom rack and allow to bake for another 10 minutes or until golden.
- Remove from the oven, allow to cool then cut the tops off, empty the inside, fill with soup and enjoy!
Nutrition
Want To Save This Recipe?
Share your email & we'll send it over! PLUS, you'll get new recipes from us weekly
Frequently Asked Questions
Yes, but you’ll need to activate it first. Dissolve the yeast in the warm water with the sugar and let it sit for 5-10 minutes until foamy before proceeding with the recipe.
This could be due to over-proofing during the second rise. Stick to the 15-minute second rise time, and make sure your dough is shaped tightly.
They should be golden brown on top and sound hollow when tapped on the bottom. If you have an instant-read thermometer, the internal temperature should be around 190-200°F.
Absolutely! Divide the dough into 6 smaller portions instead of 3 and reduce the baking time by about 5 minutes.
They’re best enjoyed the day they’re made, but will stay good for about 2 days in an airtight container at room temperature. Freeze for longer storage.
I hope you enjoy making these homemade bread bowls as much as I do! They’re the perfect way to elevate a simple soup into a memorable meal that will impress family and friends. Let me know in the comments if you try this recipe and how it turns out!
Very easy and delicious!
So happy to hear that Michelle!! Enjoy (:
Can I double this recipe? Thank You.
Nana, yes, you can double it without a problem. Just make sure everything is evenly mixed and give yourself plenty of space for shaping or baking. It scales up nicely!
The bread bowls are the best I’ve ever had, my family all loved them.
Your recipes are very easy to follow and minimal ingredients.
5 stars for sure…..
I’ll be making these on a regular basis winter is coming and we eat a lot of soup. Thank you for sharing
wooooo I’m so glad to hear this Wendy!! Your family is lucky to have you (:
All of your bread recipes are five stars. They are very easy to follow and easy to make with simple ingredients. I have made them all and my family loves them. Thank you for the recipes and sharing.
This makes me smile ear to ear Wendy!! Thank you so much for the kind comment, I appreciate you more than you know. I’ll keep the bread recipes coming (:
Made these bread bowls for the first time, along with the cheddar and broccoli soup. Absolutely delicious. I am recently retired. I have always cooked but never really baked, especially not a lot of breads. So far I have made your pita bread, bagels and now these bread bowls. So easy and so tasty. You know what you are doing, and thank you for sharing your recipes. 🙂
These bread bowls are the best and it’s so great to hear you’re taking up baking as a hobby Kathy!! It’s so rewarding and it comes with the side affect of people you know randomly showing up at your door asking for bread hahaha.
Very good! I made these for supper tonight. Quick and easy. I used the kneading hook on my mixer. Tasty, chewy bread that holds the soup in well.
That’s what I love to hear Elizabeth!! What soup did you have with it?