 Grab My Super Easy Bread Cookbook

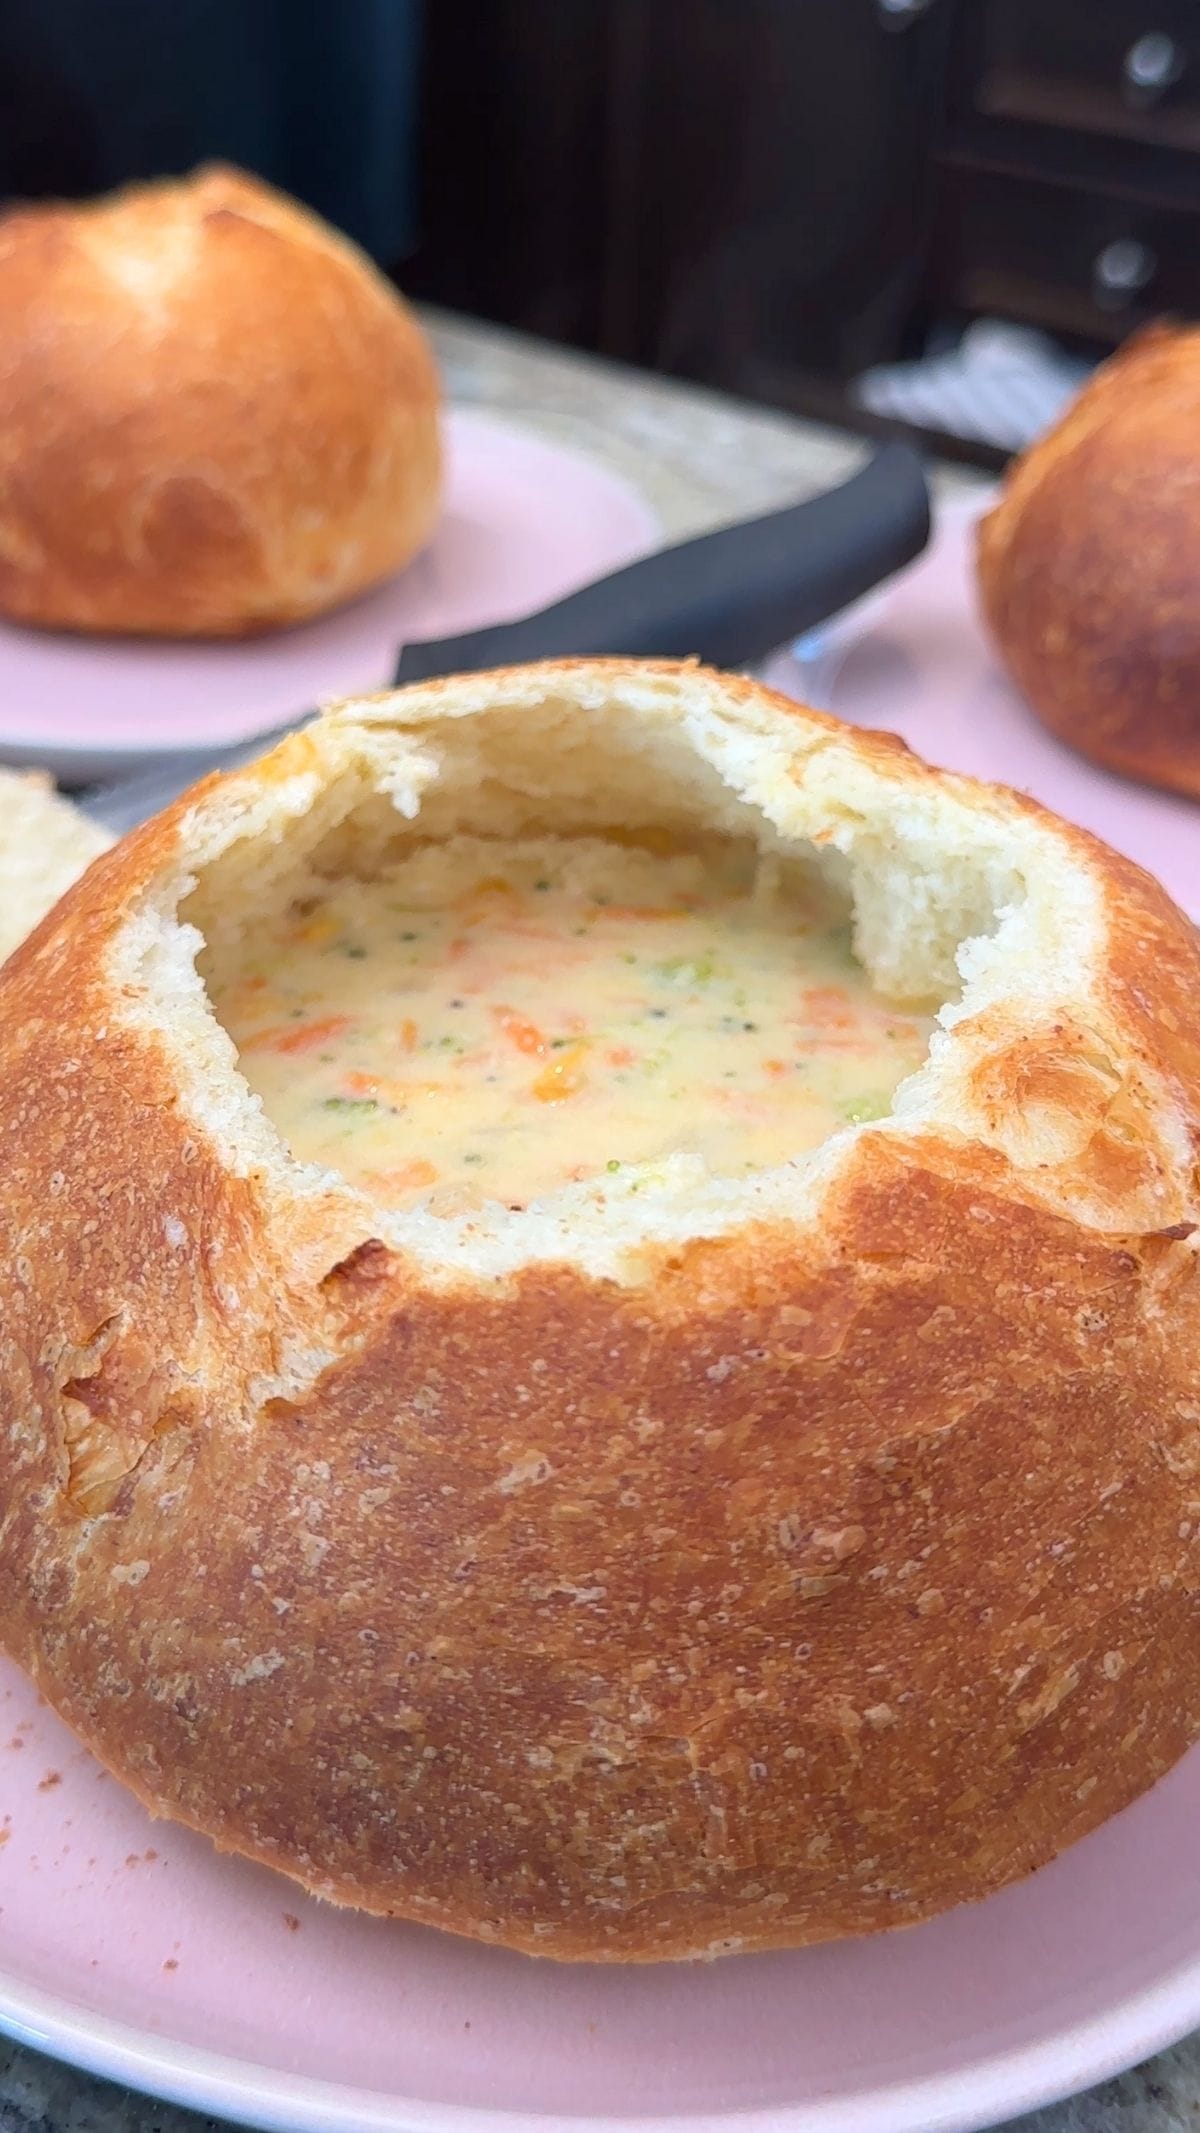
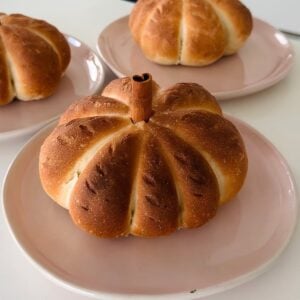
My pumpkin shaped bread bowl needs just 2 key ingredients, 25 minutes of prep, and 2 quick rises, and it's SO easy to shape that even your kids can make it! No trick here: This showstopping (and tasty!) treat is perfect for Halloween parties, a cozy fall dinner, or a cute date night with your beau. Pair with chili or my quick cheddar broccoli soup for the ultimate combo.
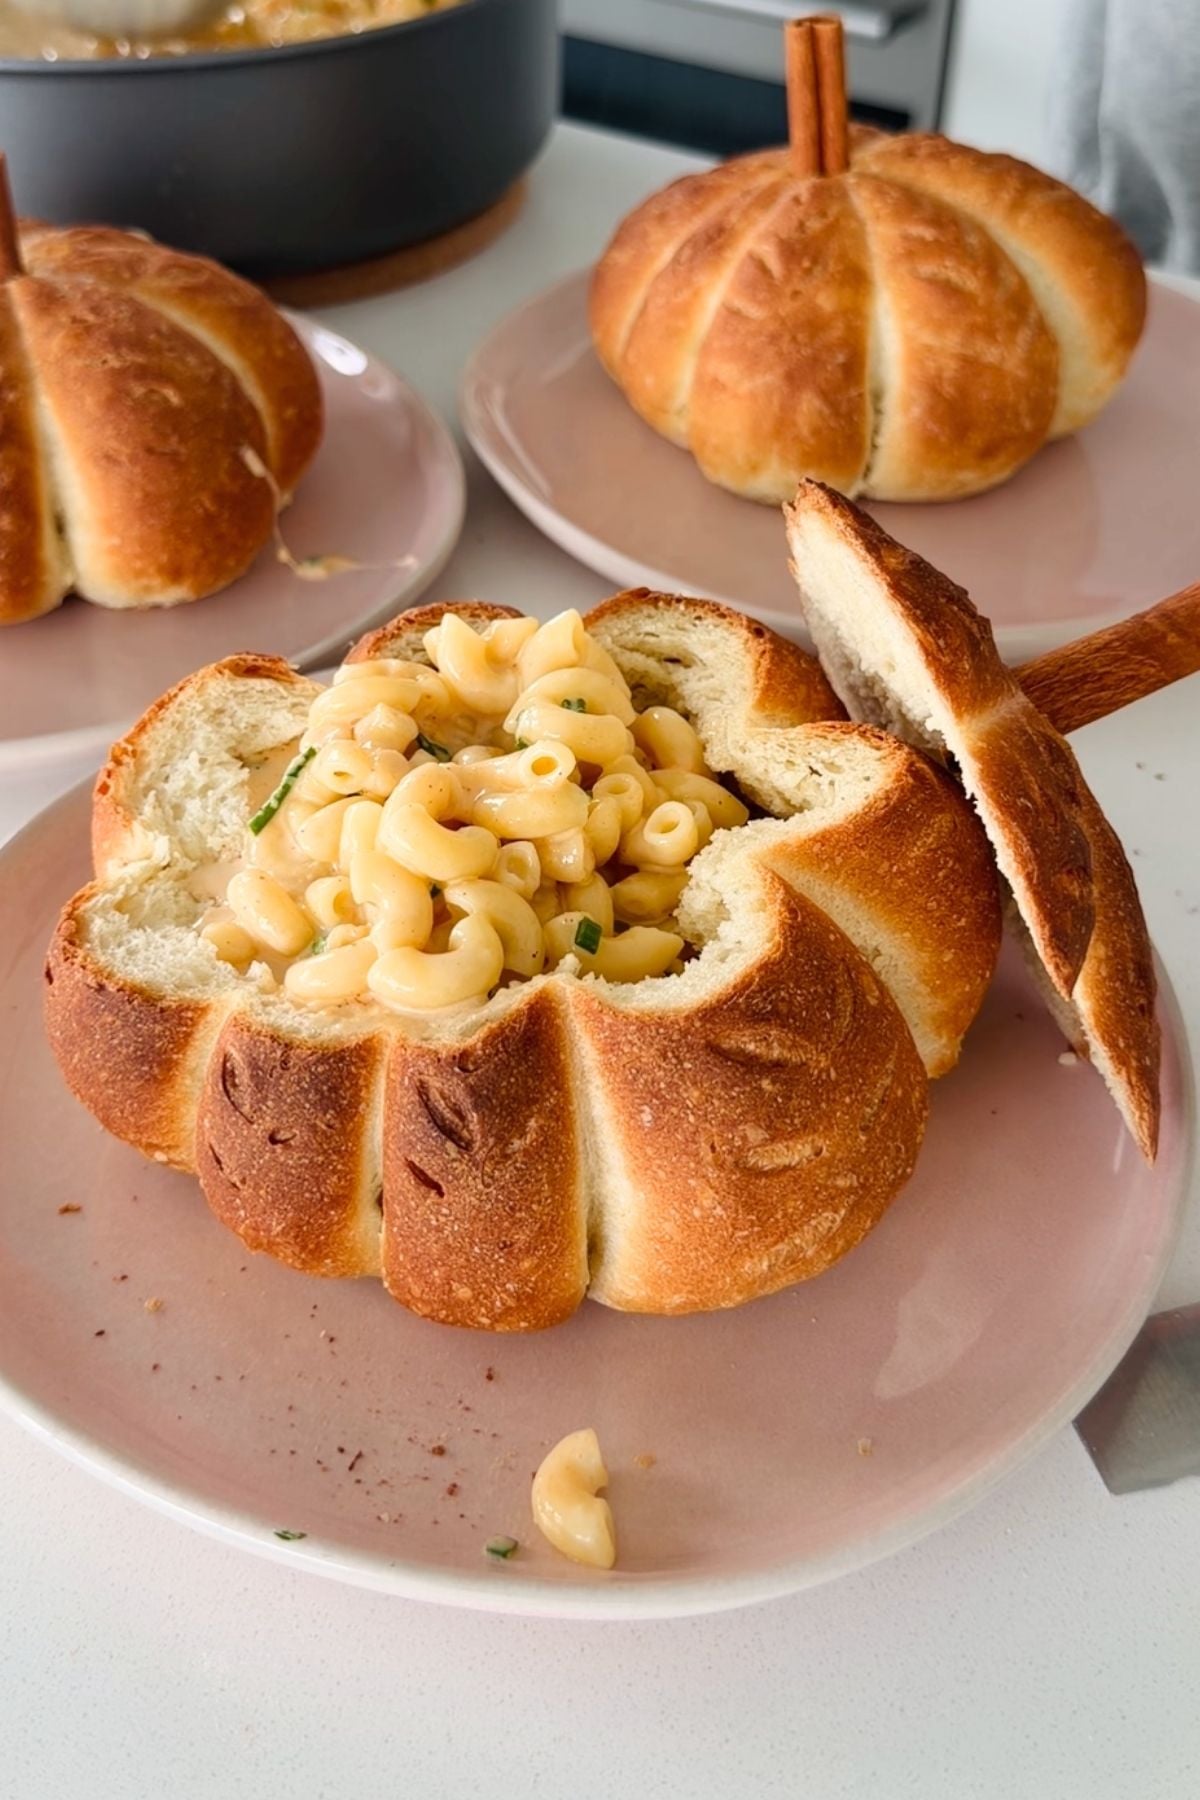
Quick Look: Pumpkin Shaped Bread Bowl
- Prep Time: 25 Minutes
- Rise Time: 45 Minutes
- Cook Time: 20 to 25 minutes
- Total Time: 1 Hour 35 Minutes (plus cooling)
- Yield: 3 Bread Bowls
- Difficulty: Beginner
- Equipment: Food-safe twine
- Optional Add Ins: Pumpkin puree, pumpkin seeds, garlic powder, chilli flakes, thyme, onion powder, paprika, cayenne, jalapeños, cheddar
- Why This Works: 2 key ingredients, 10 basic steps, and 25 minutes of prep. Simple, but the result is a cute, cozy pumpkin bread bowl that's perfect for the cooler weather.
SUMMARIZE & SAVE THIS CONTENT ON
Why We Like This
- You can't find this anywhere else: Trust me: I have tried. Even if you check every grocery store's Halloween-inspired bakery selection, you'll never find a pumpkin shaped bread bowl. Since there's no shop-bought alternative and this recipe is so easy and fun, there's no reason NOT to make it from scratch!
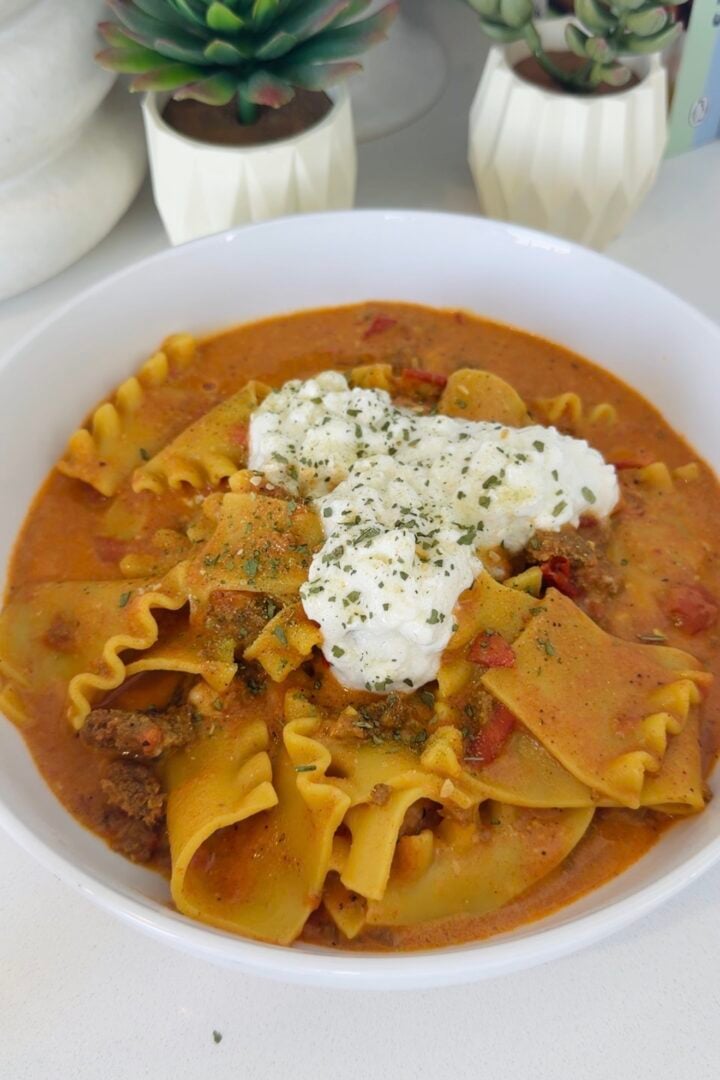
- Perfect for Halloween dinner parties: Halloween is one of my favorite festivities, and it gives you the perfect excuse to "dress up" your baked goods with some spooktastic touches. These pumpkin shaped bread bowls are a total showstopper on any table and will really impress your guests, especially if you serve them with "Dracula's blood soup" (aka my easy lasagna soup).
- Only 2 key ingredients: The dough comes together with all-purpose flour and instant yeast, plus a touch of seasoning and water. It's practically magical, but I promise you there's no witchcraft behind my recipe! Just plenty of trial and error on my part to get you the easiest and coziest fall-themed bread bowl ever.
- A fall treat your kids will remember: Everyone eats with their "eyes," but this is especially true for our little ones. These pumpkin shaped bread bowls will truly amaze them and make even a healthy vegetable soup appetizing and special; a great way to sneak in veggies and help them hit their 5 a day! I've found kids also LOVE to get involved in this recipe, especially when it comes to shaping the dough and adding the twine.
Minoo's Pro Tip: You can easily use this recipe to make a larger loaf or rolls as well (just remember to adjust the bake time). I love slicing the individual rolls and stuffing them with no-rennet mozzarella for a warming lunch, but you can even just enjoy them with fresh cream cheese or your choice of spread.
Ingredients
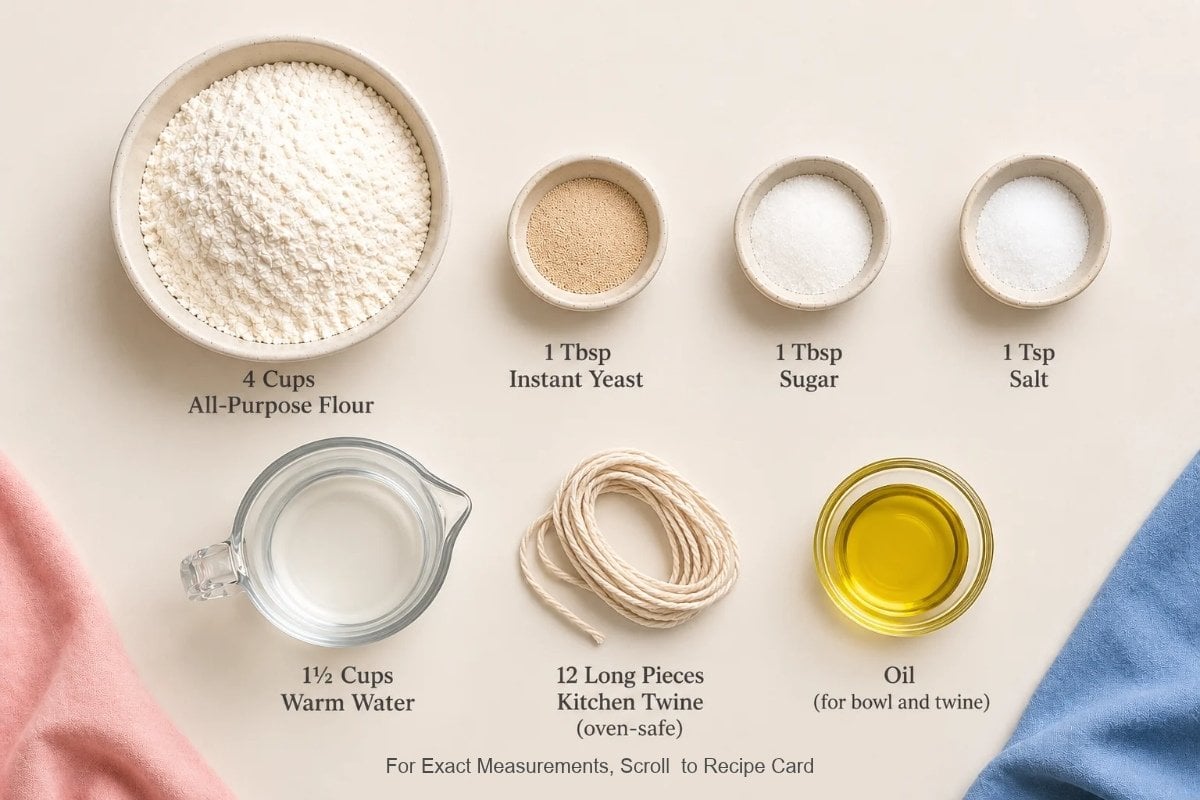
No need to pull out a potion book. My pumpkin shaped bread bowl may look spooky, but everything you need is right there in your pantry.
- All-Purpose Flour: A pantry staple! I'm always looking for ways to use up all-purpose flour, and this bread bowl is the ultimate recipe for that. It gives you that fluffy texture that soaks up stews and my mac n cheese pasta perfectly. Some bakers swear by speciality bread flour instead of all-purpose, and while this works fine, I still stand by using all-purpose flour here.
- Instant Yeast: Since instant yeast has already been activated, it's much easier to work with than active dry yeast. It saves you the prep, making it ideal for a first-time baker (or busy at-home mom). You can still use active dry yeast if that's what you have on hand, but just remember to activate it in warm water first!
Minoo's Pro Tip: Get creative! You can add any seasoning you like here, or even replace a tablespoon of water with pumpkin puree to give it an actual pumpkin flavor. Personally? I also LOVE to throw in pumpkin seeds and Italian sun dried tomatoes for more depth.
How to Make My Pumpkin Shaped Bread Bowl
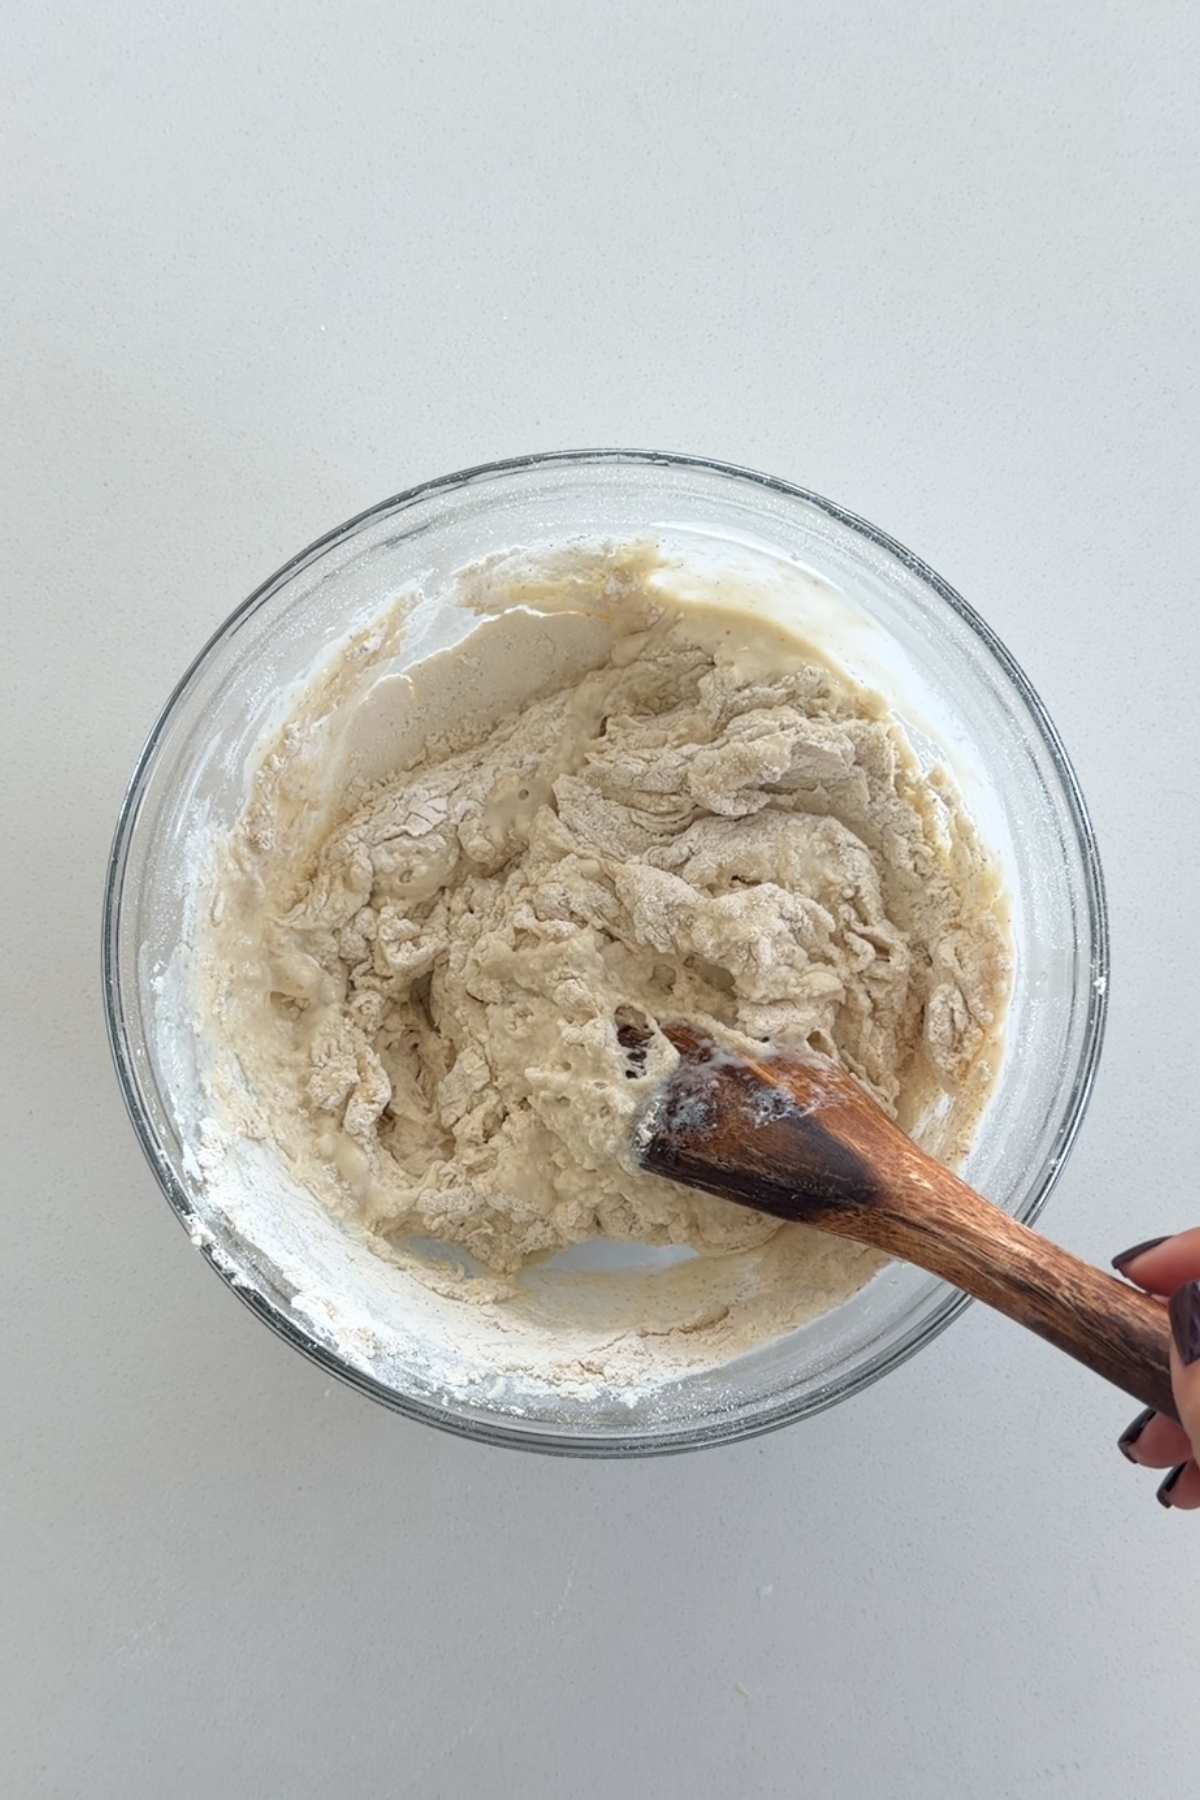
- Step 1: In a large bowl, combine 4 cups all-purpose flour, 1 tablespoon instant yeast, 1 tablespoon sugar, and 1 teaspoon salt. Pour in 1½ cups warm water and mix until a shaggy dough forms and no dry flour remains. A "shaggy" dough should look exactly like it sounds: Lumpy and sticky! Trust the process here.
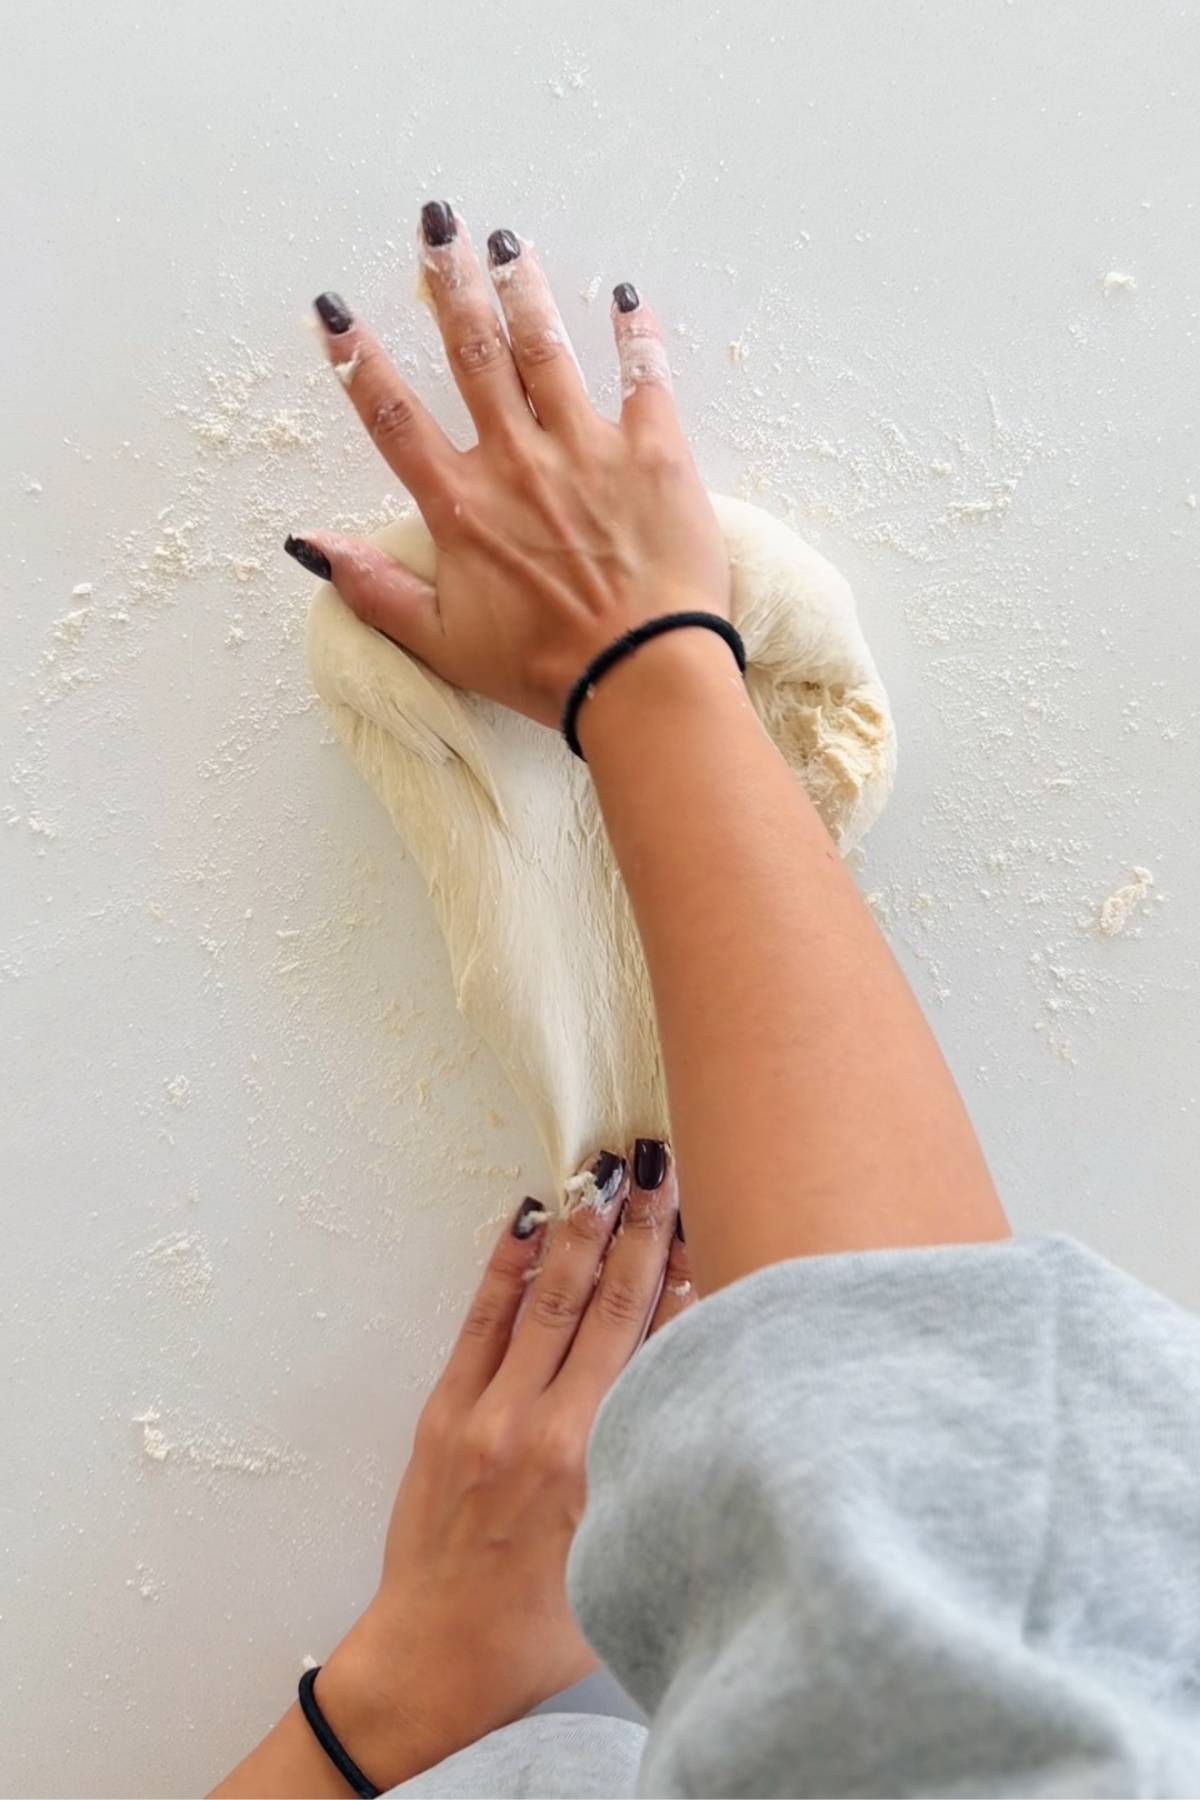
- Step 2: Transfer the dough to a lightly floured surface and knead for 3 to 5 minutes, or until smooth and elastic. It should spring back slowly when pressed.
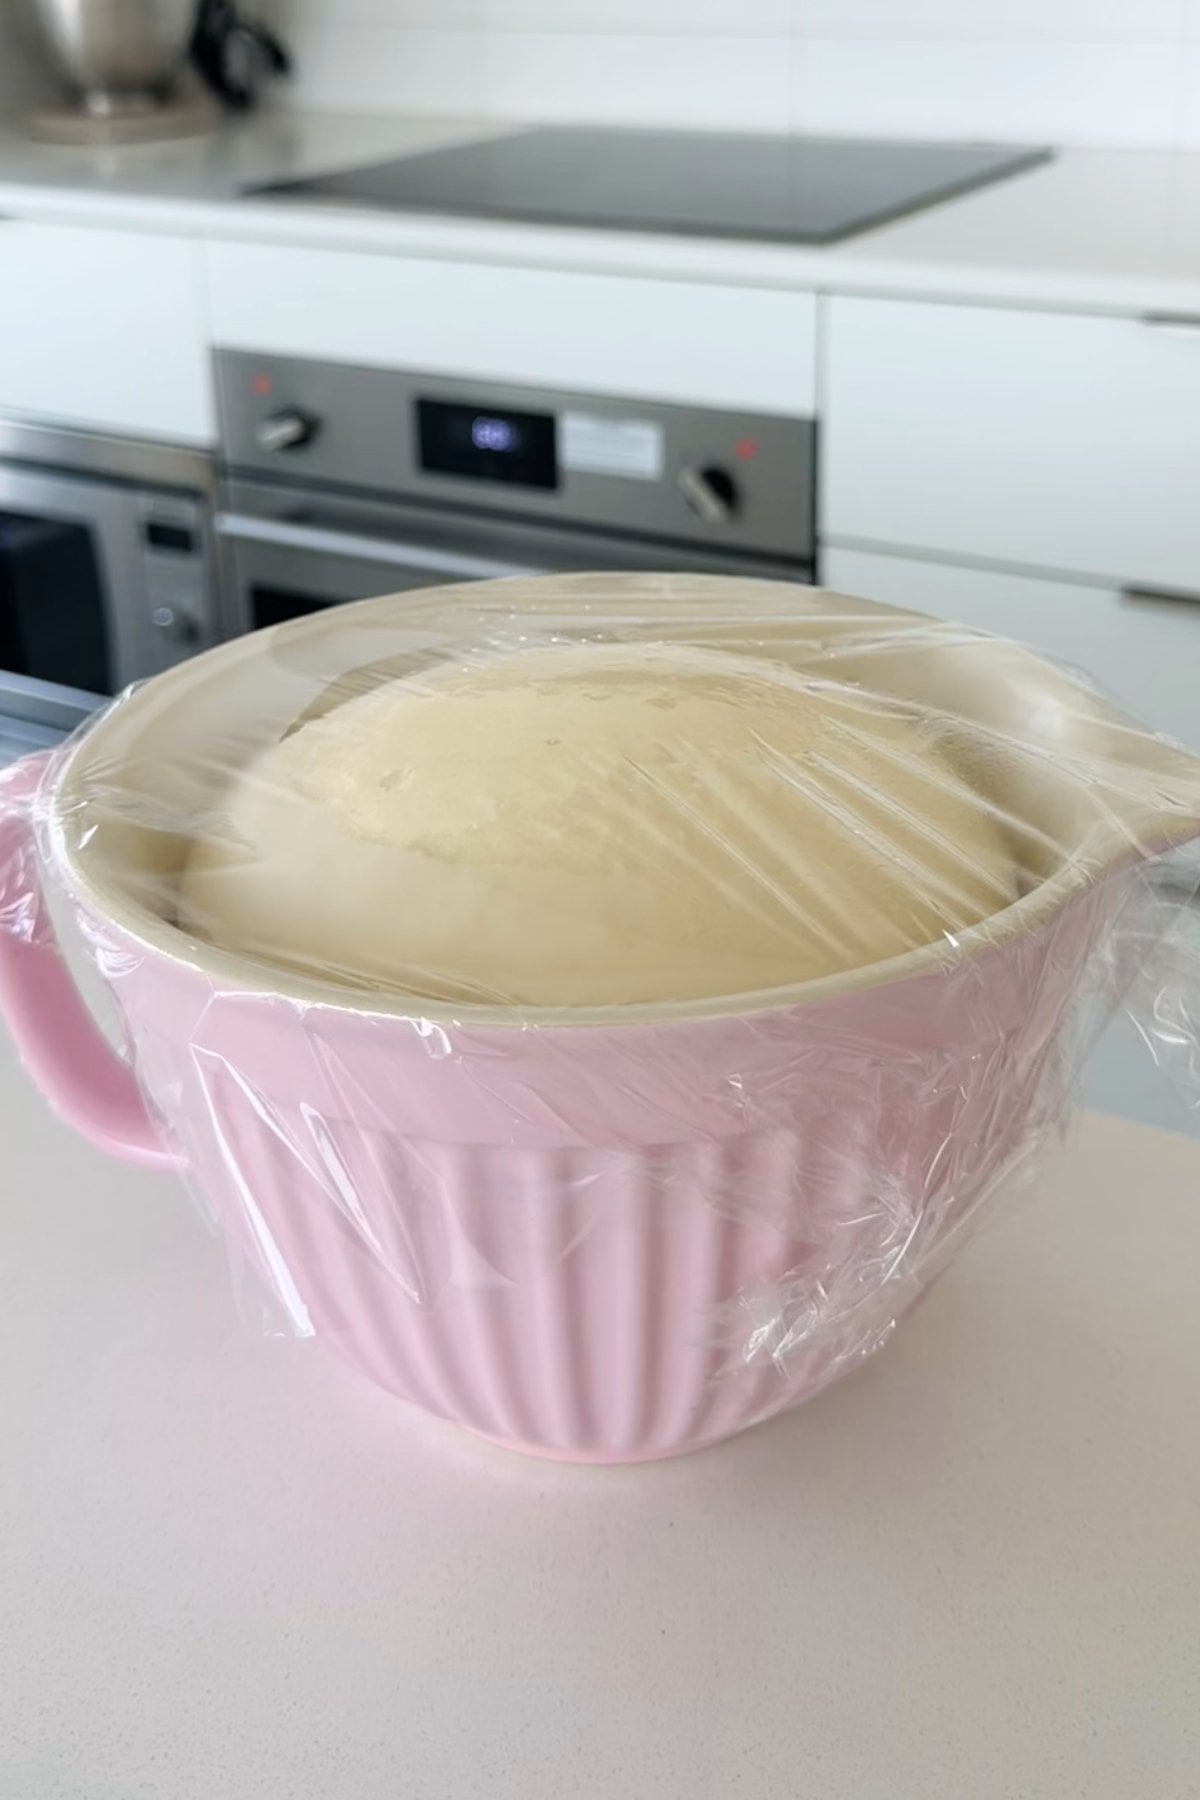
- Step 3: Place the dough in a lightly oiled bowl and cover with a kitchen towel or cling film. Let the dough rise in a warm place for 30 minutes, or until noticeably puffy.
Minoo's Pro Tip: Fall does bring cooler weather, so if you can't find a warm rising spot, pop the dough in the oven with the light on. Keep the temp off. I've found this always helps dough rise perfectly!
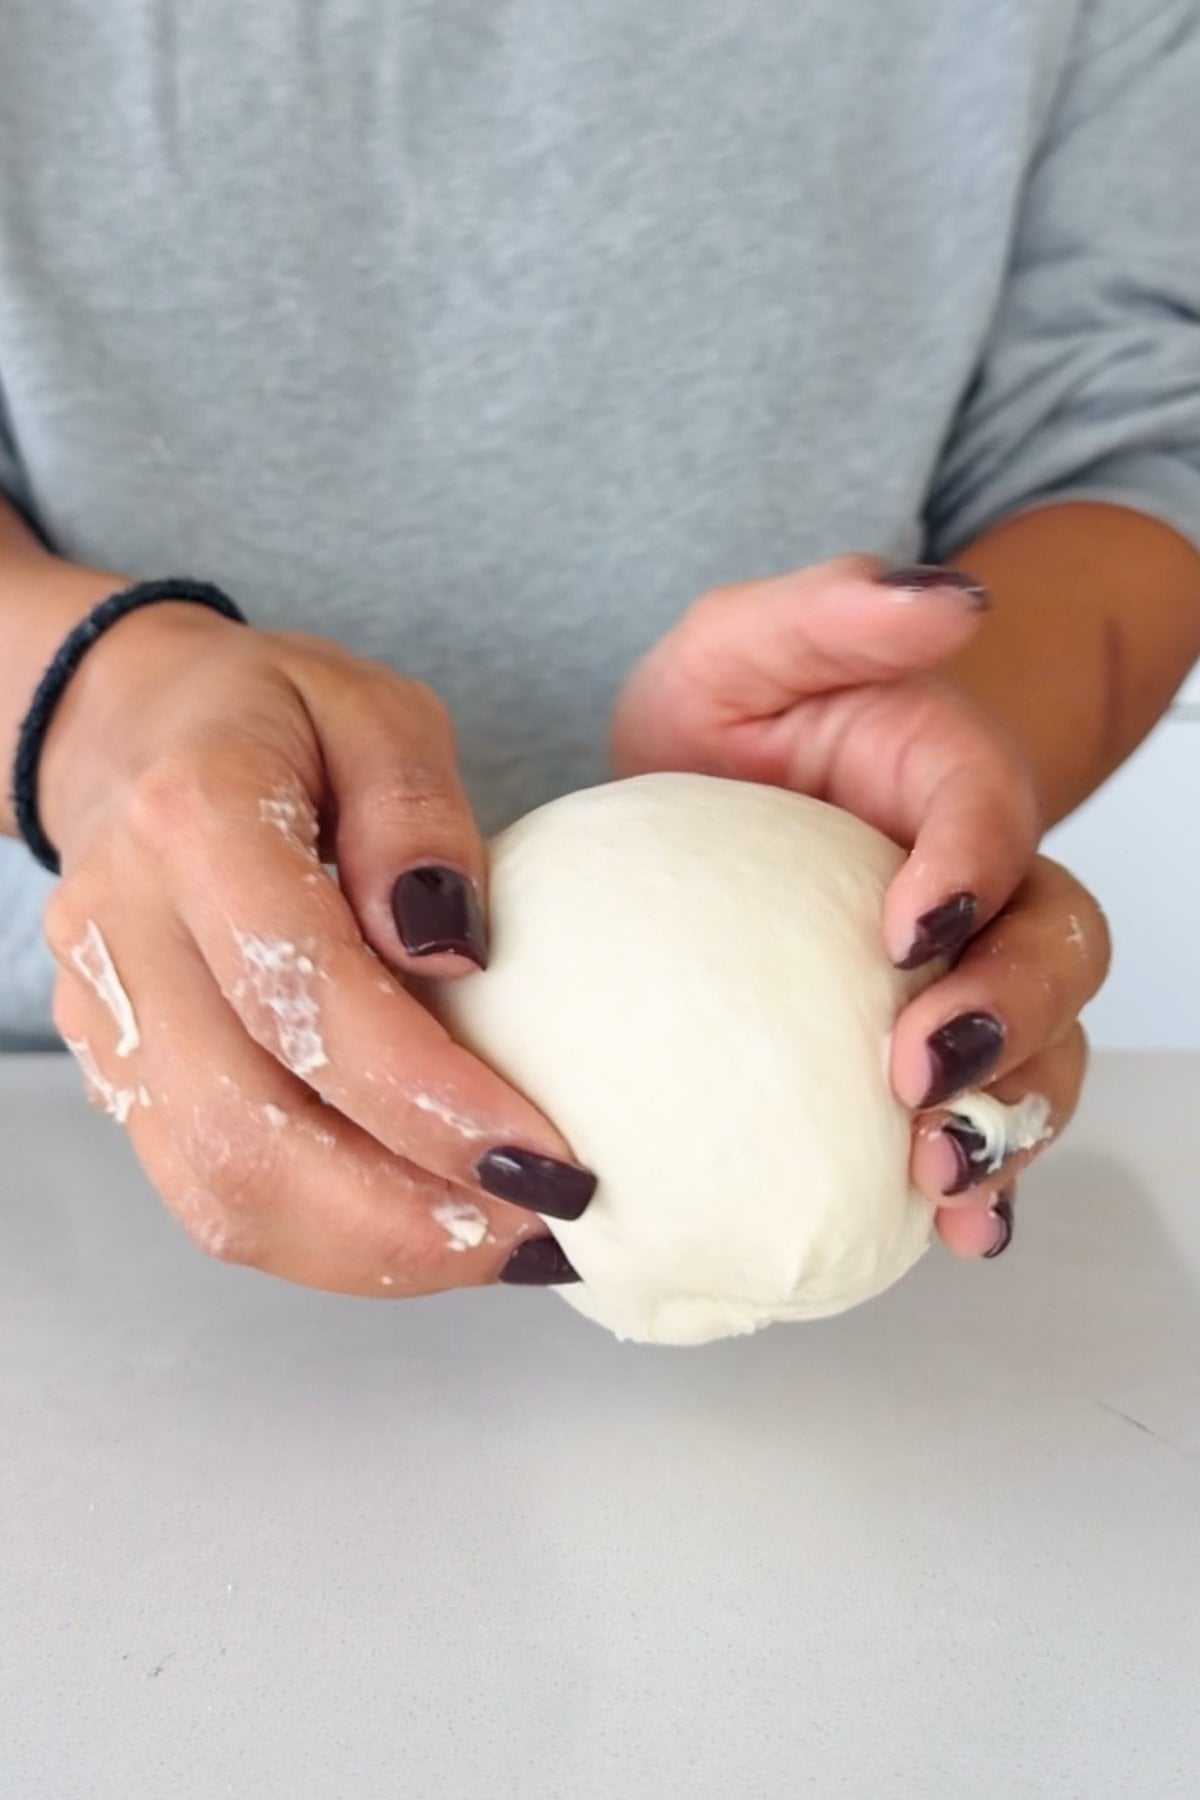
- Step 4: Punch down the dough and divide it into 3 equal portions. Roll each portion into a smooth, tight ball
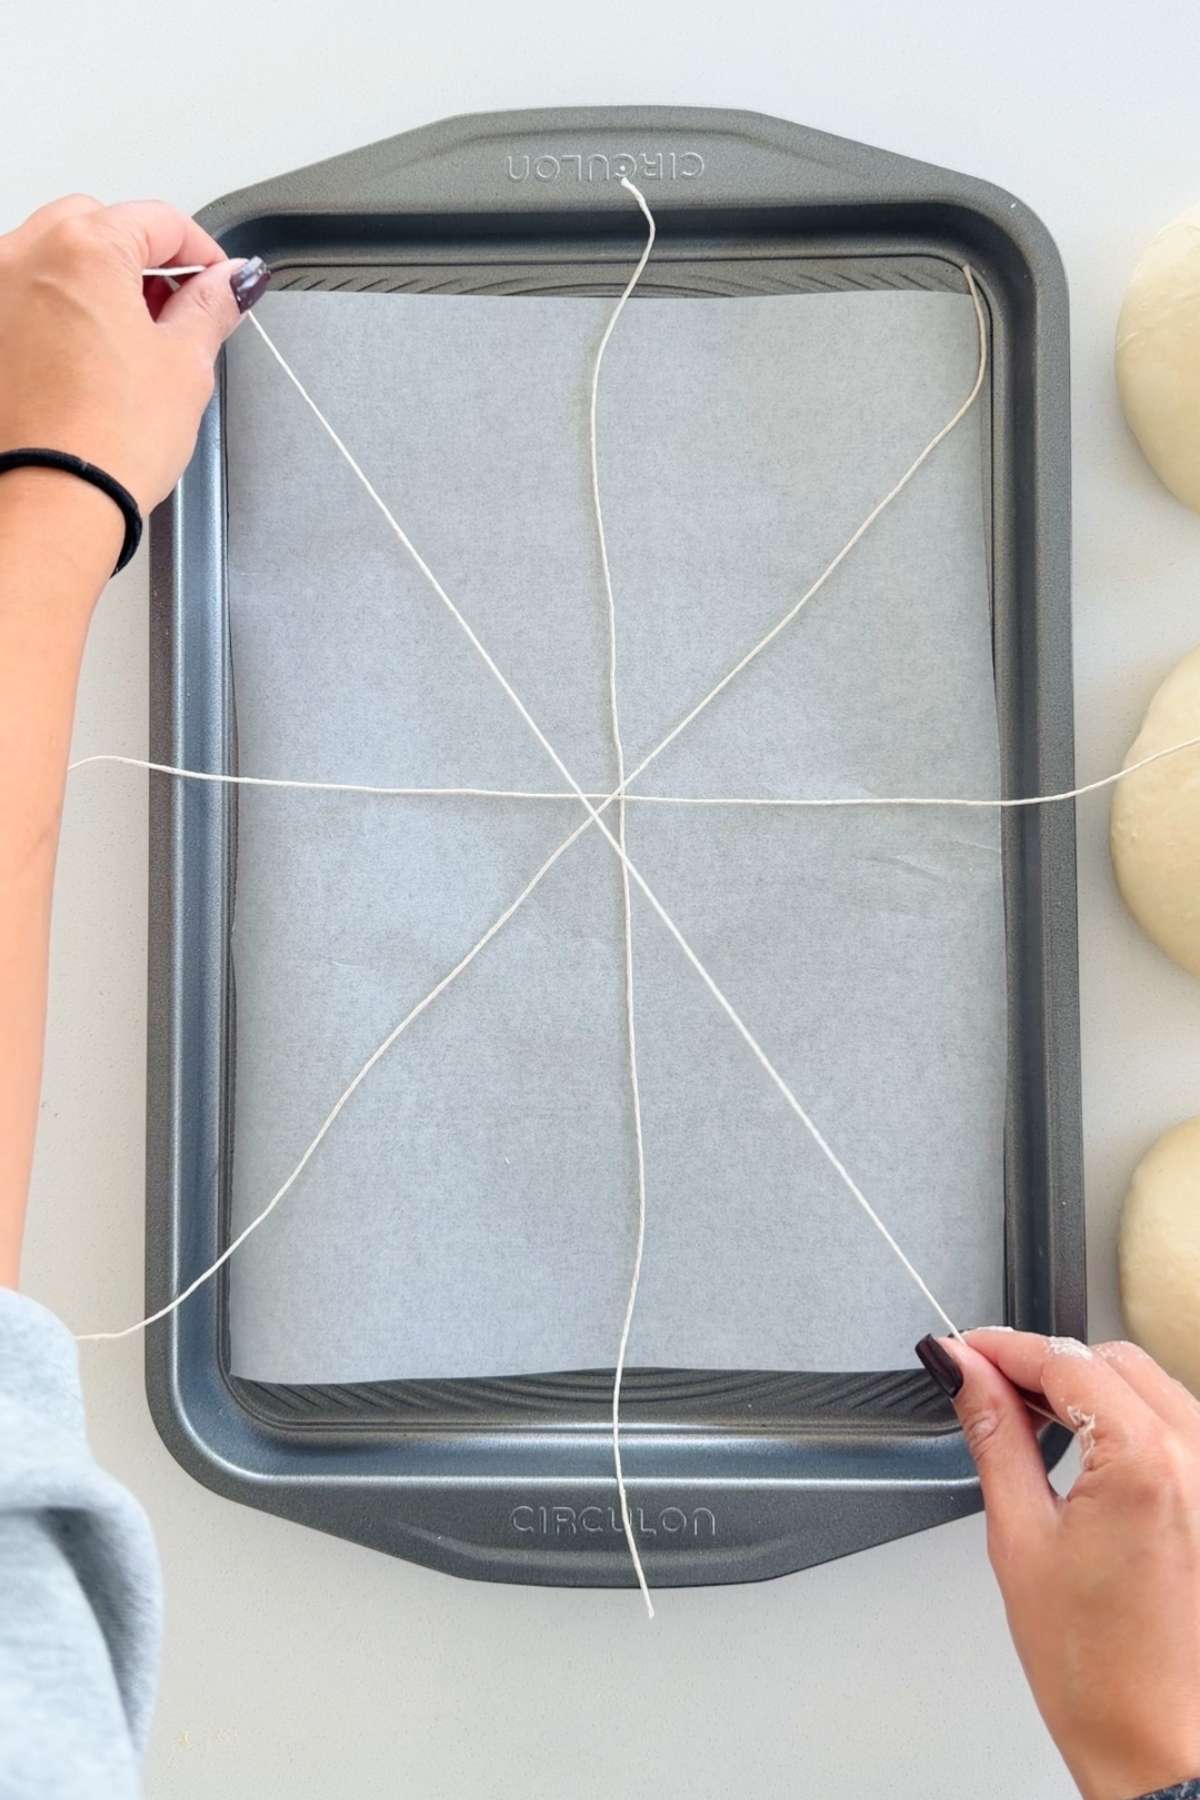
- Step 5: Cut 4 long pieces of oven-safe kitchen twine for each bread bowl (12 pieces total). Lightly coat the twine with oil so it doesn't stick and releases cleanly after baking.
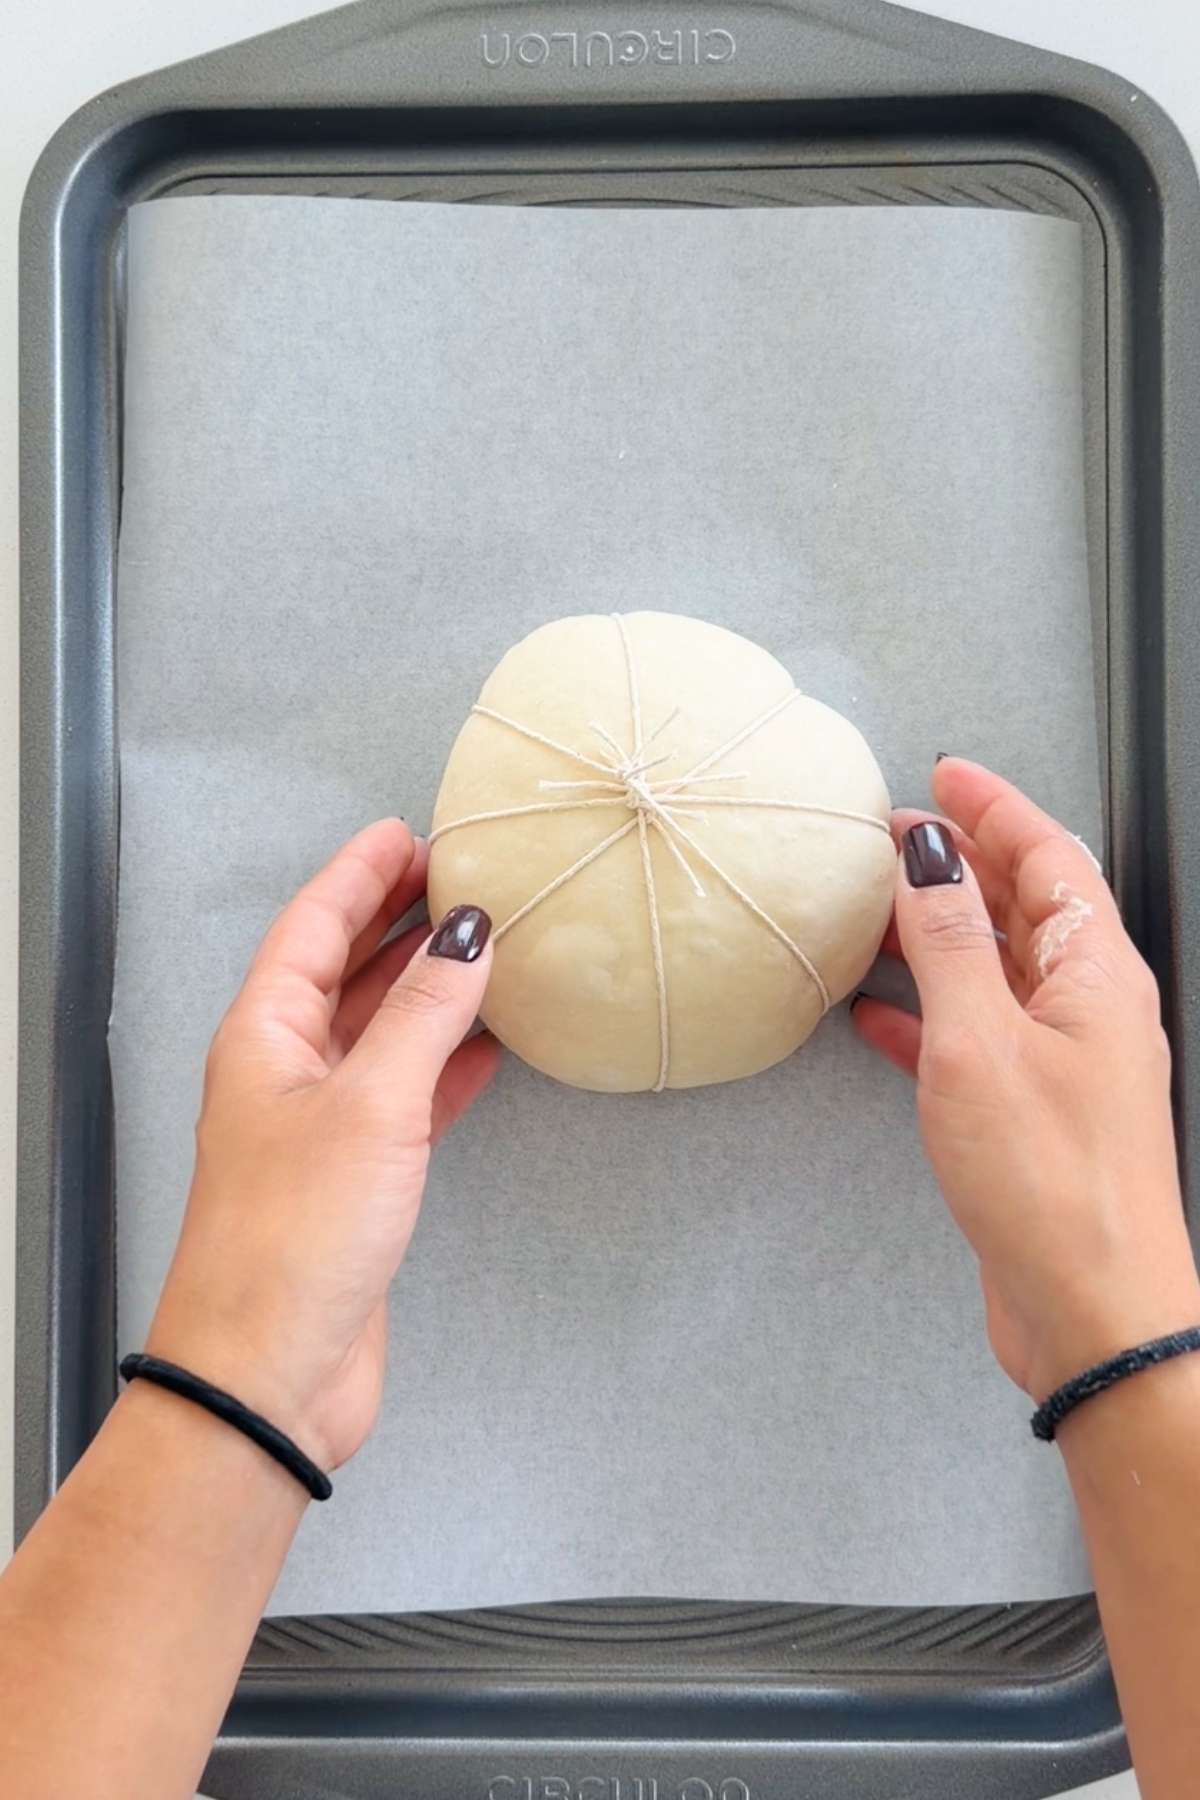
- Step 6: Arrange 4 pieces of twine so they cross in the center like a star, then place one dough ball in the middle. Bring the ends up around the dough ball and tie them loosely at the top, dividing the dough into 8 sections. Repeat with the remaining dough balls.
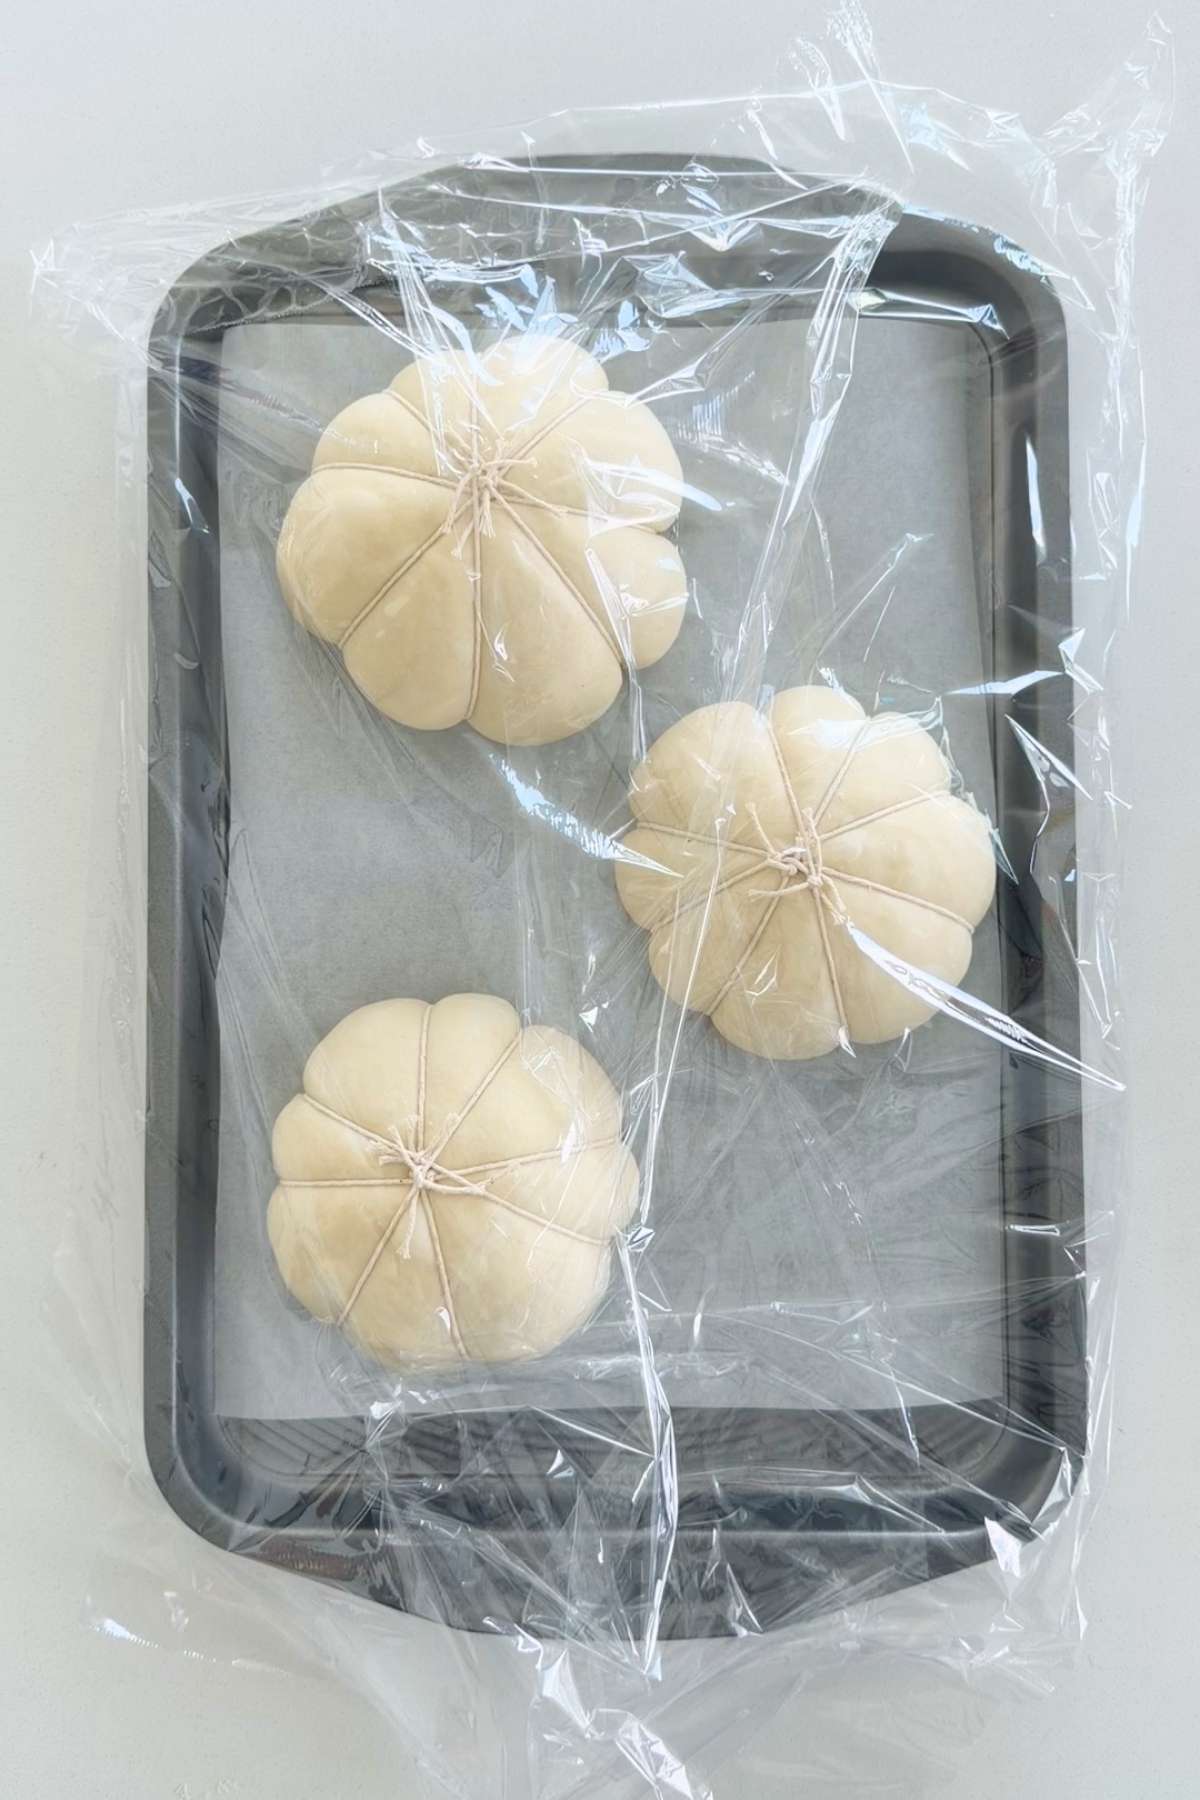
- Step 7: Transfer the tied dough balls to a parchment-lined baking sheet. Cover and let rise for 15 minutes. While the dough rises, preheat the oven to 425°F. Place an empty oven-safe dish on the lower rack.
Minoo's Pro Tip: I know the dough smells heavenly already, but don't rush that 15-minute second rise. It's what helps your bread bowl get that perfect structure and airy fluffiness that makes this recipe SO worth it!
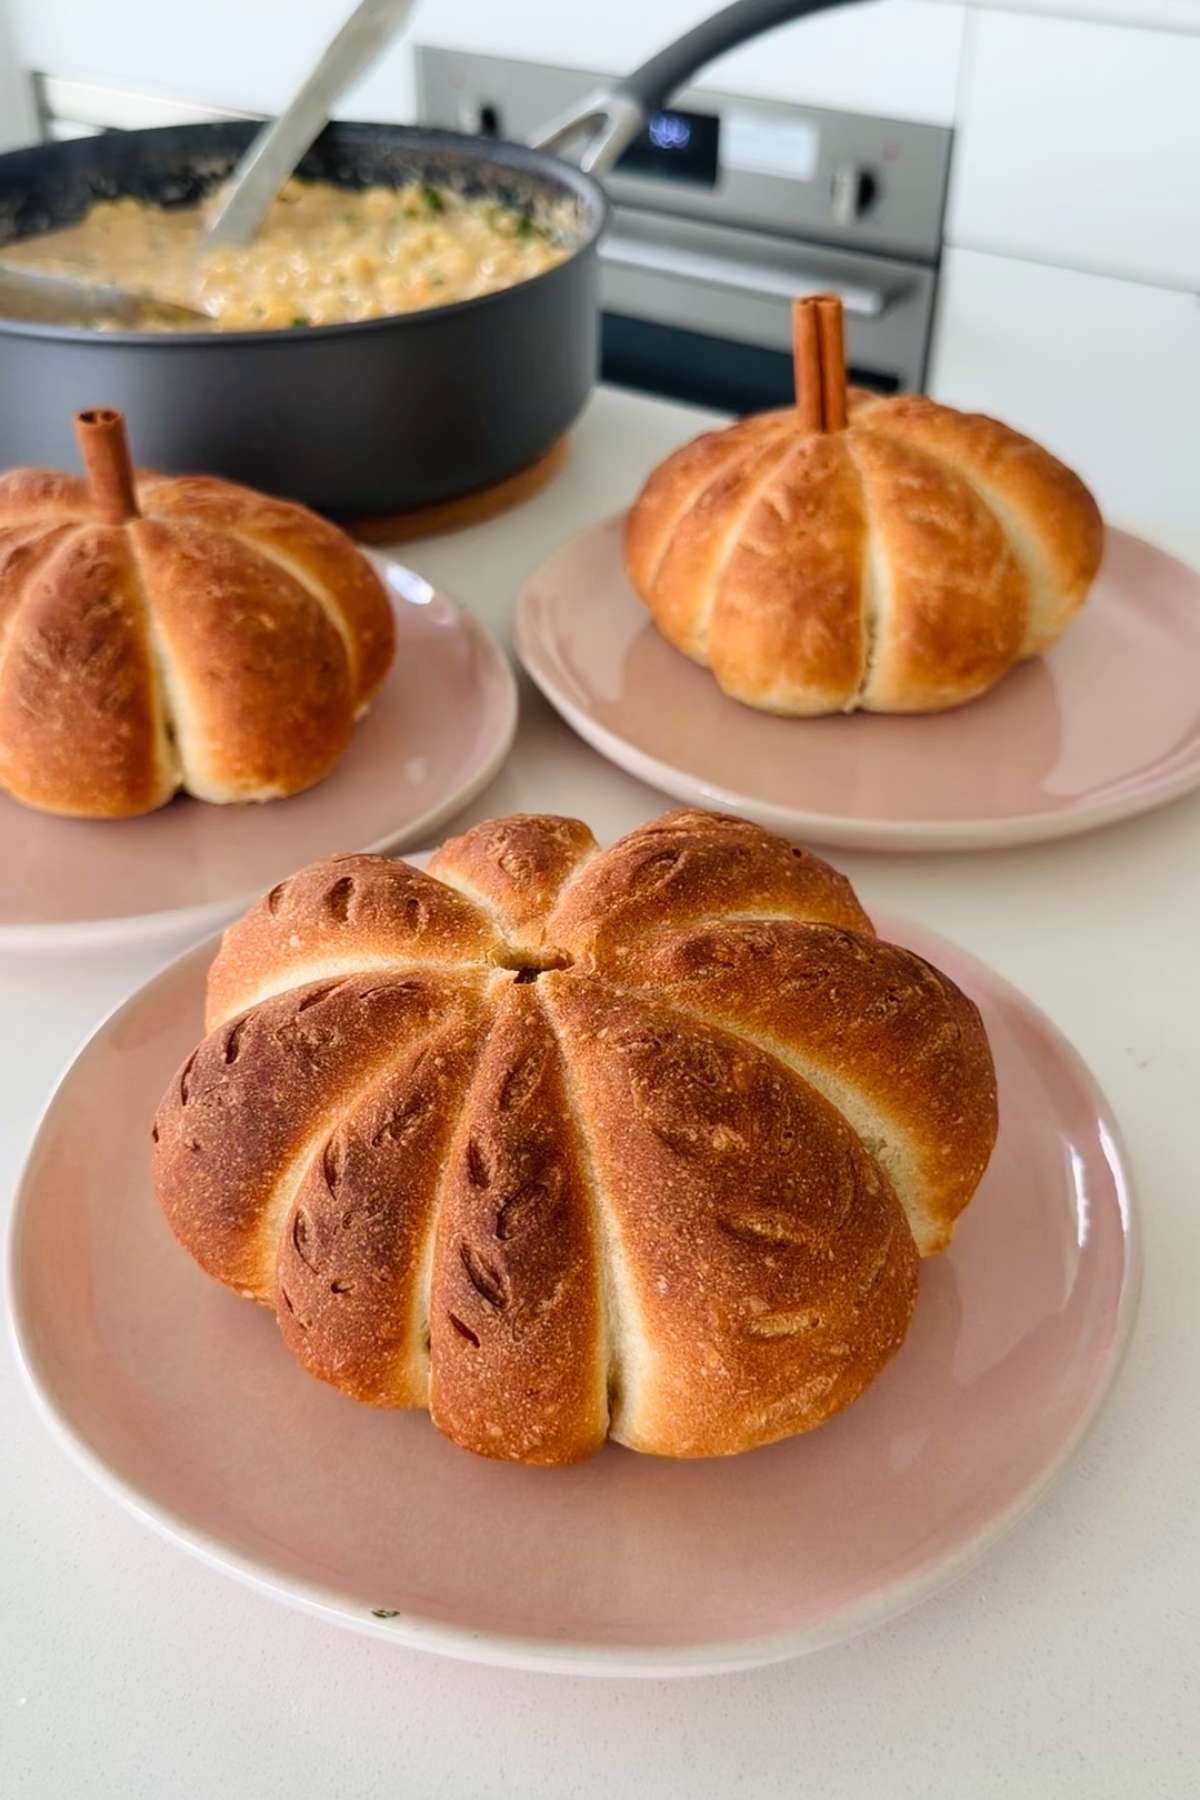
- Step 8: Put the bread bowls on the middle rack. Pour boiling water into the empty bottom dish and quickly close the oven door to create steam. Bake the bread for 10 minutes with the water bath. Then, carefully remove the water bath and move the bread bowls to the lower rack. Bake for another 10 to 15 minutes, until deeply golden brown and cooked through.
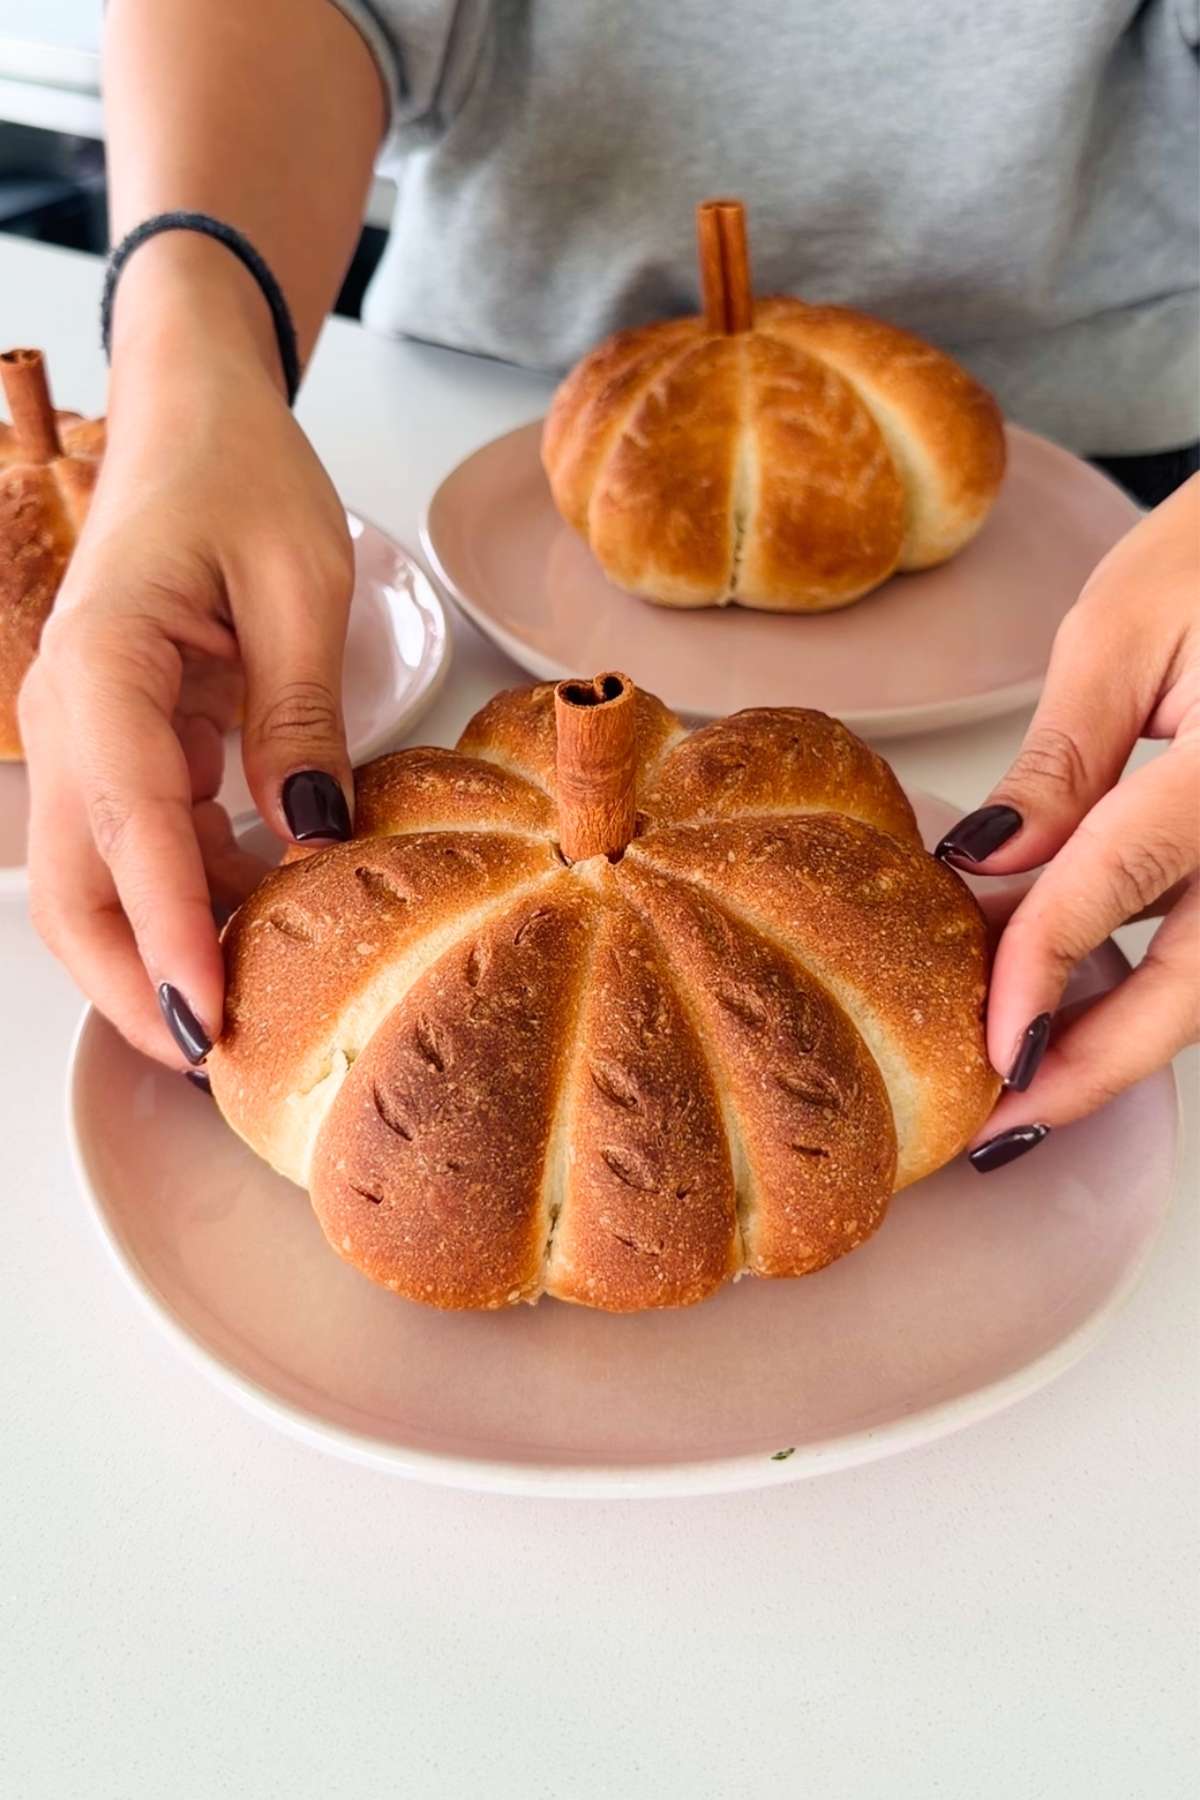
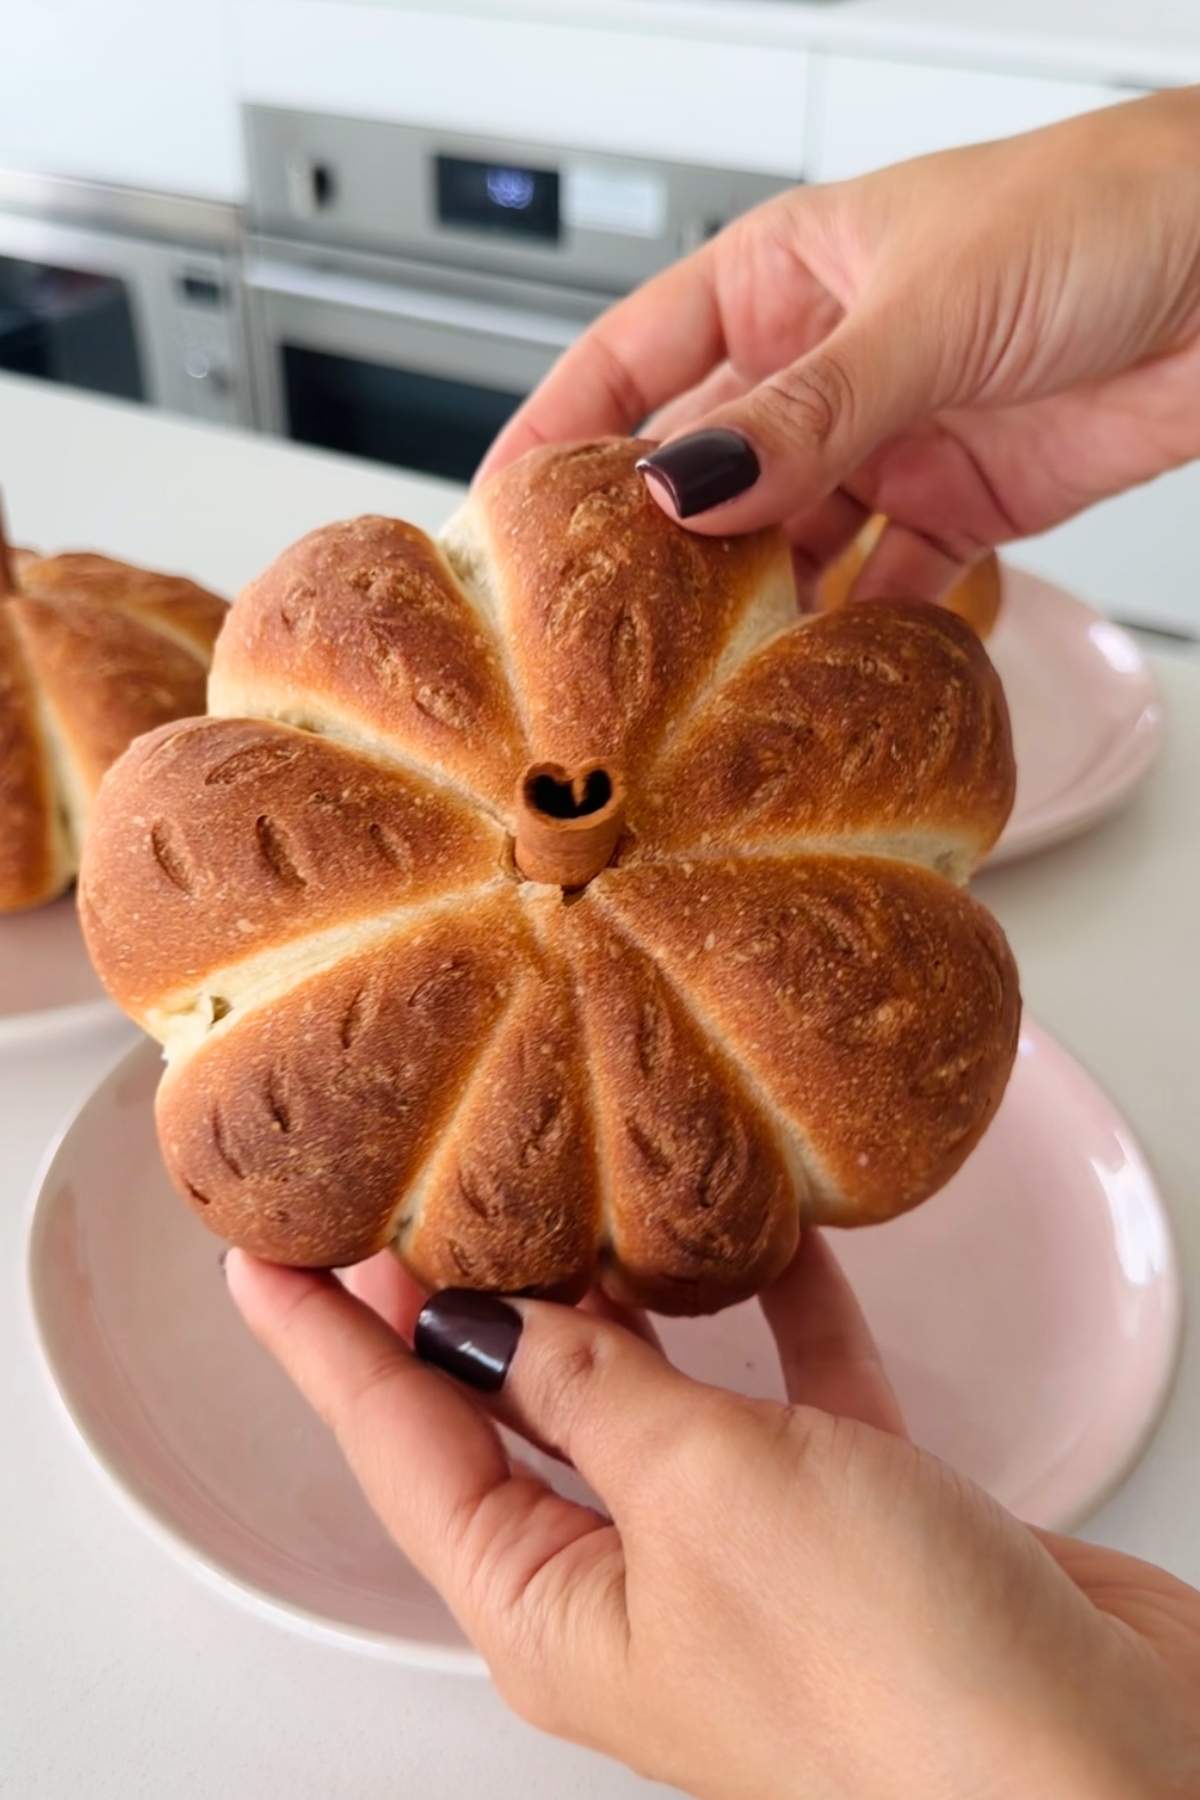
- Step 9: Let the bread bowls cool until comfortable to touch. Carefully cut the twine and peel it away from each one. If desired, insert a small cinnamon stick into the top of each bread bowl to make a pumpkin stem.
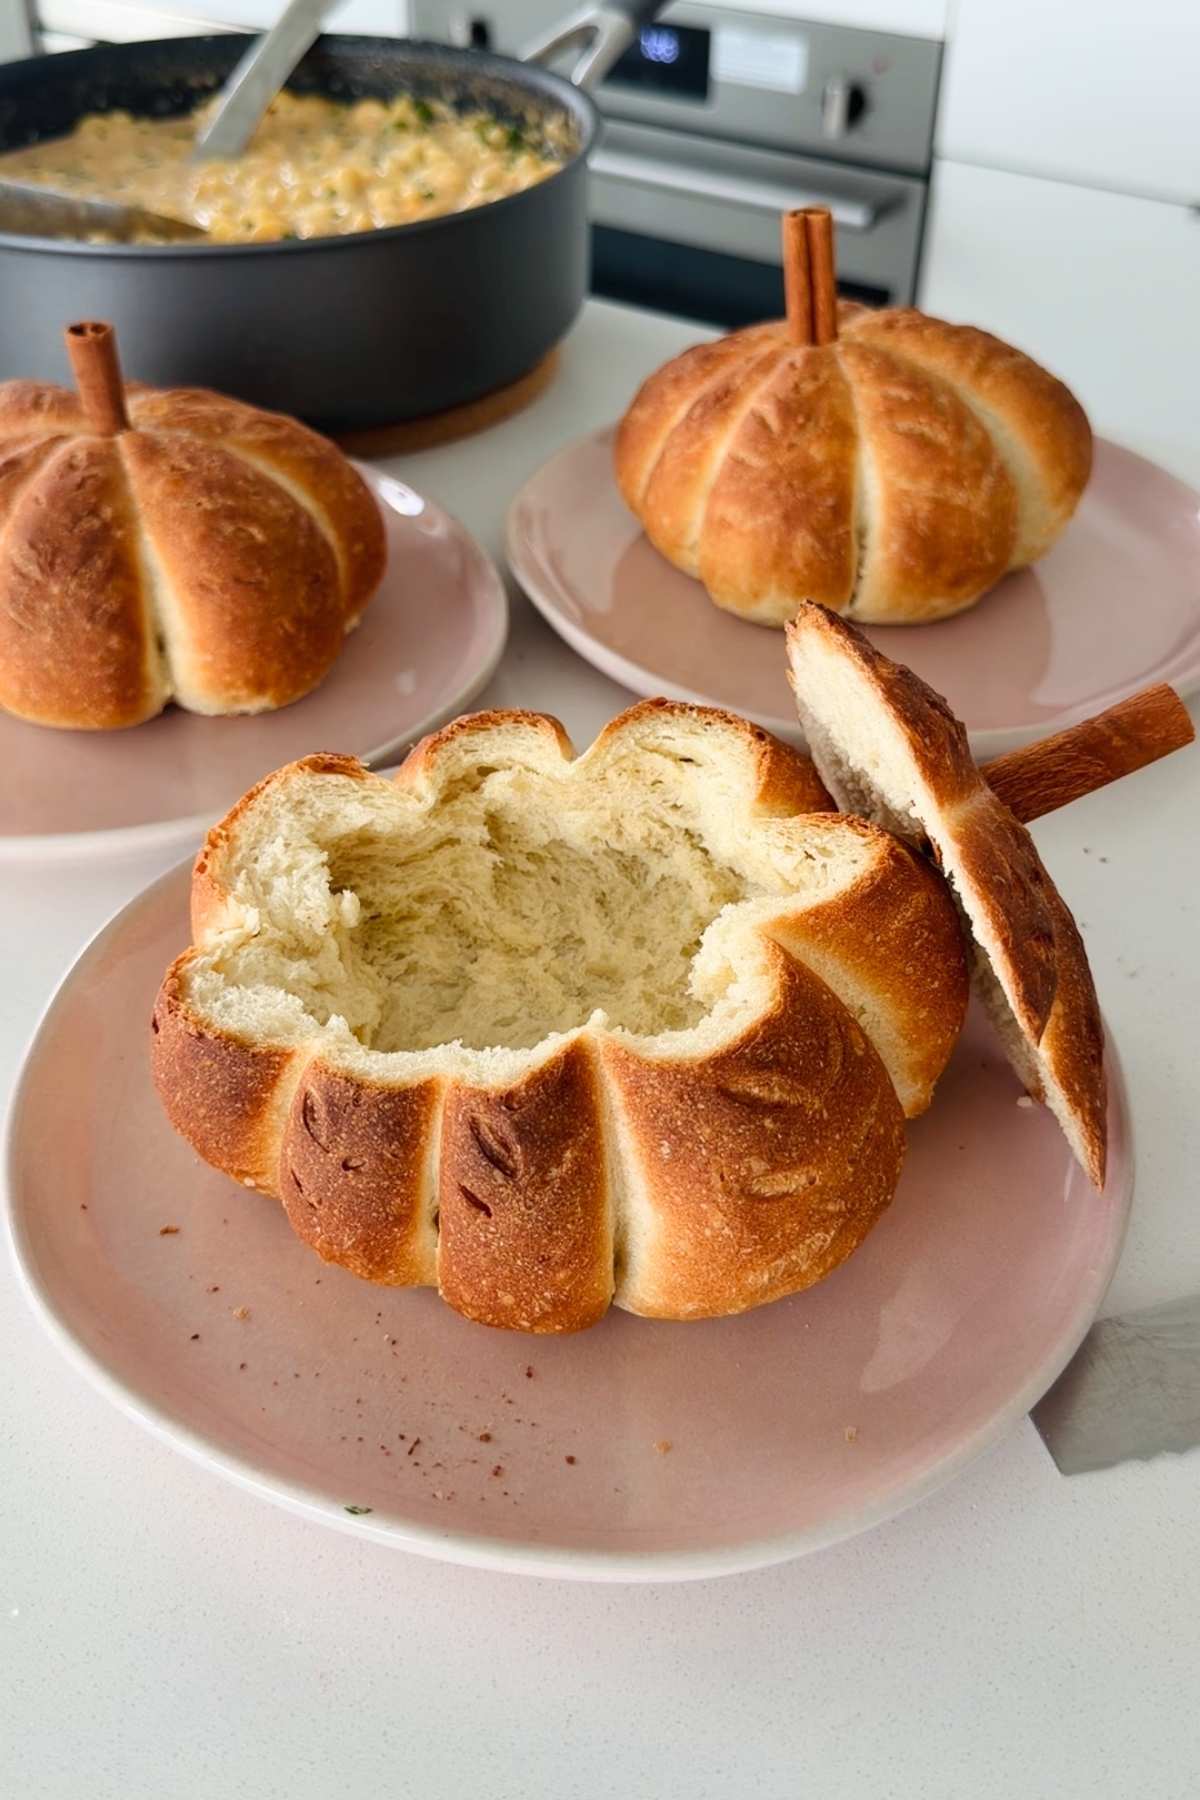
- Step 10: Cut a circle around the top of each bread bowl to create a lid. Remove the lid and hollow out the bread from the center, leaving enough around the sides and bottom to hold your filling. Serve immediately! Enjoy with a warming soup, stew, or add to a bread basket alongside my pumpkin bread rolls. Since this recipe is so hearty, you can even use it as a unique serving dish for my Thanksgiving turkey recipe!
Minoo's Pro Tip: Nothing has to go to waste here. Use the leftover bread to make croutons or breadcrumbs! They'll last well, and you can sprinkle them on soups or practically any dish; I've even coated breadcrumbs in garlic salt and added them to my pull-apart cheese garlic bread for more crunch.
Expert Tips
- Don't tie the twine too tight: I made this mistake the first time! It's so important to tie the twine gently around the dough balls. Otherwise, when the dough rises in the oven, your pumpkin ridges will turn out super deep. Instead of looking like pumpkins, they'll look more like "stars" (still gorgeous, but not the vibe we're after).
- Let your dough rest if it's sticky: If you're finding the dough difficult to work, let it rest for another 10 minutes. When you come back to it, add a little more flour and dampen your palms with water or oil. Trust me: It will be MUCH easier to knead and shape. You can also use this trick for practically any yeast bread recipe on my blog, like my sweet potato bread rolls!
- Oil (and coat) the twine before tying: The oil helps to stop your twine from sticking to the bread and taking the crust with it when you try to remove it later. I've also found you can coat the twine with garlic salt, or your choice of seasoning, to give extra flavor to those ridges. You can even coat them in paprika spice to give the ridges a deeper, pumpkin-like color.
- Always use warm water, NOT hot: The water should be warm (around 110℉), but still comfortable enough to dip your finger in. Any hotter, and you'll kill the yeast. If you accidentally boil your water while warming it up, just wait for it to cool down before you throw it into your dough.
- Read my basic bread bowl recipe: My pumpkin shaped bread bowl is a fun, fall-inspired variation of my homemade bread bowl recipe. If you take a quick peek, you'll see that I have so many more bread-making tips to share. Any advice there applies here!
Pumpkin Shaped Bread Bowl FAQs
Honestly? You can use anything that resembles a pumpkin's stem! I personally use a cinnamon stick since I find it's the closest match visually, but if you want something edible, you can use a small pretzel stick.
You can even make your own homemade garlic breadsticks and shape them to look like pumpkin stems; another fun kitchen project that your kids will love!
My pumpkin shaped bread bowls can be stored in a plastic or paper bag and left on the counter for 2 to 3 days. Make sure to only hollow out their centers when you're ready to serve, as otherwise they'll likely turn stale by the next day.
You can also freeze my pumpkin shaped bread bowls in a plastic bag for up to 3 months. When you're ready to enjoy, just dampen them with water and reheat straight from frozen in the oven for 5 to 10 minutes at 375℉.
Since they keep so well frozen, you can easily make them in advance of any dinner party, whether Thanksgiving or a Halloween dinner. It also means you have more time to prep other things on the actual day. For some inspo, you can make my cozy PSL at home and serve them together for the ultimate fall combo! I also love whipping up a garlic butter dip using my fresh butter.
In my experience, this is usually caused by your room's temperature being too cold. You need to give your dough a warm environment for it to rise.
If you can't find a snug spot in your home, then I recommend using my oven trick! Just switch the oven light on, put your covered dough in, and shut the door (with the temperature off). This essentially creates that perfect environment without needing to turn up your home's heating.
If you're confident this wasn't the issue, then check your yeast. It may have expired, especially if you've left it unopened.
Since best before dates aren't always a reliable way to tell if your yeast is good, try this test: Put some yeast in warm water with 1 teaspoon sugar. Wait for 5 to 10 minutes. If it bubbles and rises up, the yeast is viable, but if no reaction happens, the yeast is dead and needs to be replaced.
More to Try
My pumpkin shaped bread bowl is genuinely the fall season in a dish. It's cozy, warming, and undeniably gorgeous! To get the most out of your bread, pair with these equally nourishing recipes:
Enjoying This Recipe?
It would mean the world to me if you left a quick review or any questions you have in the comments below!
Recipe Card
Pumpkin Shaped Bread Bowl
EMAIL THIS RECIPE
Enter your email and I'll send this directly to you.
Plus you'll get new recipes from me every week!
Ingredients
- 4 cups All-Purpose Flour
- 1 tablespoon Instant Yeast
- 1 tablespoon Sugar
- 1 teaspoon Salt
- 1½ Cups Warm Water
For Shaping and Serving
- 12 Long Pieces Kitchen Twine oven-safe
- Oil for bowl and twine
Instructions
- Combine flour, instant yeast, sugar, and salt in a large bowl. Pour in warm water and mix until a shaggy dough forms.
- Transfer dough to a lightly floured surface. Knead for 3-5 minutes, until smooth, elastic, and springy when pressed.
- Place dough in a lightly oiled bowl, cover, and let rise in a warm place for 30 minutes, or until puffy.
- Punch down the dough and divide into 3 equal portions. Roll each portion into a smooth, tight ball.
- Cut 4 pieces of twine for each bread bowl. Coat twine with oil so it releases cleanly after baking.
- Arrange 4 pieces of twine so they cross in the center like a star, then place a dough ball in the middle. Bring the ends up around the dough and tie loosely at the top, dividing dough into 8 sections. Repeat for other dough balls.
- Transfer tied dough balls to a parchment-lined baking sheet. Cover and let rise for 15 minutes. While dough rises, preheat oven to 425°F. Place an empty oven-safe dish on the lower rack.
- Put bread bowls on the middle rack. Pour boiling water into the empty bottom dish and shut the oven door to create steam. Bake bread for 10 minutes. Then, remove the water bath and move the bread bowls to the lower rack. Bake for another 10-15 minutes, or until deeply golden brown and cooked through.
- Let bread bowls cool until comfortable to touch. Cut twine and peel away from each bread. If desired, insert a small cinnamon stick into the top of each bread to make a pumpkin stem.
- Cut a circle around the top of each bread bowl to create a lid. Remove the lid and hollow out the bread from the center. Serve and enjoy with your choice of filling.
Notes
- Don't skip the second rise: It's essential for your bread bowls to develop their structure.
- Check your yeast: Double-check that your yeast is active before you use it to avoid disappointment later down the line.
Nutrition
Want To Save This Recipe?
Share your email & we'll send it over! PLUS, you'll get new recipes from us weekly