
I BETTER NOT CATCH YOU thinking you need special skills to bake crusty, bakery-style bread at home because this recipe literally makes itself while you go about your day.
This 4-ingredient artisan bread recipe was one of the first loaves I ever made, even before I started sharing bread recipes online. It worked PERFECTLY on my first try, and that success made me feel so accomplished that I knew I had to share it with you. If baking bread intimidates you even a little bit, this is exactly where you need to start.
Why This Artisan Bread Recipe Works
Jump to:
- Why This Artisan Bread Recipe Works
- The 4 Simple Ingredients You Need
- Essential Equipment (What You Actually Need)
- Step-by-Step Instructions for Perfect Artisan Bread
- How to Know When Your Artisan Bread Is Done
- Serving Suggestions
- Endless Variations for This Artisan Bread Recipe
- Storage Tips
- Troubleshooting Common Issues
- More Easy Bread Recipes You’ll Love
- Final Thoughts
- Recipe Card
- Frequently Asked Questions
Here’s what makes this the best beginner bread recipe you’ll find:
It uses only four humble pantry staples: flour, water, yeast, and salt. That’s it. No fancy ingredients, no sourdough starter that takes weeks to develop, and ABSOLUTELY NO complicated techniques to master.
There’s no kneading required. You literally just stir the ingredients together and let time do the work for you. The dough develops its structure naturally while you’re doing other things.
You don’t need a Dutch oven to make this work. While a Dutch oven creates amazing results, I’ll show you how to bake this on a regular baking sheet with steam, so everyone can make this recipe regardless of what equipment they own.
It tastes like sourdough without the commitment. The long rise time develops that complex, slightly tangy flavor you love from artisan bakeries, but without maintaining a finicky starter.
This recipe made me fall in love with bread baking because it showed me just how SIMPLE the process could be. Once you master this base recipe, you’ll see endless possibilities for adding your own flavors and making it uniquely yours.
Minoo’s Pro Tip: The dough should look wet and shaggy after mixing. Don’t be tempted to add extra flour, this sticky texture is exactly what creates those beautiful air pockets inside your finished loaf.
The 4 Simple Ingredients You Need
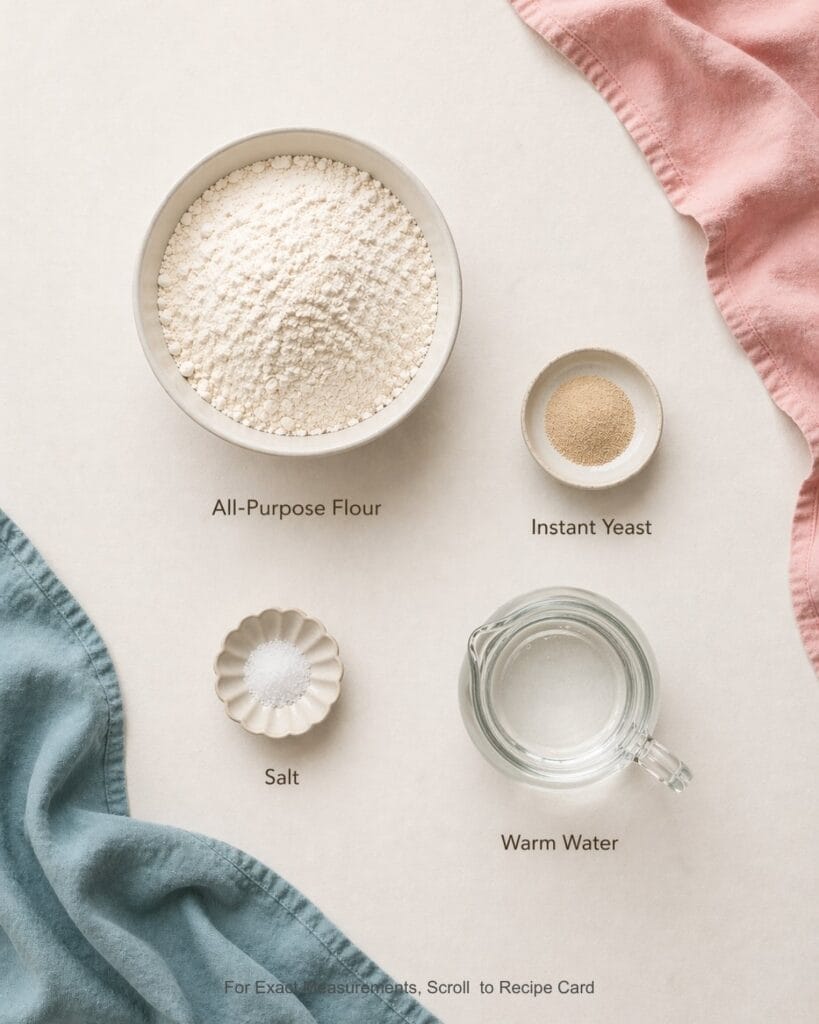
Let’s talk about what goes into this artisan bread recipe:
All-Purpose Flour (3 cups): I recommend using bread flour if you have it because the higher protein content creates a chewier texture and better structure. But all-purpose flour works perfectly fine, so use what you have on hand.
Instant Yeast (2 tsp): This is the ingredient that makes your bread rise. Instant yeast works faster than active dry and doesn’t require proofing in water first, making this recipe even easier.
Salt (1 tsp): Essential for flavor and controlling the yeast activity. Don’t skip this or your bread will taste flat and bland.
Warm Water (1½ cups, 110°F): The water should feel comfortably warm to the touch, like a nice bath. Too hot and you’ll kill the yeast, too cold and the dough will take forever to rise.
That’s literally everything you need for the dough. For baking, you’ll also want parchment paper, which is CRUCIAL for easily removing your bread from the pan. Trust me on this, I learned the hard way.
If you enjoy simple bread recipes like this, you might also love my No-Knead 5-Ingredient Bread Loaf, which is another foolproof option.
Essential Equipment (What You Actually Need)
One of the best things about this artisan bread recipe is that you don’t need fancy equipment:
- A large mixing bowl for combining your ingredients. Any bowl that holds at least 6 cups will work perfectly.
- Measuring cups and spoons for accurate ingredient amounts.
- A wooden spoon or spatula for stirring the dough together.
- Plastic wrap or a clean kitchen towel to cover the bowl during rising.
- Parchment paper to prevent sticking. This is the ONE tool I absolutely insist you use.
- A Dutch oven with lid OR a baking sheet with a separate pan for creating steam. Both methods work beautifully.
- A sharp knife or razor blade for scoring the top of your loaf.
- A wire cooling rack to let your bread cool properly.
- No stand mixer. No bread machine. No special bread pans. Just basic kitchen tools you probably already own.
Step-by-Step Instructions for Perfect Artisan Bread
Let me walk you through exactly how this comes together:
Step 1: Mix the Dough
In your large bowl, whisk together 3 cups all-purpose flour, 2 teaspoon instant yeast, and 1 teaspoon salt until combined. Pour in 1½ cups warm water (110°F) and stir with a wooden spoon for about 1 minute until all the flour is incorporated into a shaggy, sticky dough.
No dry flour should remain visible at the bottom of the bowl. The dough will look rough and wet, which is exactly right. Don’t add more flour, even though it might feel wrong.
Minoo’s Pro Tip: Use a spatula to scrape down the sides of the bowl to make sure every bit of flour gets incorporated into the dough.

Step 2: First Rise
Cover your bowl tightly with plastic wrap or a damp towel and let it rise in a warm place for 2 hours until doubled in size. You should see bubbles forming on the surface, which tells you the yeast is working its magic.
I like to place mine in the oven with just the light on (don’t turn the oven on). The gentle warmth from the light creates the perfect rising environment.

Step 3: Optional Stretch and Fold Method
This step is OPTIONAL but worth it for creating better gluten development and a more open crumb structure without kneading. After 30 minutes of the first rise, perform a set of stretch and folds by grabbing one edge of the dough with wet hands, stretching it up as high as it will go without tearing, then folding it over to the opposite side.
Rotate the bowl 90 degrees and repeat this motion 7 more times (8 total stretches). Cover and let rise for another 30 minutes, then perform a second set of 8 stretch and folds. Let the dough rise for the final hour undisturbed.
If you skip this step, your bread will still turn out great. But if you want those big, beautiful air pockets inside, take the extra 2 minutes to do this.
Step 4: Shape the Loaf
After the 2-hour rise, your dough should have doubled in size and feel soft and puffy. Turn it out onto a well-floured surface using a spatula, it will deflate slightly and that’s normal.
With generously floured hands, gently shape the dough into a round by tucking the edges underneath toward the center. Work quickly and gently because you want to preserve those air bubbles. The dough will be very sticky and loose, this is what creates that artisan texture.
Minoo’s Pro Tip: Don’t punch down the dough or handle it too roughly. Treat it gently and you’ll be rewarded with those gorgeous holes in the crumb.

Step 5: Second Rise
Place your shaped loaf on a piece of parchment paper and transfer the whole thing (parchment and all) to your Dutch oven or baking sheet. Cover with a towel and let rise for 30 minutes to 1 hour until puffy and increased in size by about 50%.
During this time, the dough will relax and spread slightly, which is perfectly normal.

Step 6: Prepare for Baking
About 30 minutes before you’re ready to bake, preheat your oven to 450°F. If using a Dutch oven, place it in the oven (without the lid) to preheat as well.
Right before baking, score a single slash about ½ inch deep across the top of your loaf using a sharp knife or razor blade. This allows the bread to expand properly and creates that signature artisan look.

Step 7: Bake with Steam
Steam is the secret to getting that crispy, crackling crust. Here’s how to create it:
If using a Dutch oven: Carefully remove the hot Dutch oven from the oven. Add 3 to 4 ice cubes alongside the bread outside of the parchment paper (not on top of it), quickly cover with the lid, and place back in the oven. Bake covered at 450°F for 40 minutes until the crust sounds hollow when tapped.
If using a baking sheet: Place a metal or cast iron pan on the bottom rack of your oven. Put your bread on the middle rack, then carefully pour about 1 cup of boiling water into the hot pan below. Quickly close the oven door to trap the steam inside. Bake at 450°F for 40 minutes.
The steam helps the crust stay soft initially so the bread can rise fully before the exterior sets.

Step 8: Final Bake
After 40 minutes, reduce the oven temperature to 425°F and remove the lid from your Dutch oven (or continue without steam if using a baking sheet). Bake uncovered for 15 minutes more until the loaf is deep golden brown with a crispy crust.
You want that beautiful color because it means the sugars in the flour have caramelized, adding incredible flavor.

Step 9: Cool
Transfer your bread to a wire rack and let it cool for at least 30 minutes before slicing. I know this is the hardest part, but if you cut into it too soon, the interior will be gummy and the texture won’t be right.
The bread continues cooking internally as it cools, and the crumb needs time to set properly.

How to Know When Your Artisan Bread Is Done
Here’s what to look for when checking if your bread is perfectly baked:
- The crust will be deep golden brown all over, not pale yellow. That rich color means flavor.
- The scored section on top will have lifted and opened up, creating that rustic artisan appearance you see in bakeries.
- When you tap the bottom of the loaf, it should sound hollow like a drum. This is the most reliable test for doneness.
- If you have an instant-read thermometer, the internal temperature should read between 200°F and 210°F when fully baked.
Minoo’s Pro Tip: If your crust is browning too quickly but the bread isn’t done yet, tent it loosely with aluminum foil for the final 10 minutes of baking.
Serving Suggestions

This crusty artisan bread is incredibly versatile. Here’s how I love to serve it:
Slice it thick and slather with butter or my Homemade Butter for the simplest pleasure. The contrast between the crunchy crust and soft interior is amazing.
Serve alongside soups and stews for dunking. This bread holds up beautifully to liquids without getting soggy too quickly. It’s perfect with hearty winter soups.
Make it into garlic bread by brushing slices with garlic butter and toasting under the broiler for a few minutes.
Use it for sandwiches, though I recommend letting it sit for a day first. Day-old bread slices more cleanly and has a slightly chewier texture that’s perfect for sandwiches.
Toast slices and top with avocado, eggs, or whatever you love for breakfast. The sturdy texture stands up to any topping.
This bread reminds me of the endless possibilities that open up when you learn to bake. Once you have this base recipe down, you can customize it endlessly to make it your own.
Endless Variations for This Artisan Bread Recipe
The beauty of this simple base recipe is how easily you can customize it. Here are some of my favorite variations:
Cheese Loaf: Fold in 1 to 1½ cups of shredded cheddar, gruyere, or parmesan cheese after the first rise before shaping. The cheese creates pockets of melty goodness throughout the bread.
Cinnamon Raisin Loaf: Add 1 tablespoon ground cinnamon to the flour mixture and fold in 1 cup raisins after the first rise. This makes incredible toast for breakfast.
Pizza Loaf: Mix in 1 teaspoon Italian seasoning, 1 teaspoon garlic powder, and ½ cup diced pepperoni after the first rise. Sprinkle the top with parmesan before baking for a savory treat.
Garlic and Herb Loaf: Add 2 teaspoons dried rosemary (or your favorite herbs) and 1 teaspoon garlic powder to the flour mixture. Brush the top with olive oil and sprinkle with flaky salt before baking.
Whole Wheat Version: Replace up to 1 cup of the all-purpose flour with whole wheat flour for a heartier, nuttier loaf. You may need to add 2 to 3 tablespoons extra water since whole wheat absorbs more liquid.
Each variation follows the exact same method, you just add the mix-ins after the first rise or incorporate seasonings into the initial flour mixture.
Storage Tips

Here’s how to keep your artisan bread fresh:
Room Temperature: Store in a paper bag at room temperature for up to 3 days. The paper bag allows the crust to breathe and stay crispy. If you prefer a softer crust, wrap it in plastic wrap or store in a plastic bag instead.
Freezing: Slice the cooled bread and freeze individual slices in a freezer bag for up to 3 months. You can toast frozen slices directly from the freezer, making this perfect for meal prep.
Refreshing Day-Old Bread: If your bread has lost its crispy crust, sprinkle the outside lightly with water and place in a 350°F oven for 5 to 10 minutes to crisp it back up.
Minoo’s Pro Tip: Never store bread in the refrigerator. The cold temperature actually makes bread go stale faster through a process called retrogradation.
Troubleshooting Common Issues
Even with an easy recipe like this, sometimes things don’t go as planned. Here’s how to fix common problems:
My bread is dense and didn’t rise properly: This usually means your water was too hot and killed the yeast, or your yeast was expired. Make sure your water feels comfortably warm (110°F), not hot. Also check the expiration date on your yeast.
Another possibility is that you didn’t let it rise long enough. The dough should fully double in size during the first rise, which can take longer in a cold kitchen.
The crust is too thick and hard: Your oven temperature might be too high, or you baked it too long. Try reducing the initial temperature to 425°F instead of 450°F. Also make sure you’re creating enough steam, which keeps the crust tender during the first part of baking.
The bread stuck to my pan: This is why I’m so insistent about parchment paper. Without it, the wet dough will absolutely stick, and your beautiful loaf will tear when you try to remove it. Don’t skip the parchment.
The bread is gummy inside: You probably cut into it too soon. I know waiting is hard, but the bread needs at least 30 minutes to cool so the crumb can set properly. If you cut it while still warm, the interior will seem undercooked even if it’s fully baked.
There are no big holes in my crumb: This comes down to not adding too much flour and handling the dough gently. The wetter and stickier the dough, the more likely you’ll get those artisan-style holes. Also try the stretch and fold method for better gluten development.
More Easy Bread Recipes You’ll Love

If this artisan bread recipe has you excited about baking, here are some other recipes from my blog you should try:
My 5-Ingredient Greek Pita Breads are another simple option that uses similar basic ingredients and comes together quickly.
For something with a bit more flavor complexity, try my Easy Sourdough Recipe, which walks you through maintaining a starter.
If you want individual portions, my 5-Ingredient New York Style Bagels are surprisingly easy to make at home.
My 4-Ingredient Bread Bowl Recipe is perfect for serving soups in edible bowls.
For a flatbread option, check out my Easy Same-Day Pizza Dough Recipe, which is ready much faster than this artisan loaf.
And if you want to make garlic bread with your fresh loaf, pair it with my Homemade 4-Ingredient Ketchup for dipping.
Final Thoughts

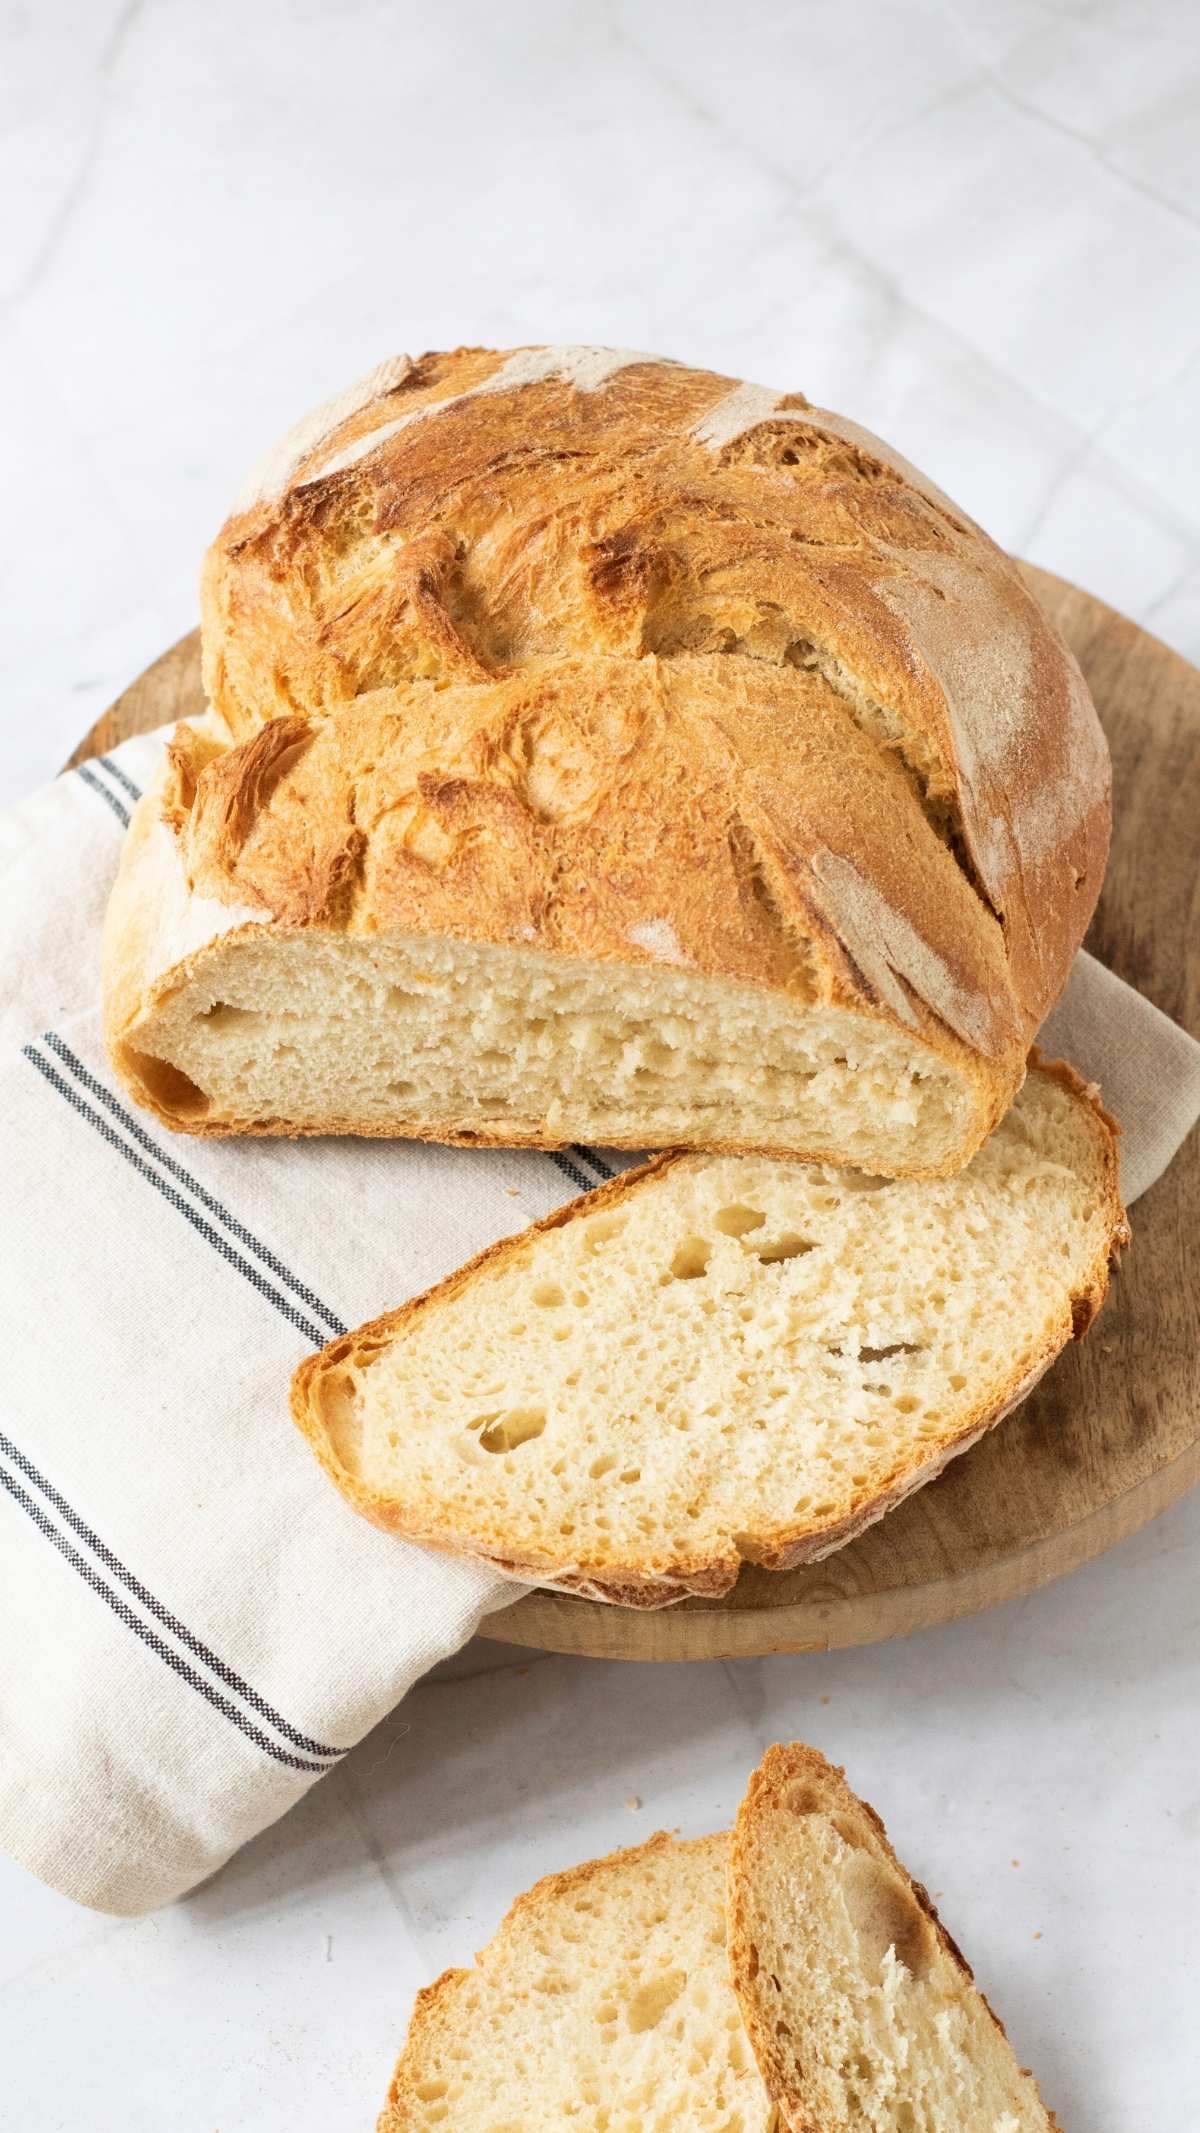
This artisan bread recipe proved to me that you don’t need years of experience or complicated techniques to bake incredible bread at home. With just four ingredients and a little bit of patience, you can create a loaf that rivals anything from an expensive bakery.
I love crusty bread like this because it feels substantial and satisfying, with that perfect chew and those beautiful air pockets inside. It tastes and feels like a loaf of sourdough, but without the difficulty of maintaining a starter.
The best part? Once you master this basic recipe, you’ll see the endless possibilities for making it your own with different additions and flavors.
I can’t wait to hear how your first loaf turns out! Rate this recipe below and leave a comment telling me which variation you want to try first. And remember, if I can make this perfectly on my first try, so can you.
Recipe Card

World’s Easiest Artisan Bread Recipe! (4 Ingredients)
EMAIL THIS RECIPE
Enter your email and I’ll send this directly to you.
Plus you’ll get new recipes from me every week!
Ingredients
- 3 Cups All-Purpose Flour
- 2 teaspoon Instant Yeast
- 1 teaspoon Salt
- 1 ½ Cups Warm Water
Instructions
- Mix the dough: In a large bowl, whisk together 3 cups flour, 2 teaspoon instant yeast, and 1 teaspoon salt. Pour in 1½ cups warm water and stir with a wooden spoon until all flour is incorporated into a shaggy, sticky dough. No dry flour should remain visible.
- First rise: Cover bowl tightly with plastic wrap or damp towel and let rise in a warm place for 2 hours until doubled in size and the surface shows bubbles.
- Optional stretch and fold method: For a stronger crumb structure, after 30 minutes of rising, perform a set of stretch and folds by grabbing one edge of the dough, stretching it up as high as it will go without tearing, then folding it over to the opposite side. Rotate bowl 90 degrees and repeat 7 more times. Cover and let rise 30 minutes, perform another set of 8 stretch and folds, then let rise for the final hour.
- Shape the loaf: Turn the risen dough onto a well-floured surface using a spatula. With floured hands, gently shape into a round by tucking the edges underneath, being careful not to knock out air bubbles. The dough will be very sticky and loose.
- Second rise: Place shaped loaf on parchment paper and transfer to your Dutch oven or baking sheet. Cover and let rise for 30 minutes to 1 hour until puffy and increased in size by about 50%.
- Prepare for baking: Preheat oven to 450°F with Dutch oven inside if using. Score a single slash about ½ inch deep across the top of the loaf with a sharp knife or razor blade.
- Bake with steam: If using Dutch oven, add 3-4 ice cubes alongside the bread for steam and cover with lid. If using a baking sheet, place a pan of boiling water on the rack below. Bake covered at 450°F for 40 minutes until the crust sounds hollow when tapped.
- Final bake: Reduce heat to 425°F and bake uncovered for 15 minutes more until deep golden brown with a crispy crust.
- Cool: Transfer to a wire rack and let cool for at least 30 minutes before slicing to allow the crumb to set properly.
Notes
Nutrition
Want To Save This Recipe?
Share your email & we'll send it over! PLUS, you'll get new recipes from us weekly
Frequently Asked Questions
Yes, all-purpose flour works perfectly in this artisan bread recipe. Bread flour will give you a slightly chewier texture due to its higher protein content, but all-purpose flour produces excellent results too.
Dense bread usually means the water was too hot (killing the yeast) or the rise time was insufficient. Make sure your water is around 110°F (comfortably warm to touch), and let the dough fully double during the first rise.
Absolutely. Use a regular baking sheet and create steam by placing a pan of boiling water on the rack below your bread. The steam helps develop that crispy crust just like a Dutch oven does.
Store in a paper bag at room temperature for up to 3 days to maintain the crispy crust. For a softer crust, use a plastic bag. Never refrigerate bread as it makes it go stale faster. Freeze sliced bread for up to 3 months.
Yes, fold in cheese, herbs, dried fruit, or spices after the first rise before shaping. Just keep add-ins to about 1 to 1½ cups total so they don’t interfere with the dough structure.
You can substitute active dry yeast in the same amount. Just expect the rising times to be slightly longer, potentially 2½ to 3 hours for the first rise.
The crust should be deep golden brown, and when you tap the bottom of the loaf, it should sound hollow. The internal temperature should read 200°F to 210°F if you have a thermometer.
The dough is very wet and sticky, which means it will absolutely stick to your pan without parchment paper. Parchment makes it easy to transfer and remove the bread without tearing it.
The taste and texture were great, but the loaf spread out to about 8 inches wide and only 1-2 inches high. What did I do wrong?
Hi Andy! Glad the taste was great (: For size, you may have not shaped the loaf tightly enough, or your dough may have been too wet. These things can cause the loaf to spread.
If I bake this in a baking sheet do I bake for 40 min with the steam the whole baking time , Or extra time like the Dutch oven
Do I need to cover it? (Foil)
Looking for clarification before trying the recipe
Thank you
Hi Ans! Great questions. If you’re skipping the Dutch oven and using a baking sheet, add steam at the beginning only — that’s what helps with oven spring. After the first 15–20 minutes, you can remove the steam and let it bake out the rest of the way. No foil needed unless the top starts getting too dark. It should still bake around the same total time, just keep an eye on color.
I dont have a dutch oven….or sheet pan. Can I use ordinary loaf pan (approx 11×21 cm). Maybe halve the dough? for 2 loaves?? Must I still use parchment paper…or must the pan be oiled?.and must the pans be covered? Maybe cover the one pan with another and form a dome with foil? Im 87 yrs old and want to try this. Please help with any suggestion. Thanks
Ria, this made my day — I’m cheering you on already You can absolutely use loaf pans. I recommend dividing the dough into two loaves so they bake evenly. I would recommend using parchment paper as well. No covering needed during baking, but you can add the foil if it browns too quickly. Keep it simple — that’s the beauty of this recipe. Please come back and tell me how it goes!
easy & artisan!! I’ve been baking bread for 6+ months and this turned out easily the best out of all recipes
WOW that makes me so happy to hear!! Glad you liked it (:
Turned out great – one suggestion though – you say to let the dough rise a 2nd time in the (cold) Dutch oven then to pre heat the Dutch oven prior to baking – can the 2nd rise be done in a bowl instead so that the Dutch oven can be heated at the same time? Vs removing the bread before heating the oven
Hi Huw! Yes it absolutely can. If you have a banaton that would be even better. If you’re using a bowl, you’ll want to line it with a tea towel that’s brushed with rice flour so your dough doesn’t stick (:
Can you use bread flour or is it a must to use all purpose?
You can absolutely use bread flour Ryan!
I love this recipe. It’s a favorite in my house. If I double to recipe and make 1 large loaf, do I need to make any adjustment (bake time, number of stretch and fold…)?
Hi Myriam! If you wanted to double the recipe to make one big loaf, you can keep the number of stretch and folds the same, but I you’ll need to increase your bake time to make sure it bakes all the way through. I would bake it for about 1 hour covered, then 15 minutes uncovered. If after 1 hour you bread isn’t really risen and starting to build a crust over the top, you can leave it for an extra 15 minutes before removing the lid (:
If you wanted to add inclusions, when you do that?
Hi Brandy! I’d mix inclusions in right before shaping. After the first rise, flatten the dough slightly, scatter your add-ins, then fold and shape as usual. It keeps the structure intact but gets everything nicely incorporated.
I made this today just on a cookie sheet with water under it. It turned out very nice but it just doesn’t have much taste. It’s kind of flat tasting to me.
Lori, I appreciate you sharing that. This recipe is designed to be super simple, which does mean the flavor is more subtle. For more depth, you could extend the rise time or add a touch more salt. Even brushing the top with butter and sprinkling flaky salt after baking can really boost the flavor.
Going to bake my first loaf today wish me luck. Friend recommended your recipe. Stay tunned
Good luck Cori!!! Let me know how it goes (:
Can I use active dry yeast instead of instant Yeast?
Absolutely! You just have to add the water, yeast and a dash of sugar first and let it activate for 10 minutes. then add in your dry ingredients (:
I did this bread today and it was so amazing and delicious. I used the Pro method and was not disappointed. I also used my Emile Henry bakeware to bake my dough in the oven . Love love this recipe. Thank you!
That sounds amazing Lynn!! I am so happy you liked the bread, thanks for sharing (:
Hi Minoo made the artisan bread today came out delicious. Thank you for the recipes.
I’m so glad you liked it Phyllis!!
If using a Dutch oven, where do the ice cubes go?
This was my question too
Did you get an answer?
Hi Maggie!! The ice cubes go outside the parchment paper, in the dutch oven.
The ice cubes go between the parchment paper and the side of the Dutch oven.
That’s correct Norm!
On the sides underneath the parchment paper with Dutch oven