
Your goal is to make the perfect ciabatta bread rolls, not to read through walls of text about its history (although, that could be a nice addition.)
To help you achieve that goal, and make things easier, I left a handy, dandy table of contents right above.
Whether you're more visual and want to start with my step-by-step YouTube video, follow along with a text recipe, or even read the 100-year-old history of the Ciabatta bread… It's all yours to discover.
Proof This Ciabatta Bread Recipe Works!
Jump to:
- Proof This Ciabatta Bread Recipe Works!
- Video for the Ciabatta Roll Recipe:
- Grab Your FREE Ciabatta Recipe Card
- What You'll Need to Make Ciabatta Bread Rolls
- What Else Can You Add to Your Ciabatta Rolls?
- Ciabatta Substitutions & Dietary Restrictions
- Grab Your FREE Ciabatta Recipe Card
- Measurements
- Equipment You Need For This Ciabatta Recipe
- Step-By-Step Ciabatta Bread Rolls Recipe
- Troubleshooting If the Ciabatta Recipes Goes Wrong
- Grab Your FREE Ciabatta Recipe Card
- Step By Step Instructions for This Fast Ciabatta Recipe
- Recipes Similar to Ciabatta You May Like
- If You Have a Bread Machine Here's How to Make Ciabatta
- A Little History of Ciabatta Bread Rolls
- Grab Your FREE Ciabatta Recipe Card
- Recipe Card
If you're like me, you've been met with multiple recipes claiming to work only to leave you with wasted time along with dry and inedible bread…
Before getting to the step-by-step YouTube video, I want to give you some reassurances, that this recipe works.
In fact, with over 5M views on Instagram, they've been recipe tested thousands, if not hundreds of thousands of times…
Without further ado, here's what others experienced following this exact recipe.
I tried this, the bread is sooo delicious, trust me, you may not wanna hold back to buying ciabatta ever again, its just so simple & delicious, so if you have some spare time give it a go! (It was my first time too, trust me 🙂 )
@itsjustme_joanna
Girl!!! I made 2 loaves yesterday and my family is asking for more!!! After failing at sourdough, because I'm not willing to dedicate my life to it…this is a great alternative! Absolutely delicious!
@brenda_geb
I had to come back and report how easy and so good this is. First time making bread with no issues. My son (9) said it's the best thing he's ever had. We topped it with pasta sauce. Soooo yum! Thank you so much!
@nekebrown
First time bread baker here, and it was right up my alley! I hate the texture of wet ???? dough on my hands, and this helped avoid that while also giving me the most beautiful and delicious loaf! Honestly, easier than I thought and even better results. I will absolutely be trying this recipe again.
@christina
I’ve made this before and it doesn’t last. Meaning my family it’s ALL of it the day it’s made lol. How do I make the dough today for baking tomorrow? Just keep it in the fridge?
@moshorty
Video for the Ciabatta Roll Recipe:

If you're more visual and want a follow-along video of making the ciabatta rolls, then check out this YouTube video I made.
If not, let's get through this step-by-step in text.

Grab Your FREE Ciabatta Recipe Card
I’ll email you the Ciabatta recipe as a card you can easily print or save forever.
What You'll Need to Make Ciabatta Bread Rolls

This Ciabatta bread recipe uses basic ingredients readily available in your kitchen and is super simple to make. Here's what you'll need:
- Flour: we will use all-purpose flour because it gives the right texture to the bread.
- Yeast: preferably instant yeast. If you have to use active dry yeast, mix it with warm water with a pinch of sugar and let it sit for about 10 minutes to activate it before using it for better results.
- Water: in this case, we use warm water in a ratio that makes the dough sticky. Compared to other types of bread, Ciabatta is made with high hydration levels, making the bread have bigger holes.
- Salt: Salt enhances the flavor of bread and supports the yeast fermentation process for maximum flavor. However, it has to be the right quantity since excess salt could cause dehydration and inactive yeast.
- Sugar or honey: Adding sugar enhances yeast fermentation because sugar provides energy. However, adding sugar or honey to the Ciabatta recipe is optional. You can add just a little to balance the taste and enhance browning because sugar caramelizes when heated.
What Else Can You Add to Your Ciabatta Rolls?
You don't have to stick to the basic ingredients. Here are some ways to switch up the recipe and try new flavors
1. Fresh or dried herbs
Adding herbs to your dough is a good way to enhance flavor. You can use fresh herbs such as chopped parsley, chives, and basil or dried alternatives such as oregano and thyme.
2. Cheese
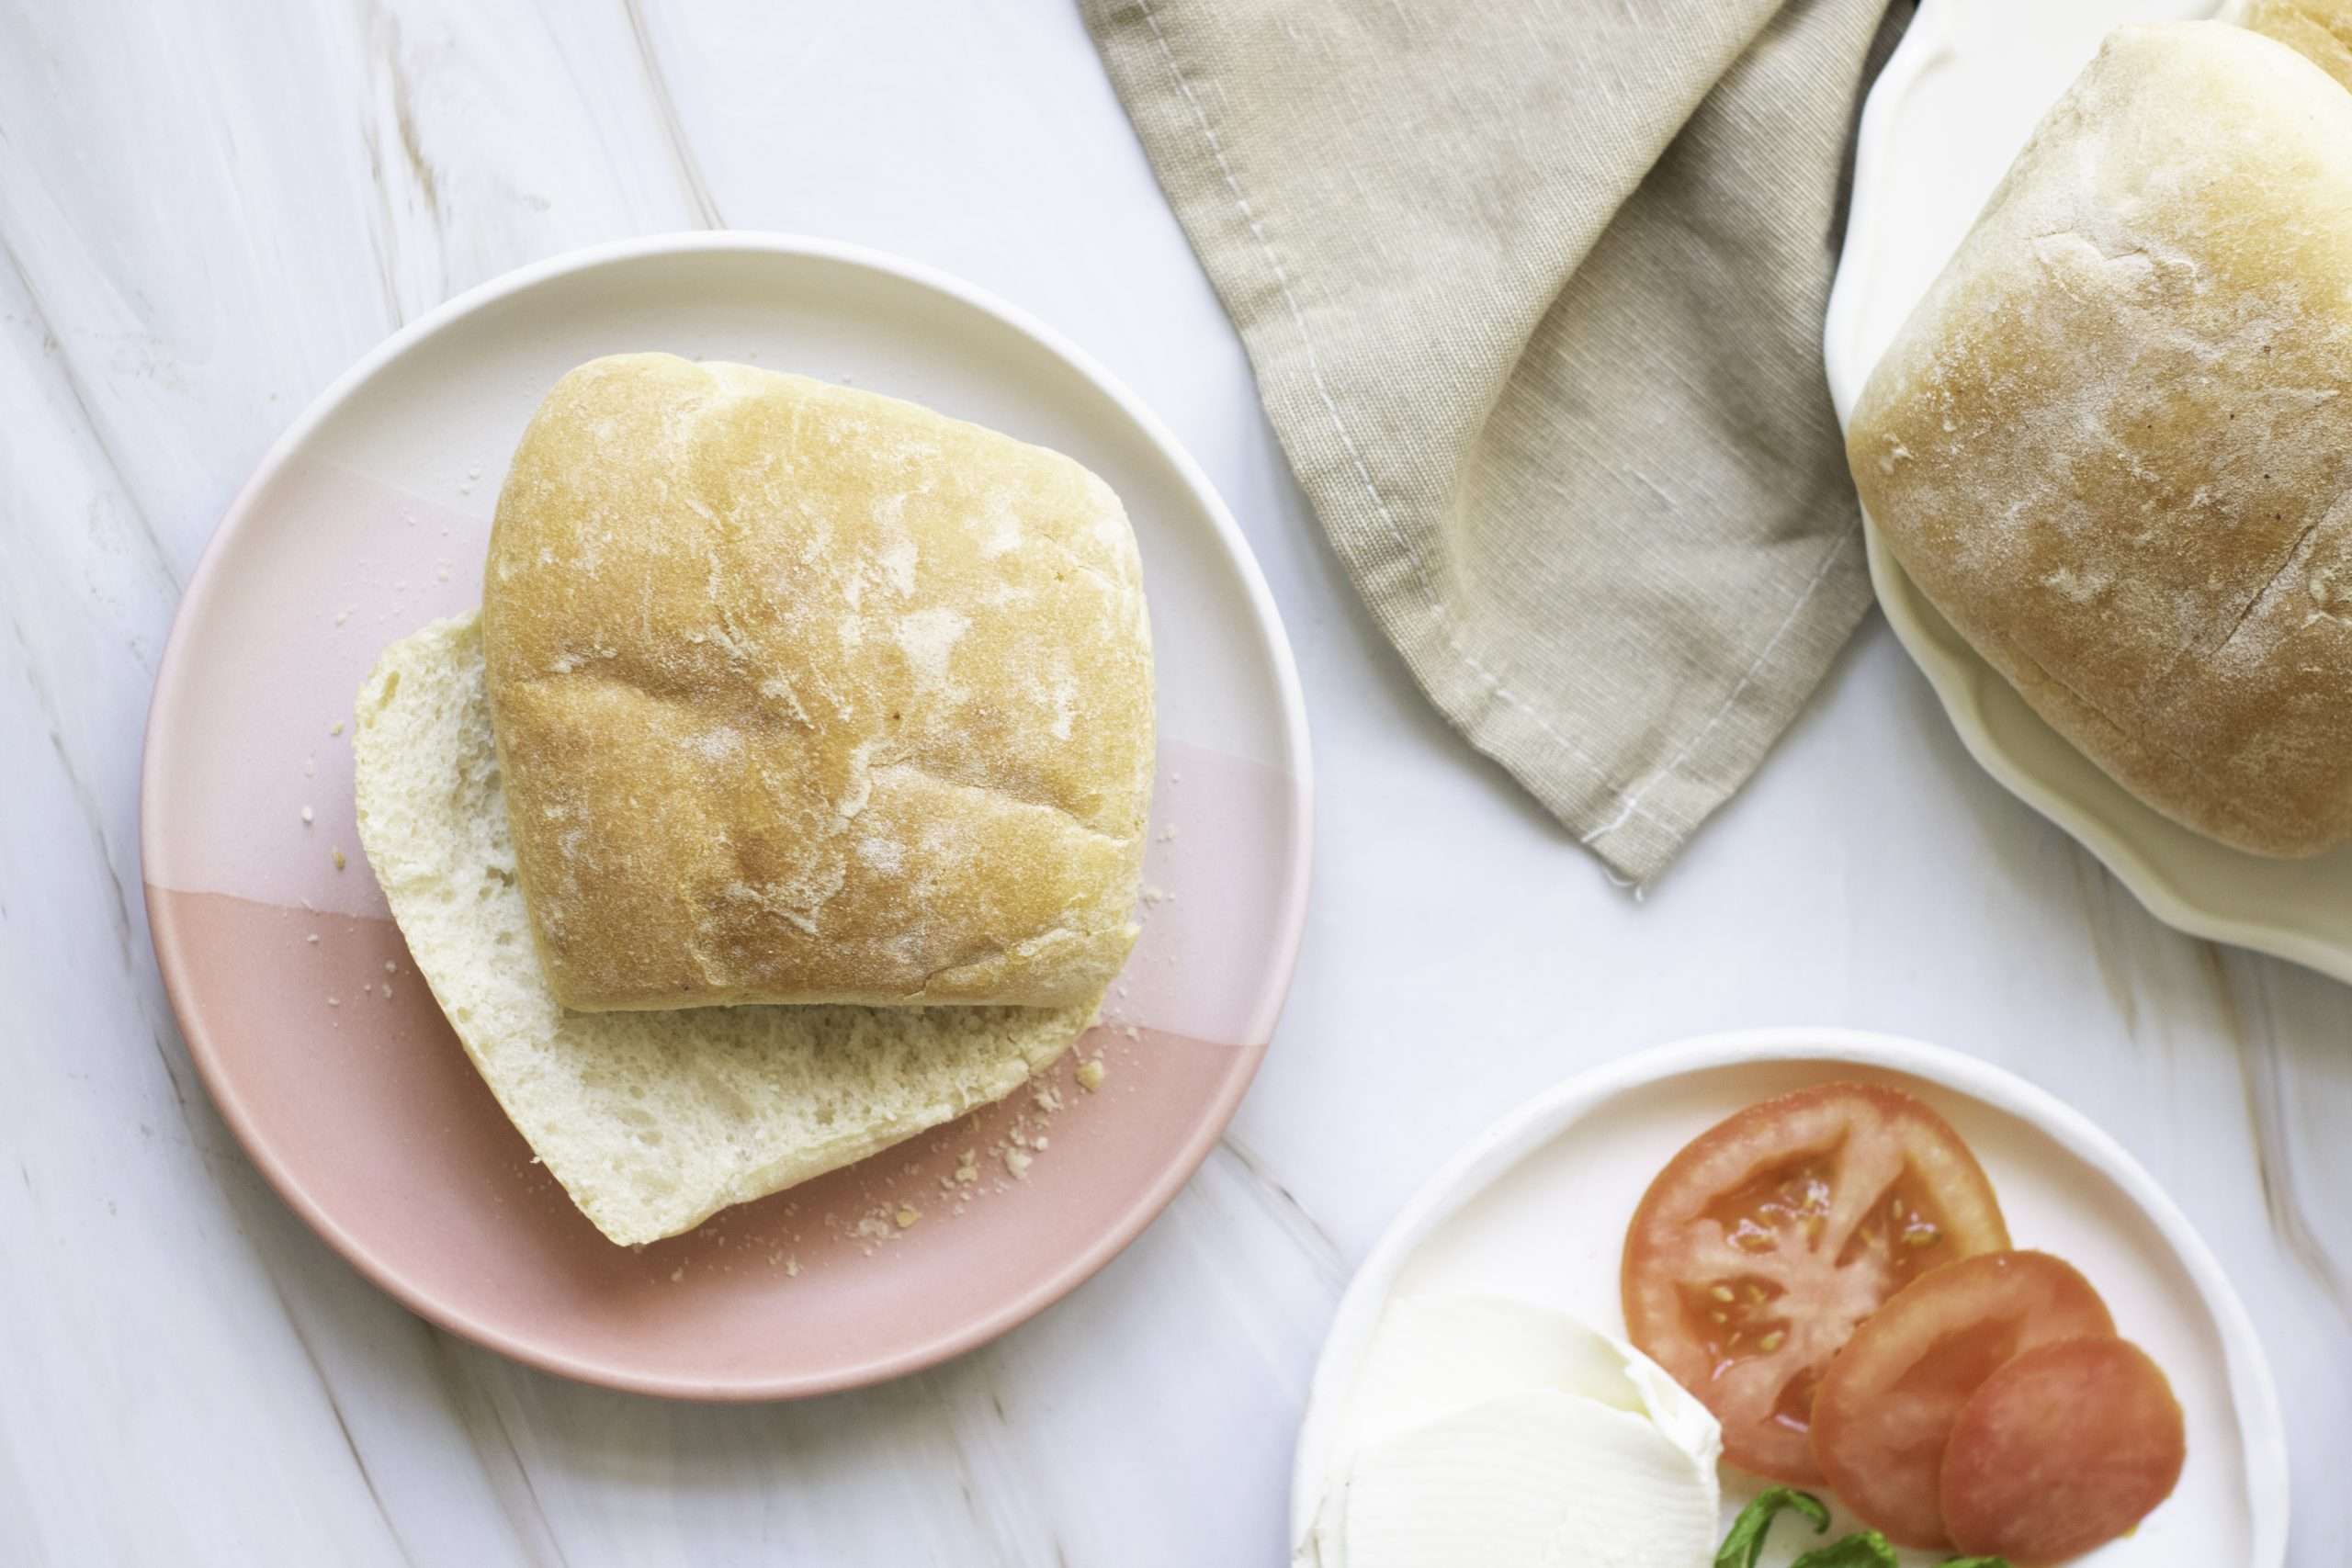
Add a cheesy flavor to your bread by adding cheese to your dough. For example, you could add shredded Parmesan cheese to enhance the flavor a notch higher than the regular Ciabatta bread rolls recipe or skip adding cheese to the dough and use the finished bread for sandwiches made with my fresh mozzarella cheese recipe for beginners, tomatoes, basil, and olive oil.
Ciabatta Substitutions & Dietary Restrictions
You can make several recipe variations to suit your preference or adhere to dietary restrictions. Let's look at some of them:
1. Gluten free variation
To make a gluten-free Ciabatta bread, substitute the all-purpose flour with a high-quality gluten-free flour blend. Look for a mix that includes rice flour, potato starch, and tapioca starch. Add xanthan gum if the blend doesn't include it. You also need to adjust the water quantity for a better consistency since gluten-free flour absorbs more water than wheat flour.
2. High fiber variation
If you are under the doctor’s instructions to avoid refined flours or prefer to add more fiber to your diet, choose whole wheat flour because it has higher fiber content and is healthier. However, you may notice that the Ciabatta bread will be denser than those made with refined all-purpose flour.
Grab Your FREE Ciabatta Recipe Card
I’ll email you the Ciabatta recipe as a card you can easily print or save forever.
Measurements
- Flour: 2 cups
- Yeast: 2 teaspoons instant yeast
- Sugar: ½ teaspoon
- Salt: 1 teaspoon
- Water: 1 cup
You can double up the measurements if you want to increase the quantity of bread.
Equipment You Need For This Ciabatta Recipe
This recipe is easy to make, and you don't need fancy tools or equipment to make the dough come together quickly. Here are some things you may need:
- Measuring cup
- Spoon
- Spatula
- Baking sheet
- A serrated knife or a scraper
- Mixing bowl
- Baking dish to hold boiling water and create steam in the oven
- Oven
Step-By-Step Ciabatta Bread Rolls Recipe
Ready to make your home smell like a fresh bakery? Try this quick Ciabatta bread rolls recipe and enjoy fresh, crusty homemade bread with minimal effort. It has a perfect crunch and crispy crust on the outside and soft and fluffy on the inside.
Ingredients
- 2 cups all-purpose flour (plus more for dusting)
- 2 teaspoons instant yeast
- 1 cup warm water
- 1 teaspoon salt
- ½ teaspoon sugar or honey
Directions
- Combine flour, instant yeast, salt, and sugar in a mixing bowl. Add warm water and mix with a spatula until no flour is left to make a sticky dough.
- Sprinkle a little flour on top of the dough and cover for 90 minutes to allow it to rise.
- Line the baking sheet with parchment paper and dust with flour to prevent the dough from sticking. Transfer the dough to the baking sheet and shape it into an elongated loaf using your hands or a spatula. Dust a little flour on top.
- Preheat the oven to 425 degrees Fahrenheit and place the empty baking dish tray on the lower rack.
- Transfer the baking sheet with the dough to the top rack of the preheated oven. Fill the baking dish below with 2 cups of boiling water to create a water bath.
- Bake for 10 minutes, then remove the water bath. Transfer the baking sheet with ciabatta bread to the bottom of the rack and bake for another 15 minutes.
- Remove from the oven and set aside to cool. Enjoy.
Troubleshooting If the Ciabatta Recipes Goes Wrong
Ciabatta bread may be a little trickier to make than other types of bread. You may need a little more practice, so don't give up if you don't get it right on your first attempt. One of the most common challenges is when Ciabatta bread won't rise. Let's look at some of the causes and ways to troubleshoot.
1. Using cold or hot water
Yeast is essential for bread making but sometimes it fails and you may end up with bread that doesn’t rise the way it should. Yeast requires warmth to rise so using cold water will not work. Also, using hot water may be counterproductive. To avoid future flops so ensure that you use warm water.
2. Using expired yeast
Yeast is a microorganism that has a lifespan. If you use yeast past the best-by date, you may end up with bread that doesn't rise. It's always advisable to proof yeast before use to make bread. Mix yeast with warm water and sugar and let it sit for about 5 minutes. If the mixture forms bubbles, then the yeast is okay, and you can use it to make your dough.
3. Using excess sugar or salt
Adding too much salt may kill the yeast and prevent the dough from rising. Also, too much sugar may make the dough take longer to rise. Use the right measurements for better results.
4. Using too much flour
Just like salt and sugar, using too much flour can impact the outcome of the recipe and make the bread too stiff and dry. The dough should be sticky, but avoid the temptation to add more flour as it will affect the hydration levels necessary for bread and yeast activity.
Grab Your FREE Ciabatta Recipe Card
I’ll email you the Ciabatta recipe as a card you can easily print or save forever.
Step By Step Instructions for This Fast Ciabatta Recipe
It is possible to succeed on your first attempt with this quick ciabatta recipe because it is easy to follow. We also give you tips and ideas to improve your confidence in making Ciabatta bread at home that tastes better than store-bought ones. Here's how to make yummy homemade Ciabatta.
Step 1: Mixing ingredients
Combine 2 cups of all-purpose flour, 2 teaspoons of instant yeast, 1 teaspoon of salt, and ½ teaspoon of sugar in a mixing bowl. Add 1 cup of warm water and mix with a spatula until no flour is left to make a sticky dough. You may need to add water first if you're using active yeast instead of instant yeast.
Step 2: Rising
Sprinkle a little flour on the top of the dough, cover, and place it in a warm place for 90 minutes to allow the dough to rise. I like to uncover the dough at minute 30 and minute 60 to pull, stretch, and fold the dough about four times to build the gluten and make the bread fluffier. Then, cover and let it rise. But it is optional.
Step 3: Shaping the dough
Line the baking sheet with parchment paper and dust flour to prevent the dough from sticking. Transfer the dough to the baking sheet using a spatula. Shape the dough into an elongated loaf shape using our hands or a spatula. Dust a little flour on top to ensure the floured surface is upward. If you prefer to add toppings to the bread, brush the top with water before adding the herbs or cheese.
Step 4: Baking
Place the empty baking dish tray on the lower rack of the oven and preheat the oven to 425 degrees Fahrenheit. Place the baking sheet with the dough on the top rack of the preheated oven. Then, fill the baking dish with 2 cups of boiling water to create steam in the oven to ensure the Ciabatta bread is moist on the inside and crunchy on the outside.
Bake for 10 minutes, then remove the water bath. Move the baking sheet to the bottom of the rack and bake for another 15 minutes.
Recipes Similar to Ciabatta You May Like
If you love Ciabatta, you may also like other breads. Here are some considerations that we recommend you try out:
If You Have a Bread Machine Here's How to Make Ciabatta
Making dough for Ciabatta is hassle-free, and you'll have fewer dishes to clean up. But if you prefer a bread machine, the process may differ slightly from making the dough by hand. However, the baking process is quite similar. All other ingredients remain constant, but you may need to use bread machine yeast instead of regular yeast for better results. Here are the steps:
Step 1
Transfer the water, flour, salt, sugar, and yeast to the bread machine in that order. Run the dough cycle for about 90 minutes.
Step 2
Once the cycle is over, remove the dough from the bread machine, place it on a floured board, and cover it with plastic wrap for about 15 minutes. The dough tends to be sticky, but do not add more flour, as it may affect the outcome.
Step 3
Sprinkle flour on two baking sheets or line with parchment paper. Cut the dough with a serrated knife into two equal parts and form an elongated oval. Transfer them to the baking sheets and dust lightly with flour. Cover for about 45 minutes to allow it to rise.
Step 4
Preheat the oven to 425 degrees Fahrenheit (220 °C). Bake the loaves on the middle rack for 25 to 30 minutes or until golden, to your preference.
A Little History of Ciabatta Bread Rolls
The Ciabatta bread recipe is a delightful treat for bread lovers, so what makes it so popular, and where did it originate from? Since a little history lesson never hurts anyone, let’s dive into the history of Ciabatta bread rolls.
Ciabatta is an Italian name that means "slipper," and it perfectly references the flat and elongated shape of the bread, which resembles a slipper. According to Wikipedia, the Ciabatta bread rolls recipe was invented by Arnaldo Cavallari, an Italian baker from Rovigo, Veneto, Italy, in 1982. At the time, French baguettes were popular around Europe, and the Italian baker decided to create an Italian alternative to protect his baking business. And who could blame him? Imagine Italians choosing French bread.
After weeks of trying different variations, Cavallari created a Ciabatta roll recipe that soon became popular in Italy. However, unlike the baguettes baked to be golden brown, Ciabatta bread rolls are longer and bigger and are baked with strong flour with higher hydration levels. Today, there are different variations of Ciabatta bread recipes in countries such as the United Kingdom. Surprisingly, it is now one of the most popular breads in the US and has taken the country by storm. I hope you enjoyed the little history lesson about the origin of Ciabatta bread.
Grab Your FREE Ciabatta Recipe Card
I’ll email you the Ciabatta recipe as a card you can easily print or save forever.
Recipe Card

The Quickest Ciabatta Bread Rolls Recipe That Works…
EMAIL THIS RECIPE
Enter your email and I’ll send this directly to you.
Plus you’ll get new recipes from me every week!
Ingredients
- 2 Cups All purpose flour (plus more for dusting)
- 1 Cup Warm Water
- 2 teaspoon Instant Yeast
- ½ teaspoon Sugar (or honey)
- 1 teaspoon Salt
Instructions
- In a bowl, combine flour, yeast, salt and sugar. Add in the water, and mix well until there is no dry flour left and a wet, sticky dough forms. Spinkle flour on the top then cover and allow to rise in a warm place for 1 ½ hours.
- Line a baking sheet with parchment paper and sprinkle flour on it. Once your dough as risen, use a spatula to directly transfer the dough from the bowl onto your baking sheet. Using the spatula or your hands, shape the dough into a oblong loaf shape. Make sure the floured top stays on top.
- Pre-heat over to 425℉ and place an empty baking dish on the bottom rack of the oven. Place your ciabatta loaf on the top rack, then fill the bottom baking dish with 1-2 cups boiling water and quickly close the oven (create a water bath).
- Bake for 10 minutes, then remove the water bath and move the ciabatta to the bottom or middle rack of the oven. Bake for another 10-15 minute, until golden. Remove and enjoy!!!
Nutrition
Want To Save This Recipe?
Share your email & we'll send it over! PLUS, you'll get new recipes from us weekly
I made this for the first time today. I did 2x the recipe and instead of doing a single loaf, I dumped the dough on to a floured silicone dough mat, and once formed, I cut the loaf into 8 “rolls”. (Down the middle horizontally and down the middle vertically and then another two cuts vertically) I then placed the rolls into the flour/parchment covered baking sheet. The resulting rolls were light and airy and were delicious with fresh mozzarella, tomato and prosciutto. Thx!
Paul, that’s such a great way to use the dough! Cutting it into rolls after the first rise is honestly brilliant. And now I’m craving that combo of mozzarella, tomato, and prosciutto… sounds amazing. Really glad it worked so well for you!
Mine was really heavy. Do you have any suggestions for me? Also, I wanted to clarify the water bath method is it a traditional water bath where the actual pan holding the bread sits inside a pan of water or is it just a pan with steam that could attribute to the heaviness? I just used a pot in the oven and then put the bread on a sheet tray it on a sheet tray.
Hi Dyanna! Yes the way you did it was correct. You put a pot or baking sheet and fill it with boiling water to create steam in the oven, but the pan with the breads itself does not go in the water! In terms of your dough being heavy, you may have added too much flour into your dough? Your dough should be pretty wet and sticky which is what create the light and airy ciabatta rolls.
My oven doesn’t cook hot, but these were very overdone at 40 minutes. Not crunchy, rock hard. Next time I’ll stop at 35. I immediately buttered the tops, which helped some. The middles were still soft and delicious.
Hi Diana! There may have been a misunderstanding because the recipe mentioned to have for 25 minutes total. 10 minutes with the water bath and 15 minutes without! Hopefully that helps (:
I just made this for my family for some chicken pesto ciabatta sandwiches and they came out perfect! You made the recipe so easy and it was my first time trying the water bath I was so nervous but it was perfect! Thank you! I can’t wait to make this again!
Stacey!! I am so happy to hear that. And those pesto chicken sandwiches sound delicious… I’m jealous!
Recipe looks easy peasy. I will be making this Ciabatta bread. What kind of flour do you use? AP or Bread?
Thank you
It truly is easy peasy Ruth!! I use all purpose flour but you can use bread flour as well. Which ever you have on hand will work great!
I’ve made this 3 times in the last week as my first bread!! Came out perfect each time. I did have to bake a couple extras minutes too to get that crust though.
This bread was great, simple, less mess than other breads, quicker, with good outcome. I believe it deserves a bit more salt, and I needed to leave the loaves in a few extra minutes to really brown them. Definitely use silpat or parchment paper, or at the very least grease your pan. One of my loaves stuck very badly hahaha. Tasty!
First time bread baker here, and it was right up my alley! I hate the texture of wet dough on my hands, and this helped avoid that while also giving me the most beautiful and delicious loaf! Honestly, easier than I thought and even better results. I will absolutely be trying this recipe again.
Made this for Christmas Eve dinner. It was a big hit. ????
I should have cooked it a little longer to make it “crustier “
Thank you for the wonderful recipes CC
Hi Loreen!!
I’m so happy to hear that. I shared it with my family as well and they loved it. The crustier the better in my opinion. Thank you for your kind comment (: