
You know that moment when the server brings out that warm, slightly sweet brown bread at Cheesecake Factory and suddenly your actual meal doesn’t matter anymore? Let’s recreate that magic in your own kitchen.
This Cheesecake Factory brown bread recipe delivers two gorgeous loaves with that signature subtle sweetness, tender crumb, and hint of cocoa. No stand mixer required, no complicated techniques, just SIMPLE ingredients you probably already have.
Why This Cheesecake Factory Brown Bread Recipe Works
Jump to:
- Why This Cheesecake Factory Brown Bread Recipe Works
- What You’ll Need to Make Cheesecake Factory Brown Bread
- Essential Equipment
- How to Make Cheesecake Factory Brown Bread: Step-by-Step
- Tips for Perfect Cheesecake Factory Brown Bread Every Time
- Ways to Serve Your Cheesecake Factory Brown Bread
- Variations to Try
- Troubleshooting Common Issues
- Storage and Reheating
- Other Copycat Recipes You'll Love
- Final Thoughts
- Recipe Card
- Frequently Asked Questions
I BETTER NOT CATCH YOU spending money on restaurant bread when you can make this at home for pennies per loaf!
Here’s why this recipe is worth your time:
It uses basic pantry ingredients with no fancy flour or special equipment. The whole wheat flour gives authentic texture while cocoa powder creates that signature dark color without making it taste like chocolate.
The dough comes together in minutes. Unlike traditional bread recipes that require stand mixers or extensive kneading, this one needs just 5 minutes of simple hand kneading.
You get TWO full loaves from one batch. That’s enough for dinner tonight AND sandwiches all week.
The rise time is reasonable. You’re looking at about 1 hour 30 minutes total rising time, which means fresh bread in under 3 hours from start to finish.
Minoo’s Pro Tip: The slightly sticky dough is intentional. It creates that tender, moist crumb that makes this bread so addictive.
What You’ll Need to Make Cheesecake Factory Brown Bread
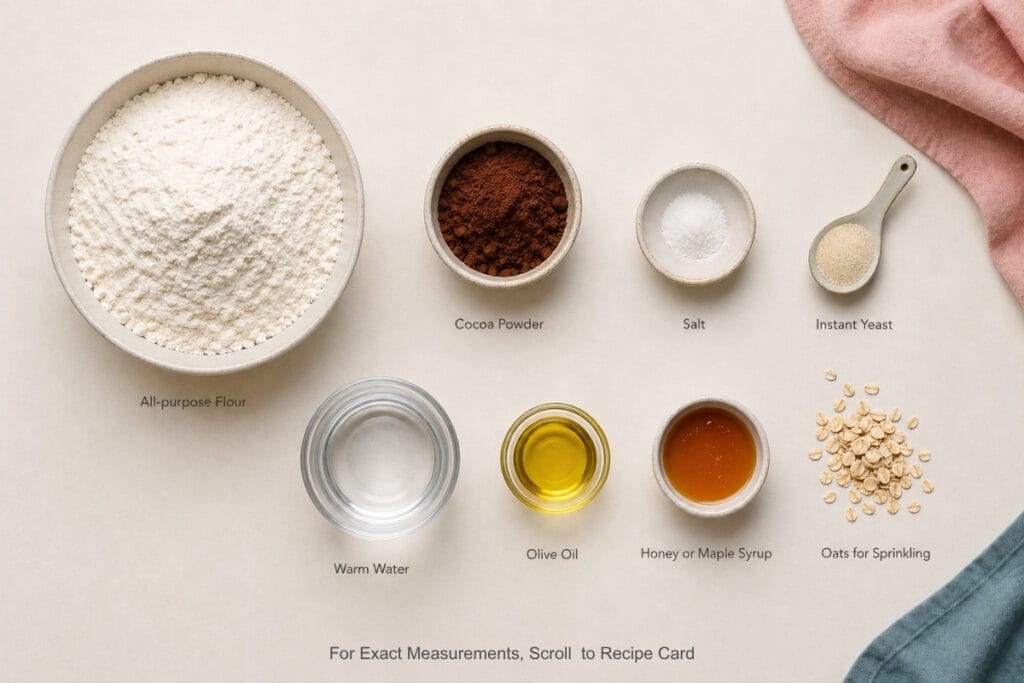
Let me break down exactly what goes into this Cheesecake Factory brown bread recipe and why each ingredient matters:
All-Purpose Flour (2 ¾ cup): The base to any good bread recipe.
Cocoa Powder (3 tablespoons): This is the SECRET ingredient that gives the bread its distinctive dark color. It adds depth without making it taste like chocolate bread. Use regular unsweetened cocoa powder, not Dutch-processed.
Salt (1 teaspoon): Enhances all the other flavors and controls the yeast activity.
Instant Yeast (2 teaspoons): I prefer instant yeast because it works quickly and doesn’t require proofing. Active dry yeast works too, but instant gives more reliable results.
Warm Water (1 cup, about 110°F): Should feel warm but not hot to the touch. Water that’s too hot will kill the yeast, while water that’s too cool won’t activate it properly.
Olive Oil (2 tablespoons): Adds moisture and helps create that tender texture. You can substitute with vegetable oil if needed.
Warm Honey (¼ cup): Provides the signature subtle sweetness. Warming it slightly makes it easier to mix into the dough. Maple syrup works for a vegan version.
Oats (optional): For sprinkling on top to recreate that classic restaurant look.
If you love making bread at home, you might also enjoy my No Knead 5-Ingredient Bread Loaf, which requires even less hands-on time.
Essential Equipment
You don’t need fancy equipment to make this Cheesecake Factory brown bread recipe:
Large mixing bowl, measuring cups and spoons, Wooden spoon or sturdy spatula, Clean kitchen towel or plastic wrap, Baking sheet, Parchment paper, Sharp knife or bread lame for scoring, Wire cooling rack
That’s it! No stand mixer, no bread machine, no special pans required.
How to Make Cheesecake Factory Brown Bread: Step-by-Step
Let me walk you through exactly how to make Cheesecake Factory brown bread from start to finish.
Step 1: Mix Your Dry Ingredients
In a large bowl, combine 2 ¾ cup all-purpose flour, 3 tablespoons cocoa powder, 1 teaspoon salt, and 2 teaspoons instant yeast.
Whisk everything together until evenly mixed with no streaks of cocoa powder. This takes about 30 seconds.
Minoo’s Pro Tip: Make sure your cocoa powder isn’t clumpy. If it is, sift it before adding to avoid dark spots in your bread.

Step 2: Add the Wet Ingredients
Add 1 cup warm water, ¼ cup warm honey, and 2 tablespoons olive oil to your dry ingredients.
Stir with a wooden spoon until a shaggy, rough dough forms with no dry flour remaining at the bottom of the bowl. This takes about 1 minute of stirring. The dough will look messy and uneven, and that’s PERFECTLY normal.

Step 3: Knead the Dough
Turn the dough out onto a lightly floured surface and knead for 5 minutes until smooth and slightly sticky.
To knead properly, push the dough away from you with the heel of your hand, fold it back over itself, turn it a quarter turn, and repeat. You’ll feel the dough transform from rough and shaggy to smooth and elastic.
If the dough feels too stiff or dry, wet your hands slightly while kneading to add moisture. The dough should be slightly sticky but manageable. If it’s sticking to your hands too much, dust with a tiny bit of flour, but don’t overdo it.
Minoo’s Pro Tip: Resist the urge to add too much extra flour. A slightly sticky dough makes softer, more tender bread.

Step 4: First Rise
Place the dough in a lightly greased bowl and cover tightly with plastic wrap.
Let it rise in a warm place for 1 hour until nearly doubled in size. I recommend placing it in an oven set to the lowest temperature for 1-2 minutes, then turning the oven OFF and using it as a proofing box. The warm environment helps the whole wheat dough rise beautifully.
You’ll know the dough is ready when it’s visibly puffed and nearly doubled. If you press it gently with your finger, the indent should slowly spring back.

Step 5: Shape Your Loaves
Once risen, turn the dough out onto a lightly floured surface and divide it into 2 equal pieces using a bench scraper or knife.
Take one piece and flatten it into a rectangle about 8 inches long and 6 inches wide. Roll it up lengthwise tightly like a jelly roll, starting from the short end. Pinch the seam closed along the length of the loaf to seal it.
Repeat with the second piece of dough.
Place both shaped loaves seam-side down on a parchment-lined baking sheet, spacing them about 4 inches apart.
Brush the tops lightly with water using a pastry brush or your fingers. If using oats, sprinkle them generously over the wet surface and press gently so they adhere.
Minoo’s Pro Tip: Rolling the dough tightly creates a better structure and helps the loaves hold their shape during baking.

Step 6: Second Rise
Cover the loaves loosely with a clean kitchen towel and let them rise for 30 minutes until visibly puffed and nearly doubled in size.
During this time, preheat your oven to 350°F so it’s ready when your loaves are.

Step 7: Score and Bake
Using a sharp knife or bread lame, score 3-4 diagonal slashes across the top of each loaf, about ¼ inch deep. Cut confidently and quickly for clean lines.
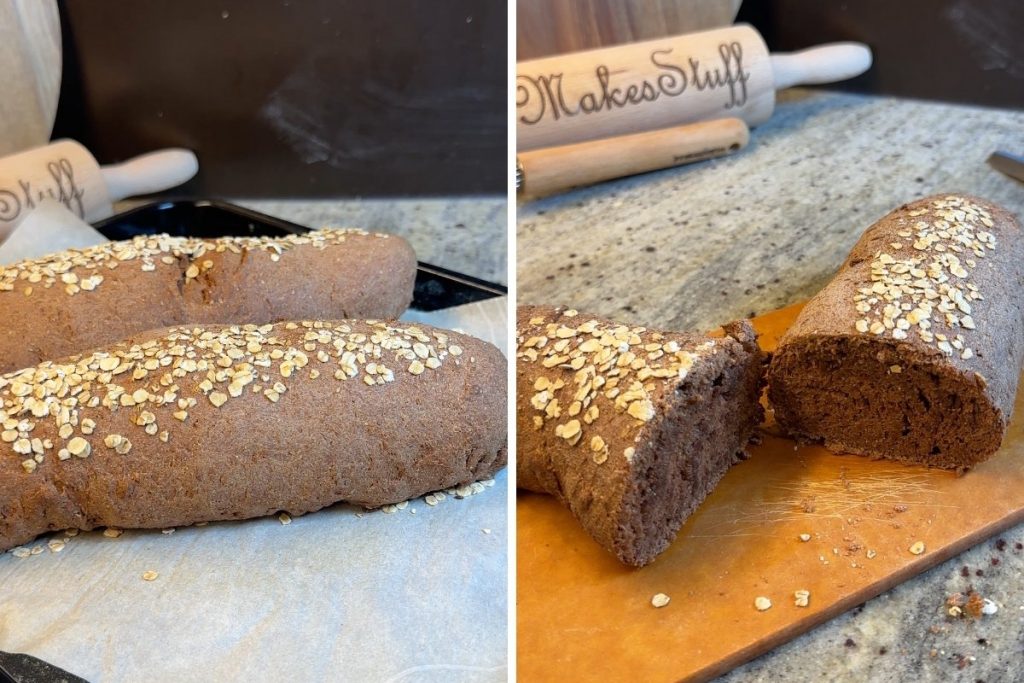
Bake for 30 minutes until the loaves are deep brown and sound hollow when tapped on the bottom. The internal temperature should reach about 190°F if you want to check with a thermometer.
Let the loaves cool on a wire rack for at least 15 minutes before slicing. I know it’s tempting to cut into them immediately, but letting them cool slightly helps the texture set properly.
This Cheesecake Factory brown bread recipe is similar in ease to my 4-Ingredient Bread Bowl Recipe, but with a unique flavor profile.
Tips for Perfect Cheesecake Factory Brown Bread Every Time
After making this bread dozens of times, I’ve learned a few tricks:
Water temperature matters. Your water should be about 110°F, which feels warm but not hot to the touch. If you kill the yeast with hot water, your bread won’t rise.
Don’t skip the warm rising environment. Whole wheat dough is denser and benefits from warmth. If your kitchen is cool, that oven trick I mentioned (turning it on for 1-2 minutes, then OFF) creates the perfect proofing box.
The dough should be slightly sticky. This might feel wrong if you’re used to other bread recipes, but trust me. Sticky dough equals tender bread.
Score decisively. The slashes allow the bread to expand properly during baking and create that classic artisan look. Cut confidently about ¼ inch deep.
Let it cool before slicing. I know, I know. But cutting into hot bread compresses the crumb and makes it gummy. Give it at least 15 minutes.
Minoo’s Pro Tip: If your loaves spread sideways instead of rising up, your dough was probably too wet or you didn’t shape them tightly enough. Next time, roll them more firmly and make sure your dough isn’t overly sticky.
Ways to Serve Your Cheesecake Factory Brown Bread

This bread is INCREDIBLY versatile:
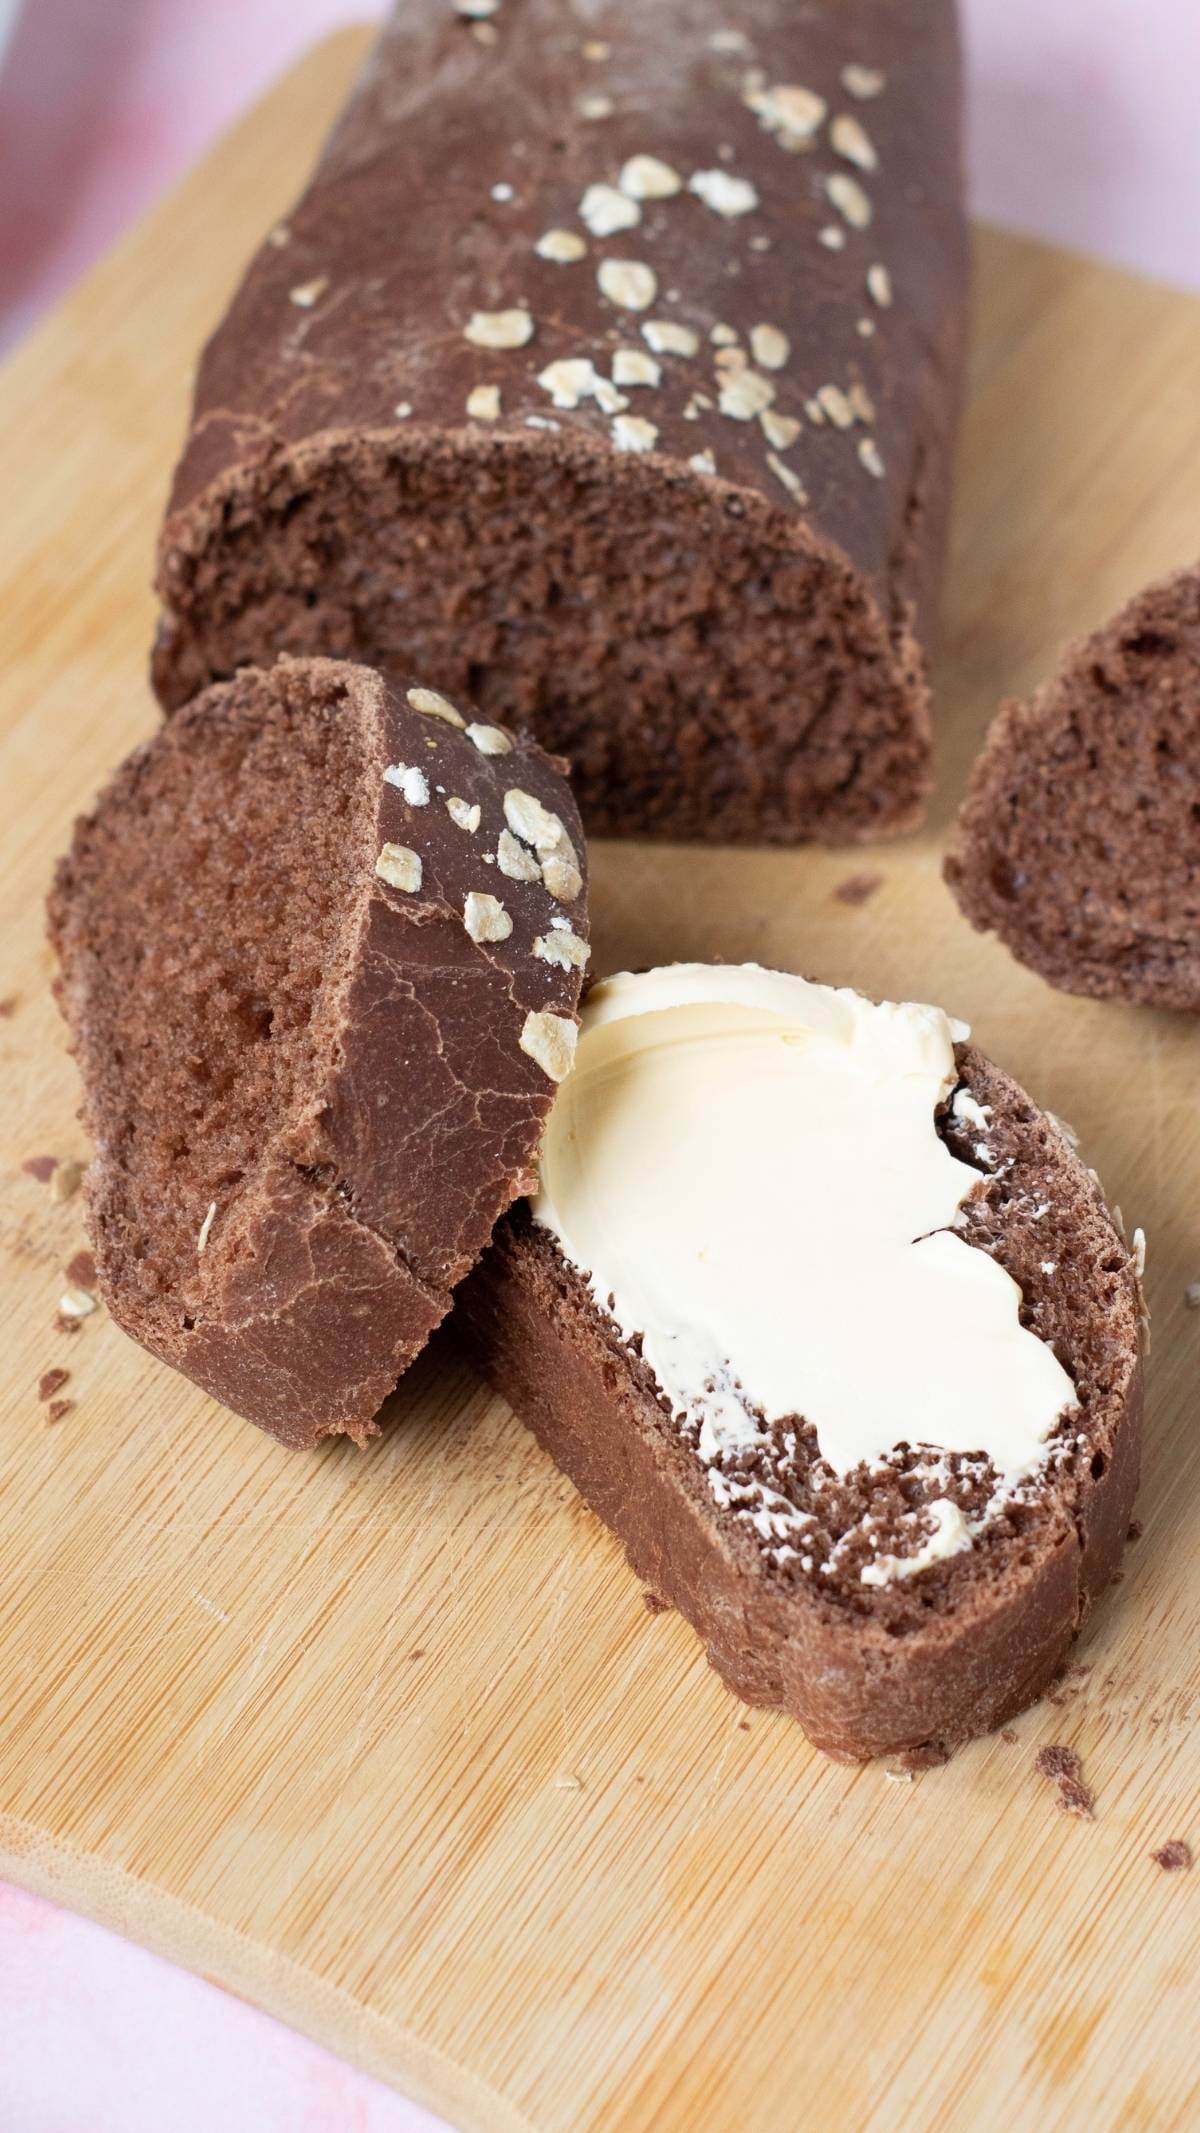
Slather it with softened butter while still warm for the classic restaurant experience. The butter melts into all those soft holes in the crumb.
Make incredible sandwiches. This bread holds up beautifully to hearty fillings without getting soggy. Try it with turkey, avocado, and sprouts, or with my Banh Mi Steak Sandwich filling.
Toast it for breakfast. Slice it thick, toast it until crispy on the edges, and top with cream cheese and jam.
Serve alongside soups and stews. The subtle sweetness pairs perfectly with savory dishes. Try it with my Cheddar & Broccoli Soup.
Use it for French toast. The slight sweetness and sturdy texture make it PERFECT for a weekend breakfast.
Turn it into breadcrumbs. Let leftover bread get stale, then pulse it in a food processor for homemade breadcrumbs with a unique flavor.
After enjoying this homemade brown bread, finish the meal with my easy marshmallow recipe for an easy homemade dessert that’s perfect for cozy evenings, family gatherings, or campfires.
Variations to Try

Once you master this basic Cheesecake Factory brown bread recipe, try these twists:
Add seeds: Mix in 2 tablespoons of sunflower seeds, pumpkin seeds, or sesame seeds to the dough for extra texture and nutrition.
Make it sweeter: Increase the honey to ⅓ cup for a slightly sweeter loaf that’s perfect for breakfast toast.
Herb version: Add 1 tablespoon of dried herbs like rosemary, thyme, or Italian seasoning to the dry ingredients for a savory twist.
Whole grain boost: Replace 1 cup of all-purpose flour with whole wheat flour for a heartier, more nutritious loaf.
Garlic butter topping: Instead of oats, brush the tops with melted butter mixed with garlic powder before baking.
Troubleshooting Common Issues

My bread didn’t rise: Check your yeast’s expiration date first. Also make sure your water wasn’t too hot (which kills yeast) or too cold (which doesn’t activate it properly). The dough needs a warm environment to rise well.
The bread is too dense: This usually happens when you add too much extra flour during kneading. Remember, the dough should be slightly sticky. Also make sure you’re giving it the full rise times.
The loaves spread sideways instead of up: Your dough was probably too wet, or you didn’t shape the loaves tightly enough. Roll them more firmly next time and consider adding a tablespoon or two more flour.
The bread tastes too much like cocoa: You might have used Dutch-processed cocoa, which has a stronger flavor. Use regular unsweetened cocoa powder for the subtle taste you want.
The bottom is too dark: Your oven might run hot. Try lowering the temperature to 325°F and baking a few minutes longer.
The bread is dry: This happens when too much flour gets added during kneading, or when the bread is overbaked. Check it at 25 minutes and remove when it sounds hollow when tapped.
Storage and Reheating

This bread stays fresh for several days with proper storage:
At room temperature: Store in an airtight container or bag for up to 3 days. The bread stays soft and tender during this time.
In the refrigerator: I don’t recommend refrigerating this bread as it can make it dry and stale faster.
In the freezer: Wrap cooled loaves tightly in plastic wrap, then place in a freezer bag for up to 3 months. Thaw at room temperature for several hours or overnight.
To reheat: Wrap in foil and warm in a 300°F oven for 10-15 minutes. Or toast individual slices for a crispy exterior.
Minoo’s Pro Tip: Slice the bread before freezing so you can pull out individual slices as needed without thawing the whole loaf.
Other Copycat Recipes You'll Love

If you enjoyed this cheesecake factory brown bread recipe, try these other restaurant favorites:
My Texas Roadhouse Rolls are sweet, fluffy, and taste EXACTLY like the original.
Copycat Pizza Hut Garlic Parmesan Breadsticks are buttery, garlicky, and absolutely addictive.
Copycat Olive Garden Breadsticks come together quickly and taste just like dining out.
Healthier Krispy Kreme Donuts let you enjoy that glazed goodness at home.
Starbucks Spinach Feta Wrap is perfect for breakfast on the go.
McDonald’s Chicken Snack Wrap brings fast food flavor to your kitchen.
Final Thoughts

This copycat Cheesecake Factory brown bread recipe proves you don’t need to go out to eat to enjoy restaurant-quality bread. With just 7 SIMPLE ingredients and about 2 hours of mostly hands-off time, you can have two gorgeous loaves sitting on your counter.
The subtle sweetness, tender crumb, and that hint of cocoa make this bread absolutely crave-worthy. Whether you’re serving it with butter alongside dinner or making incredible sandwiches for lunch, it delivers every single time.
Give this recipe a try and let me know how it turns out! Drop a comment below and rate the recipe so other readers know what to expect.
Recipe Card

Copycat Cheesecake Factory Brown Bread Recipe!
EMAIL THIS RECIPE
Enter your email and I’ll send this directly to you.
Plus you’ll get new recipes from me every week!
Ingredients
- 2¾ cup all-purpose flour
- 3 tablespoon cocoa powder
- 1 teaspoon salt
- 2 teaspoon instant yeast
- 1 cup warm water about 110℉
- 2 tablespoon olive oil
- ¼ cup warm honey or maple syrup
Optional Topping
- Oats for sprinkling
Instructions
- In a large bowl, combine 2 ¾ cup all-purpose flour, 3 tablespoons cocoa powder, 1 teaspoon salt, and 2 teaspoons instant yeast. Whisk together until evenly mixed.
- Add 1 cup warm water, ¼ cup warm honey, and 2 tablespoons olive oil to the dry ingredients. Stir with a wooden spoon until a shaggy, rough dough forms with no dry flour remaining.
- Turn the dough out onto a lightly floured surface and knead for 5 minutes until smooth and slightly sticky. If the dough feels too stiff, wet your hands slightly while kneading to add moisture.
- Place the dough in a lightly greased bowl, cover tightly with plastic wrap, and let rise in a warm place for 1 hour until nearly doubled in size. For best results, place in an oven set to the lowest temperature or in a warm spot around 80-85°F.
- Divide the risen dough into 2 equal pieces. Flatten one piece into a rectangle, then roll it up lengthwise tightly and pinch the seam closed to form a baguette shape. Repeat with the second piece.
- Place the shaped loaves on a parchment-lined baking sheet. Brush the tops lightly with water, sprinkle with oats if desired, and press gently so they adhere. Cover loosely and let rise for 30 minutes until visibly puffed and nearly doubled.
- Preheat the oven to 350°F. Using a sharp knife or bread lame, score 3-4 diagonal slashes across the top of each loaf, about ¼ inch deep.
- Bake for 30 minutes until the loaves are deep brown and sound hollow when tapped on the bottom. Let cool on a wire rack for at least 15 minutes before slicing.
Notes
Nutrition
Want To Save This Recipe?
Share your email & we'll send it over! PLUS, you'll get new recipes from us weekly
Frequently Asked Questions
You might be using Dutch-processed cocoa powder, which has a stronger chocolate flavor. Use regular unsweetened cocoa powder for the subtle taste that’s authentic to the restaurant version. The cocoa should just provide color and depth, not a chocolate taste.
Yes, but it will take longer. In a cool kitchen, your first rise might take 1.5 to 2 hours instead of 1 hour. The bread will still turn out well, just be patient and wait for it to double in size.
The loaves should be deep brown on top and sound hollow when you tap the bottom. You can also use an instant-read thermometer; the internal temperature should reach about 190°F.
Yes, but you’ll need to proof it first. Dissolve the active dry yeast in the warm water with a pinch of sugar and let it sit for 5-10 minutes until foamy before adding to the other ingredients.
This usually means the dough was too wet or the loaves weren’t shaped tightly enough. Make sure you’re rolling them firmly and pinching the seam well. Also, the dough should be slightly sticky but not overly wet.
Yes! Divide the dough in half and shape each piece to fit a greased 9×5-inch loaf pan. The baking time will be the same, about 30 minutes at 350°F.
It stays soft and fresh at room temperature in an airtight container for up to 3 days. After that, it starts to dry out. I recommend freezing any bread you won’t eat within 3 days.
Can I use bread flour? Will it make it softer?
Jo, great question! You can swap in bread flour, no problem. Just know it tends to create a slightly chewier loaf, not softer. For that soft, tender texture like the restaurant version, all-purpose really does the trick best. Either way, it’ll still be delicious
I don’t typically leave reviews unless the recipe blows my mind… and this bread did just that. It was absolutely perfect!!
AHHH Katie what an absolute honour!!! I can’t tell you how happy it makes me to hear that. Glad you enjoyed!
Can you bake a cake in loaf pan?
You absolutely can Donna!
I was worried to try a recipe that had no reviews but went ahead anyway. A little less sweet than cheesecake factory but did turn out. Soft and delicious!
I’m glad you took a chance on it and it paid of Bettina!! You can always increase the sugar and make the recipe your own too (:
Thank you for these recipes.
It would be nice if the ingredients were shown using grams or ounces so we could weigh them out.