
What if I told you that making ONE batch of yogurt at home means you’ll NEVER have to buy yogurt again? Once you make your first batch, you can use a bit of it to make your next batch, and the cycle continues forever.
I learned how to make yogurt at home the same way my mom learned it, the way her mom taught her, passed down through generations of Persian home cooks who’ve been making their own yogurt for centuries. When I moved into my first apartment, I called my mom and asked her to walk me through it over the phone. She didn’t even have a written recipe. She just told me what to do, and that’s exactly how SIMPLE this process really is.
Here’s the beautiful part: once you make your first batch, you save 2 tablespoons of it to start your next batch. Then you save 2 tablespoons from that batch for the next one. It’s an unlimited supply of thick, creamy yogurt that costs a fraction of what you’d pay at the store.
Why Make Your Own Yogurt at Home?
Jump to:
- Why Make Your Own Yogurt at Home?
- What You’ll Need (Just 2 Ingredients!)
- The Secret to Thick, Creamy Yogurt
- Step-by-Step Instructions
- How to Use Your Yogurt to Make Unlimited Batches
- Choosing the Right Milk
- Flavor Variations You Can Try
- Ways to Use Your Homemade Yogurt
- Troubleshooting Common Issues
- Storage and Shelf Life
- Why Homemade Yogurt is Healthier
- More Homemade Recipes You’ll Love
- Final Thoughts
- Recipe Card
- Frequently Asked Questions
Let me be honest with you. The first time I suggested making yogurt at home to a friend, she looked at me like I’d lost my mind. “Isn’t that complicated?” she asked. “Don’t you need special equipment?”
The answer is NO. Making yogurt at home is one of the EASIEST things you can do in your kitchen, and here’s why you should start today.
You’ll cut your yogurt expenses in HALF (or more). A gallon of milk costs around $4 to $5 and makes about 8 cups of yogurt. Compare that to buying individual containers at the store, and the savings add up FAST.
After your first batch, every future batch costs even less because you’re using your own yogurt as the starter. You’re essentially getting free starter culture forever.
The yogurt you make at home is thicker and creamier than most store-bought options. You control the fat content, the tanginess, and what goes into it.
There are NO preservatives, artificial thickeners, or added sugars unless you choose to add them yourself. Just pure, simple yogurt.
Homemade yogurt contains MORE live probiotic cultures than store-bought versions because it’s fresh and hasn’t been sitting on a shelf for weeks.
Minoo’s Pro Tip: The longer you let your yogurt ferment (up to 24 hours), the tangier it becomes and the more probiotics it develops. I prefer 12-14 hours for a mild, creamy taste.
What You’ll Need (Just 2 Ingredients!)
This is where making yogurt at home gets even better. You only need TWO ingredients, and I guarantee you can find both at any grocery store.
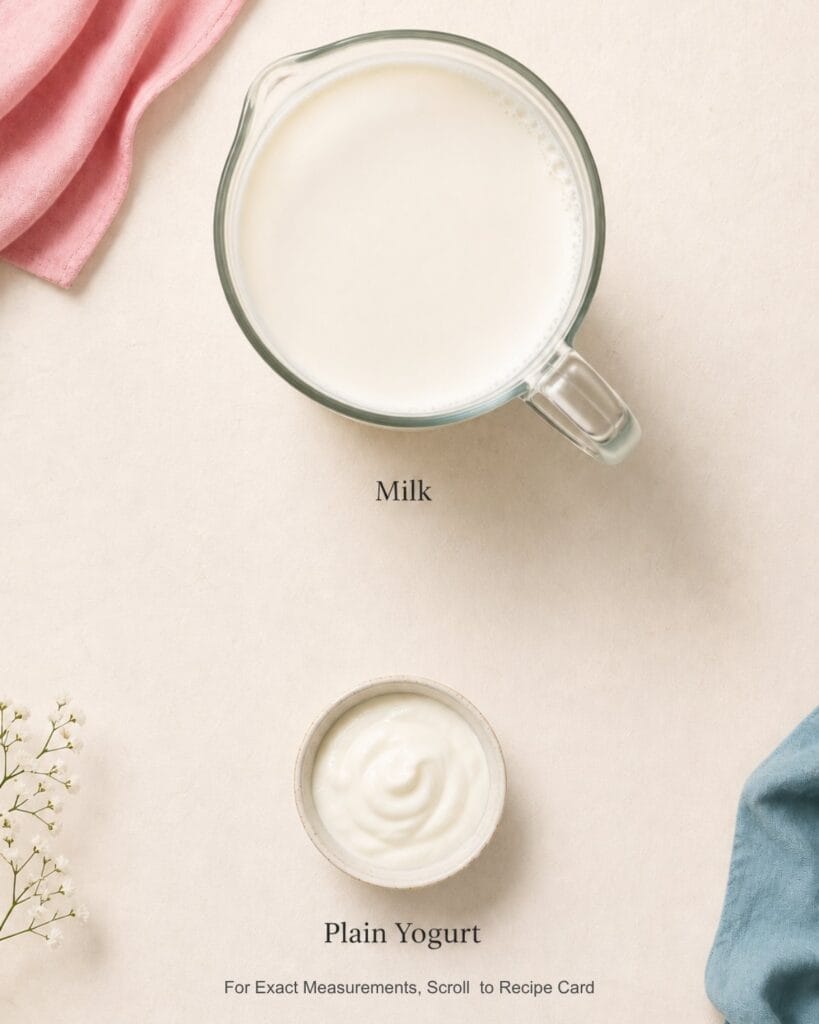
Milk (2 liters or 8 cups): You can use any fat percentage you prefer. Whole milk creates the creamiest, thickest yogurt, while 2% gives you a lighter texture. Even skim milk works, though it produces thinner yogurt. The milk should NOT be ultra-pasteurized if possible (check the label), because the high heat used in ultra-pasteurization can make it harder for the cultures to thrive.
Plain Yogurt with Live Cultures (2 tablespoons): This is your starter. Look for yogurt that says “live active cultures” or “contains active cultures” on the label. Any plain yogurt from the store works as long as it has those cultures. Greek yogurt works too! After your first batch, you’ll use your OWN homemade yogurt as the starter, which is why this becomes an unlimited supply.
Equipment You Already Own:
You don’t need any fancy yogurt makers or special equipment. Here’s what you’ll use:
- Large pot
- Small bowl
- Whisk
- Clean kitchen towel
- 2 thick blankets (for insulation)
- Thermometer (completely optional, I’ll teach you the touch test!)
That’s it. If you have a kitchen, you can make yogurt at home.
The Secret to Thick, Creamy Yogurt
Before we get into the steps, let me address the NUMBER ONE concern I hear from people: “My yogurt turned out runny and thin. What did I do wrong?”
Here’s the truth. Thick yogurt comes from three things: proper temperature during fermentation, enough time to culture, and the right milk-to-starter ratio.
Temperature matters because yogurt cultures thrive between 105°F and 115°F. Too hot and you kill the cultures. Too cold and they won’t activate properly. That’s why we wrap the pot in blankets, it maintains a consistent warm environment for 12 to 24 hours.
The longer your yogurt cultures, the thicker it gets. At 12 hours, you’ll have mild, creamy yogurt. At 24 hours, it’s tangier and thicker. You get to choose based on your preference.
Using the right amount of starter is CRITICAL. Too much starter can actually make your yogurt thin and grainy. Stick to 2 tablespoons per 2 liters of milk.
Minoo’s Pro Tip: Don’t stir your yogurt after it’s set! When you unwrap the pot and see it’s thickened, transfer it directly to the fridge without disturbing it. Stirring breaks the structure and can make it runny.
Step-by-Step Instructions
Let me walk you through exactly how to make yogurt at home. I’ve made this recipe hundreds of times, and I promise it works every single time when you follow these steps.
Step 1: Boil Your Milk
Pour 2 liters (8 cups) of milk into a large pot. Place it over medium-high heat and bring it to a full boil, stirring to prevent the milk from scorching on the bottom.
You’ll know it’s ready when you see bubbles forming around the edges and the milk starts to rise. As soon as it reaches a rolling boil, remove the pot from the heat immediately.
This boiling step is important. It kills any unwanted bacteria in the milk and helps the milk proteins restructure, which creates that thick, creamy texture we’re after.
Minoo’s Pro Tip: Watch your pot closely once the milk starts heating up! Milk can boil over in SECONDS, and cleaning burned milk off your stovetop is nobody’s idea of fun. Stay nearby and stir occasionally.

Step 2: Cool the Milk to the Perfect Temperature
This is where most people get nervous, but I’m going to make it SO EASY for you.
Remove the pot from the heat and let the milk cool to 110°F (43°C). If you have a thermometer, great! If you don’t, here’s the method my mom taught me over the phone.
Dip your clean finger into the milk and hold it there for 2 to 3 seconds. The milk should feel comfortably warm, like bath water. Not hot enough to make you pull your finger out, but definitely warm. If it feels too hot to keep your finger in, wait a bit longer and test again.
This temperature is PERFECT for the yogurt cultures to thrive. Too hot and you’ll kill them. Too cool, and they won’t activate properly.
Minoo’s Pro Tip: The cooling process takes about 20 minutes. I recommend using this time to prepare your incubation spot (find those blankets!) or clean up your kitchen. Don’t rush this step.
Step 3: Mix in Your Starter Yogurt
Transfer ½ cup of the warm milk to a small bowl. Add 2 tablespoons of plain yogurt (either store-bought or from your previous batch) to the bowl.
Whisk the mixture until it’s completely smooth with NO lumps. This step is important because it helps distribute the cultures evenly.
Pour the yogurt mixture back into the pot of warm milk. Stir gently but thoroughly to distribute the cultures throughout all the milk. You want every bit of that milk to have cultures in it.

Step 4: Create Your Warm Incubation Environment
Cover the pot with a clean kitchen towel, then place the lid on top of the towel. This creates a seal that keeps the warmth in.
Now wrap the ENTIRE pot in 2 thick blankets. You want to insulate it completely so it stays warm for the next 12 to 24 hours.
Place the wrapped pot in a warm, draft-free spot. I use my oven with just the light on (do NOT turn the oven on, just the light!). The tiny bit of warmth from the oven light is perfect. You can also use a microwave that’s turned off, a closet, or any corner of your kitchen that stays warm.

Step 5: Let It Culture (Patience Pays Off!)
This is the hands-off part. Let your yogurt culture undisturbed for 12 to 24 hours.
At 12 hours, you’ll have mild, slightly tangy yogurt with a creamy texture.
At 24 hours, the yogurt will be tangier and even thicker. Some people prefer this for the stronger flavor and extra probiotics.
Do NOT check on it. Do NOT stir it. Just let the cultures do their magic while you go about your day (or sleep through the night!).
The one mistake I made when I first learned how to make yogurt at home was not being patient enough. I kept opening the pot to check if it was ready, which let out the heat. Learn from my mistake and just TRUST the process.

Step 6: Refrigerate and Set
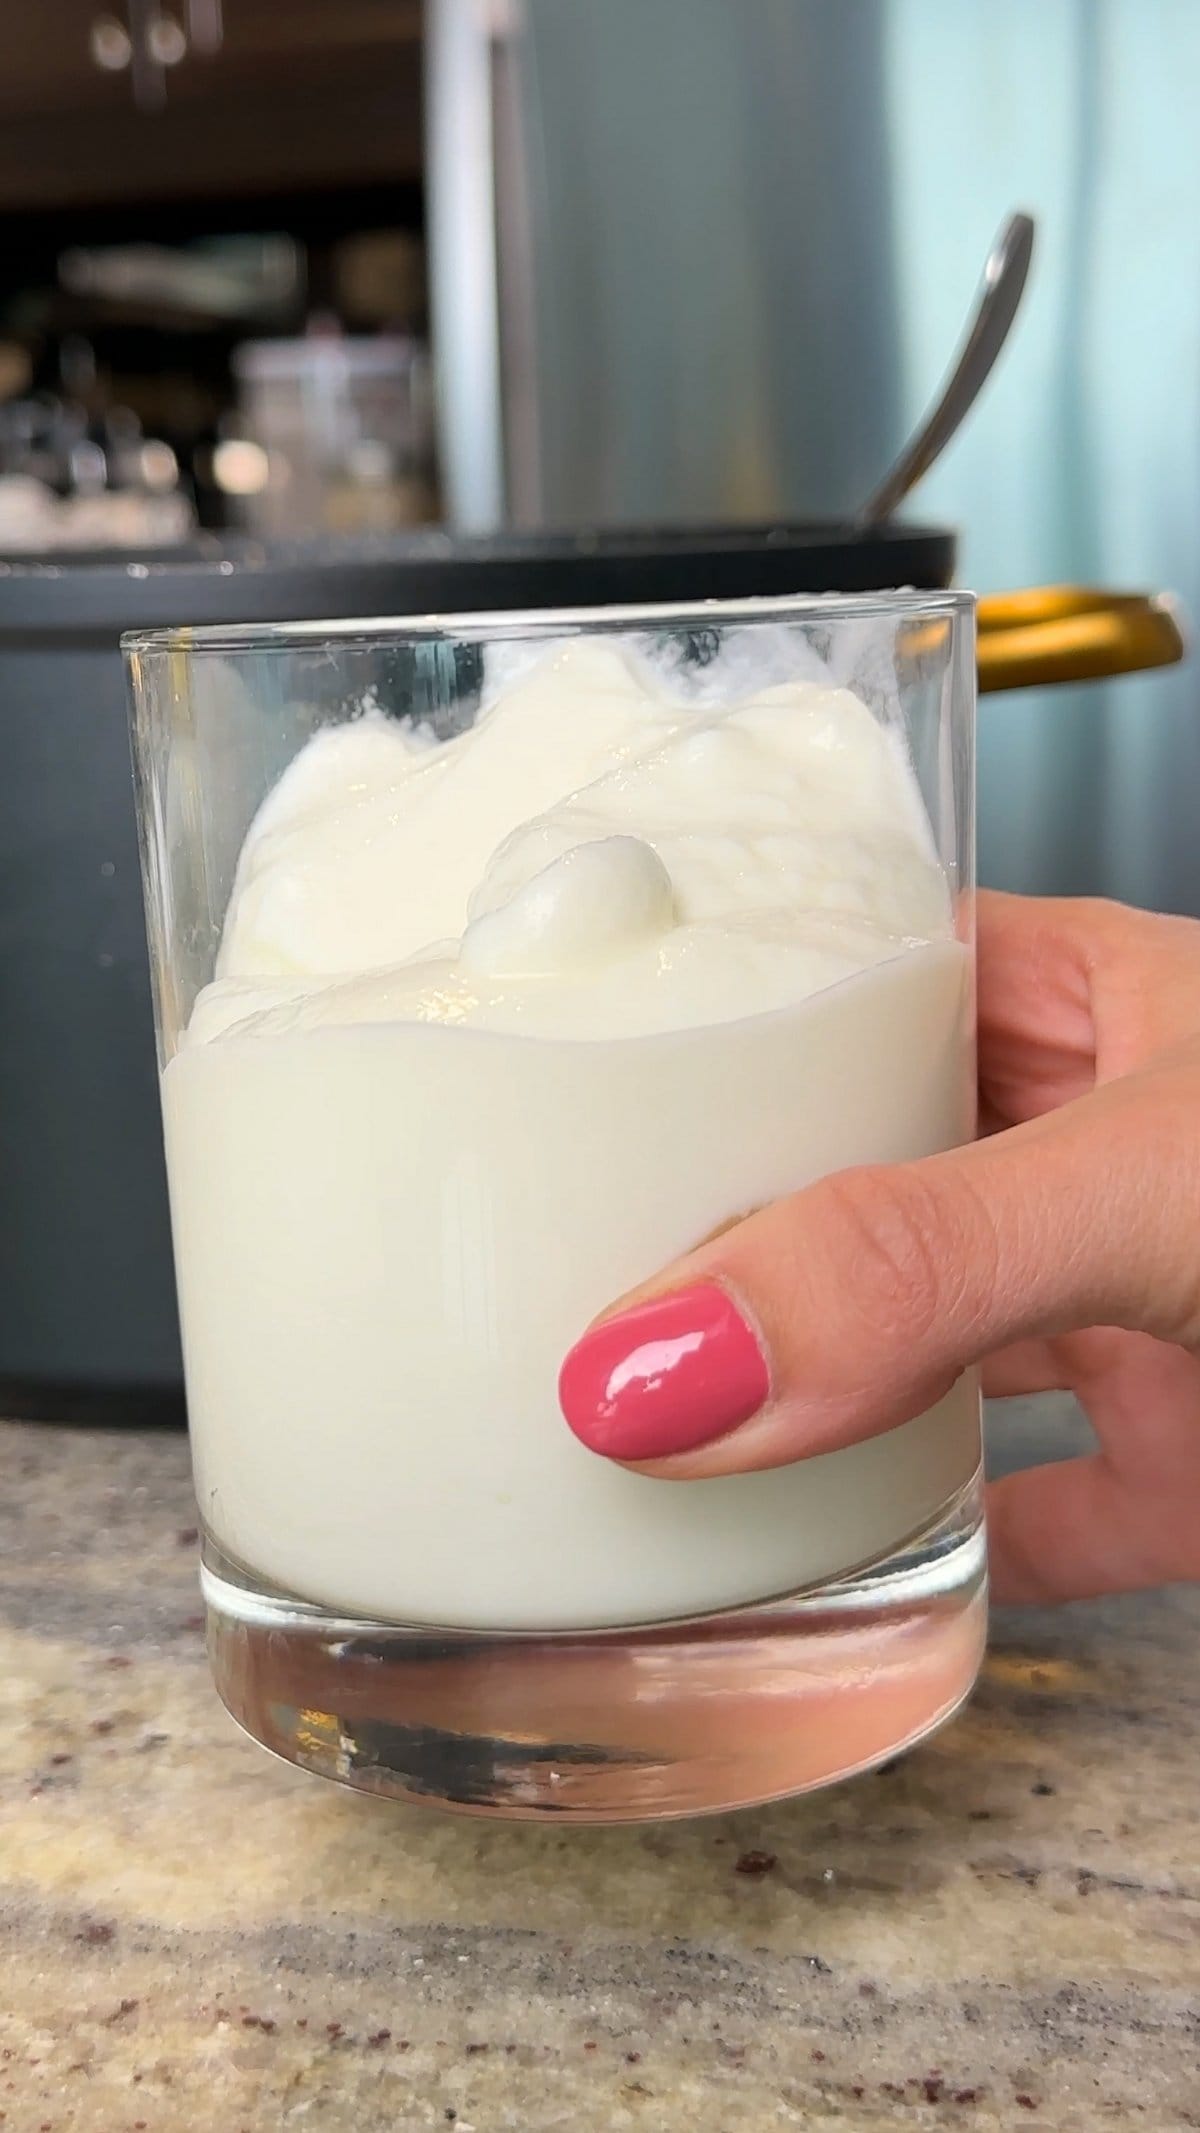
After 12 to 24 hours, unwrap the pot and remove the towel. You should see that the milk has transformed from liquid to a thick, yogurt texture.
Without stirring, transfer the pot directly to the refrigerator. Let it chill for 24 hours before serving. This chilling time allows the yogurt to set completely and develop its final texture.
After 24 hours in the fridge, your yogurt is ready! Give it a gentle stir before serving.

How to Use Your Yogurt to Make Unlimited Batches
Here’s where the MAGIC happens, and I don’t mean that in some fake, over-hyped way. I mean, this is genuinely the best part of making yogurt at home.
Before you finish your batch, save 2 tablespoons of it in a small container. Label it “yogurt starter” and keep it in the fridge. This is your starter for your next batch.
When you’re ready to make more yogurt, just repeat the same process but use YOUR homemade yogurt instead of store-bought. That’s it. You now have free starter culture forever.
I’ve been using the same yogurt line for MONTHS. The only time you need to use store-bought yogurt again is if your starter stops working (which rarely happens) or if you want to refresh your culture. I recommend starting fresh with store-bought yogurt every 4 to 5 batches just to keep the cultures strong and healthy.
Minoo’s Pro Tip: You can freeze your starter yogurt in ice cube trays! Pop out a cube when you need it, thaw it at room temperature for an hour, and use it to make your next batch. This is perfect if you’re going on vacation or just want a backup supply.
Choosing the Right Milk
Let me clear up some confusion about milk selection because this trips people up more than it should.
Whole Milk: This is what I recommend for the thickest, creamiest yogurt. The fat content creates a rich texture that’s INCREDIBLE. My mom always used whole milk, and that’s what I use too.
2% Milk: This works perfectly well and creates a lighter yogurt that’s still thick and satisfying. Great if you’re watching fat intake but still want homemade yogurt.
Skim Milk: You can use this, but know that your yogurt will be thinner. The lack of fat means less creamy texture. If you use skim milk, consider straining your yogurt afterward to thicken it up (more on that in the variations section).
What to AVOID: Ultra-pasteurized milk. Check the label before you buy. Ultra-pasteurization heats milk to extremely high temperatures, which can denature the proteins and make it harder for yogurt cultures to work properly. Regular pasteurized milk works BEST.
Flavor Variations You Can Try

Once you’ve mastered the basic recipe, you can customize your yogurt in SO many ways. Here are my favorites:
Greek Yogurt: After your yogurt has set and chilled, line a colander with cheesecloth and place it over a bowl. Pour your yogurt into the colander and let it drain in the fridge for 2 to 4 hours. The liquid that drains out is whey (save it for smoothies!), and what remains is thick, creamy Greek yogurt.
Vanilla Yogurt: After your yogurt is fully set and chilled, stir in 1 to 2 teaspoons of vanilla extract and 2 to 3 tablespoons of honey or maple syrup. Mix gently until combined.
Fruit-Flavored Yogurt: Fold in homemade 4-Ingredient Strawberry Chia Seed Jam or any fruit jam you love. You can also add fresh berries.
Persian-Style Mast-o-Khiar: This is how I grew up eating yogurt! Mix your plain yogurt with grated cucumbers, crushed walnuts, dried mint, salt, and a drizzle of olive oil. It’s AMAZING as a side dish with rice or grilled meat.
Labneh: Strain your yogurt for 12 to 24 hours until it’s thick like cream cheese. Roll it into balls, store in olive oil with herbs, and you have labneh! This is a staple in Middle Eastern cooking.
Minoo’s Pro Tip: ALWAYS add flavors AFTER the yogurt has fully set and chilled. Adding sugar, honey, or fruit during fermentation can interfere with the cultures and prevent your yogurt from setting properly.
Ways to Use Your Homemade Yogurt
Now that you’ve made this beautiful yogurt, here are some delicious ways to use it:
For Breakfast: Top it with granola, fresh fruit, honey, and nuts. Mix it into smoothies for extra creaminess. Spread it on toast with jam. Use it as the base for High Protein Bagel Bites.
As a Side Dish: Serve plain yogurt alongside spicy curries, rice dishes, or grilled meats. The cool, tangy yogurt balances out heat beautifully. This is how we always serve yogurt in Persian cooking.
In Baking: Replace sour cream or buttermilk with yogurt in recipes. It adds moisture and tang to cakes, muffins, and breads. Try it in Easy Cheesy 3-Ingredient Naan.
For Dips and Sauces: Mix with herbs, garlic, lemon juice, and salt to create tzatziki or ranch-style dips. Use it as a base for salad dressings.
As a Healthy Snack: Enjoy it on its own when you need something light and satisfying. The protein keeps you full for hours.
I BETTER NOT CATCH YOU buying those tiny overpriced yogurt containers from the store when you can make 8 cups of better yogurt at home for half the price!
Troubleshooting Common Issues

Even with the simplest recipes, things can sometimes go wrong. Here’s how to fix the most common problems when you make yogurt at home:
Problem: Yogurt is too thin or runny
Cause: Your fermentation temperature was too hot or too cold, you used too much starter, or you didn’t let it culture long enough.
Solution: Next time, make sure the milk is at the right temperature (comfortably warm to touch, not hot). Use exactly 2 tablespoons of starter per 2 liters of milk. Let it culture for at least 12 hours, and try 16 to 18 hours for thicker results.
Problem: Yogurt didn’t set at all
Cause: The milk was too hot when you added the starter (killing the cultures), or the incubation environment was too cold.
Solution: The finger test is your friend! The milk should feel warm but not hot. Make sure you’re wrapping the pot in thick blankets and placing it in a consistently warm spot. In cold weather, use the oven light trick.
Problem: Yogurt is too tangy or sour
Cause: You fermented it for too long.
Solution: This isn’t actually a problem, it’s just a preference thing! If you prefer milder yogurt, stick to 12 hours of fermentation. The tanginess develops over time, so shorter fermentation gives you sweeter results.
Problem: There’s liquid (whey) on top
Cause: This is completely NORMAL! It’s just whey separating from the yogurt.
Solution: You can either stir it back in for creamier yogurt, or pour it off for thicker yogurt. The whey is nutritious and can be used in smoothies or baking.
Problem: Temperature was too hot and I think I killed the cultures
Cause: The milk was hotter than 120°F when the starter was added.
Solution: Unfortunately, you’ll need to start over with new milk and a fresh batch of starter. This is why the finger test is so important! It prevents this exact problem.
Storage and Shelf Life
Your homemade yogurt will keep in the refrigerator for up to 2 weeks in an airtight container.
The yogurt may develop a slightly tangier flavor as it sits, which is normal. The live cultures continue to work slowly even in the cold fridge.
Remember to save 2 tablespoons as your starter BEFORE the 2-week mark! Use it or freeze it to ensure you always have starter on hand.
If you see mold, a funky smell that’s different from normal yogurt tang, or pink/orange discoloration, throw it out. These are signs of contamination (though this is rare with properly made yogurt).
Why Homemade Yogurt is Healthier

Let me give you some REAL reasons why making yogurt at home is better for your health than buying it from the store.
Fresh homemade yogurt contains more live probiotic cultures than store-bought versions. These beneficial bacteria support gut health, digestion, and immune function. The longer yogurt sits on a store shelf, the more these cultures diminish.
You control exactly what goes in. No added sugars, no thickeners like pectin or gelatin, no artificial flavors or preservatives. Just pure milk and cultures.
Making yogurt at home gives you the option to use high-quality organic milk, grass-fed milk, or any milk that meets your dietary preferences.
The fermentation process breaks down lactose, making homemade yogurt easier to digest for people with mild lactose sensitivity. The longer you ferment (up to 24 hours), the less lactose remains.
You’re saving money while eating healthier, which means you’re more likely to stick with it long term. That’s a win for your health AND your wallet.
More Homemade Recipes You’ll Love
If you enjoyed learning how to make yogurt at home, you’ll love these other homemade staples:
Homemade Cream Cheese - Another simple dairy recipe that saves you money and tastes WAY better than store-bought.
High Protein Bagel Bites - These use Greek yogurt in the dough and are perfect for breakfast or snacks.
4-Ingredient Strawberry Chia Seed Jam in 10 Minutes - The perfect topping for your homemade yogurt! No store-bought jam needed.
How to Make Mozzarella Cheese - If you’re on a homemade dairy kick, this is your next project.
Easy Cheesy 3-Ingredient Naan - This recipe uses yogurt in the dough, and it’s INCREDIBLE.
Chia Seed Pudding - Mix this with your homemade yogurt for an extra-thick, protein-packed breakfast.
Final Thoughts

Making yogurt at home changed the way I think about convenience. We’ve been trained to believe that everything needs to come from a store in a plastic container, but the truth is that some of the BEST things we eat are the ones we make ourselves.
This recipe came from my mom, who learned it from her mom, and now I’m passing it to you. Once you make your first batch, you’ll understand why my family has been making yogurt this way for generations. It’s simple, it’s foolproof, and it becomes a part of your weekly routine so easily.
The unlimited supply aspect means you’re never wasting money on starter culture after your first batch. The thick, creamy texture means you’ll actually PREFER your homemade version to anything from the store. And the fact that you made it yourself? That feeling never gets old.
So grab a gallon of milk and 2 tablespoons of store-bought yogurt. By this time tomorrow, you’ll have 8 cups of the BEST yogurt you’ve ever tasted, plus a starter for unlimited future batches.
Try this recipe and let me know how it turns out! Leave a comment below with your results, any questions you have, or your favorite way to enjoy homemade yogurt. And PLEASE rate this recipe if you loved it - it helps other people discover how easy it is to make yogurt at home.
Recipe Card

How to Make Yogurt at Home (Unlimited Supply!)
EMAIL THIS RECIPE
Enter your email and I’ll send this directly to you.
Plus you’ll get new recipes from me every week!
Ingredients
- 2 Litres Milk or 8 cups (any fat percentage)
- 2 tablespoon Plain Yogurt with active cultures
Instructions
- Pour 2 liters milk into a large pot and bring to a boil over medium-high heat, stirring occasionally to prevent scorching.
- Remove pot from heat and let milk cool to 110°F (43°C). If you don't have a thermometer, the milk should feel comfortably warm when you dip your finger in for 2-3 seconds.
- Transfer ½ cup of the warm milk to a small bowl. Add 2 tablespoons yogurt and whisk until completely smooth with no lumps.
- Pour the yogurt mixture back into the pot of warm milk, stirring gently but thoroughly to distribute the cultures evenly throughout.
- Cover the pot with a clean kitchen towel, then place the lid on top. Wrap the entire pot in 2 thick blankets to insulate.
- Place the wrapped pot in a warm, draft-free spot like a turned-off oven or microwave. Let culture undisturbed for 12-24 hours (longer fermentation creates tangier yogurt).
- Unwrap the pot and remove the towel. Without stirring, transfer the pot directly to the refrigerator and chill for 24 hours to set completely before serving.
Notes
Nutrition
Want To Save This Recipe?
Share your email & we'll send it over! PLUS, you'll get new recipes from us weekly
Frequently Asked Questions
YES! Use the finger test: dip your clean finger into the cooled milk and hold it there for 2 to 3 seconds. The milk should feel comfortably warm like bath water, not hot. If you can keep your finger in without discomfort, the temperature is perfect for adding your starter.
One liter of milk makes approximately 4 cups of yogurt. The recipe I shared uses 2 liters and makes about 8 cups. The volume stays roughly the same because yogurt is just cultured milk!
You can reuse your homemade yogurt indefinitely as long as it continues to set properly. I recommend refreshing with store-bought starter yogurt every 4 to 5 batches to keep the cultures strong and healthy, but many people go much longer without issues.
The most common causes are: using too much starter (stick to 2 tablespoons per 2 liters), temperature that was too hot or too cold during fermentation, or not fermenting long enough. Try fermenting for 16 to 18 hours instead of 12 for thicker results.
Whole milk creates the thickest, creamiest yogurt because of its higher fat content. If you prefer lower fat, 2% milk works well too. Avoid ultra-pasteurized milk when possible, as the high heat used in processing can make it harder for cultures to work properly.
Absolutely! As long as it says “live active cultures” on the label, Greek yogurt works perfectly as a starter. You’ll get regular yogurt from the process, but you can strain it afterward to make it Greek-style again.
Homemade yogurt keeps in the refrigerator for up to 2 weeks in an airtight container. Make sure to save 2 tablespoons as your starter before the 2-week mark! The yogurt may become slightly tangier over time but is still safe to eat.
Yes, boiling is important! It kills any unwanted bacteria in the milk and helps restructure the milk proteins for that thick, creamy texture. Even if you’re using pasteurized milk, boiling makes a significant difference in the final texture of your yogurt.