
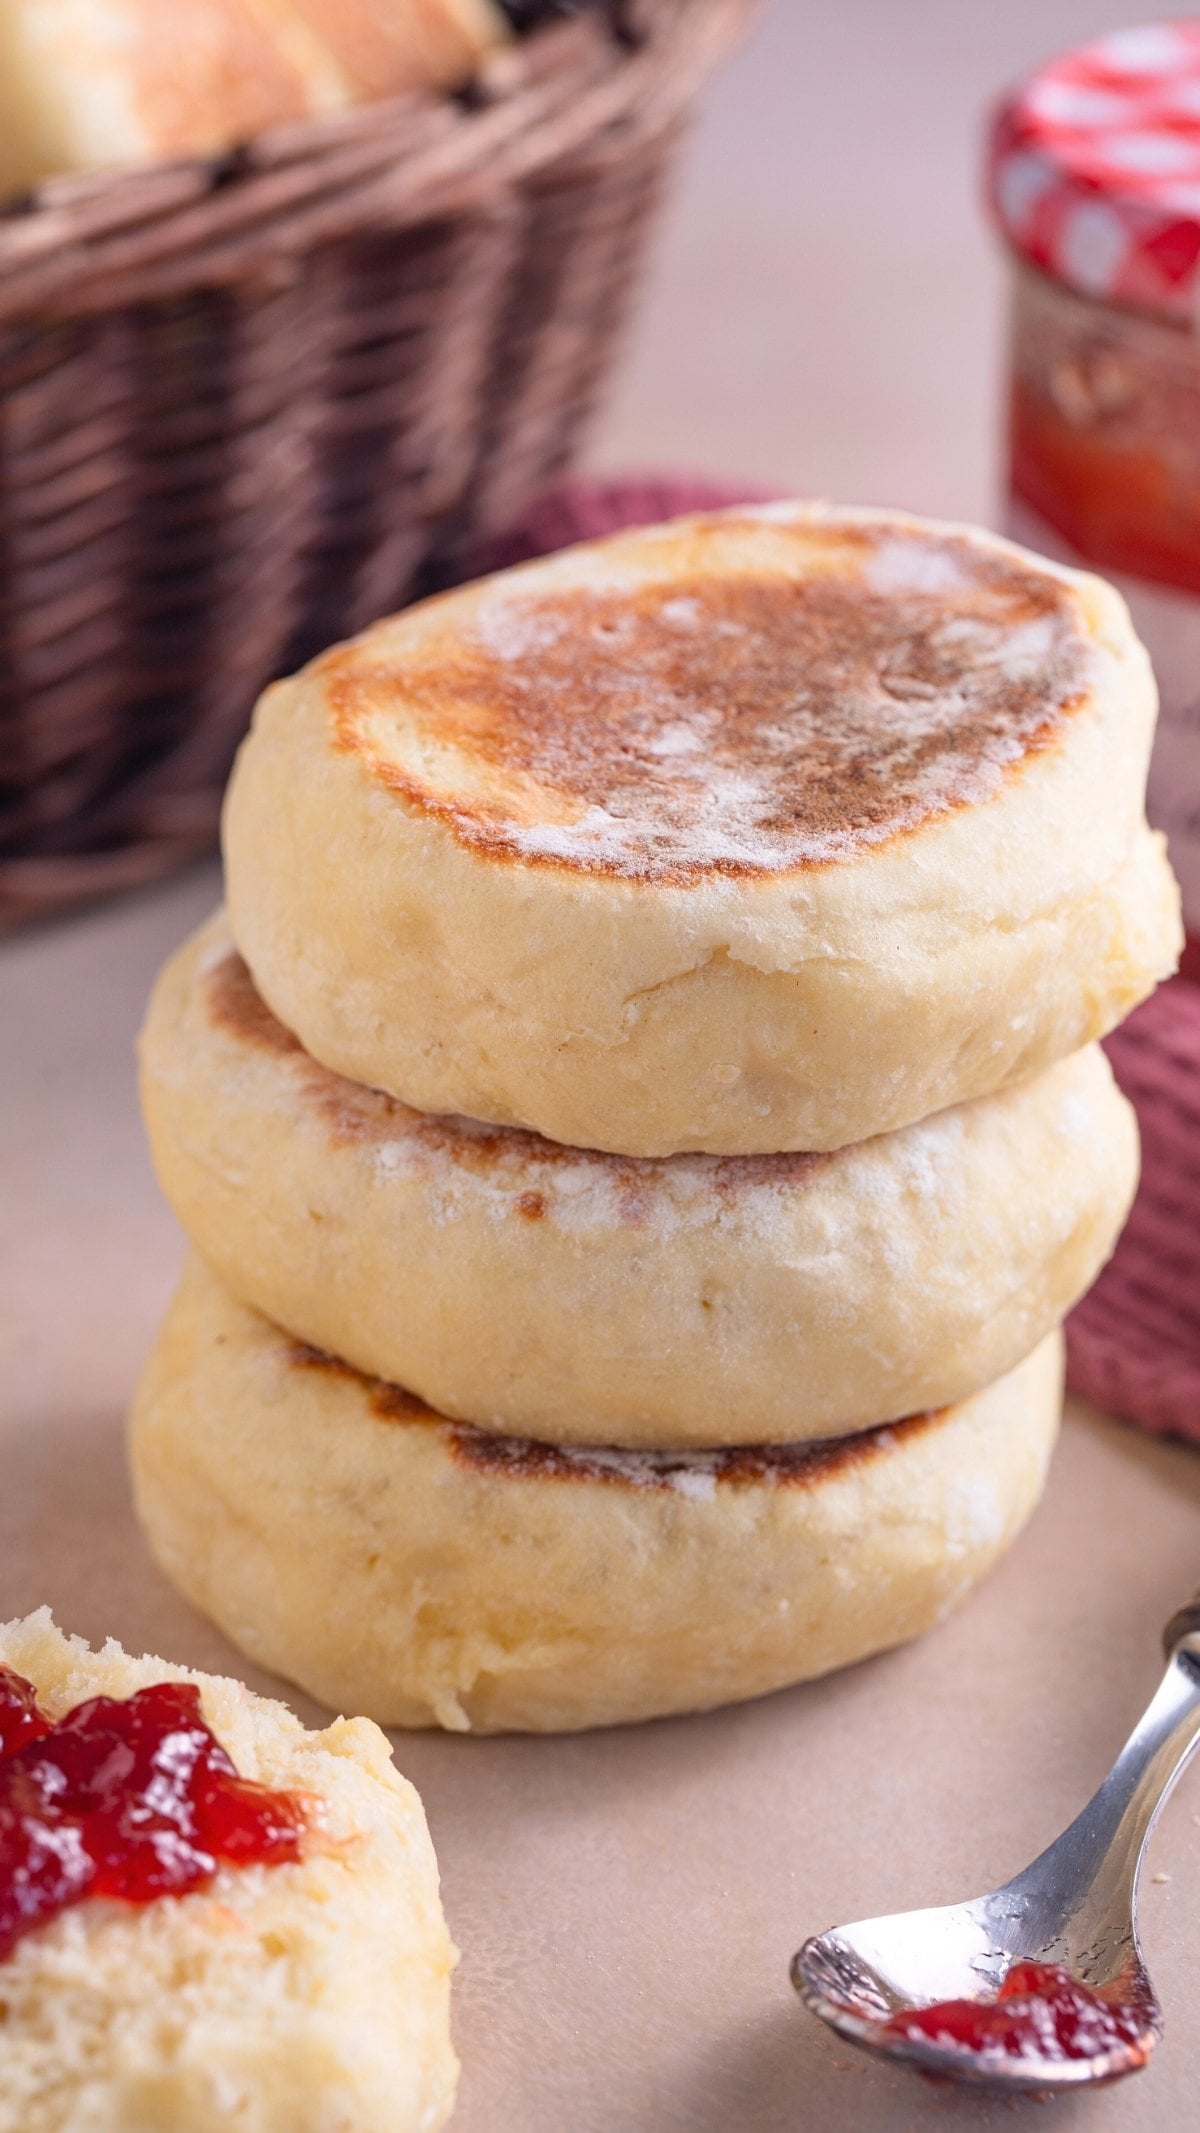
Picture this: you wake up at 7am, start this recipe, and by 9 am you’re biting into warm, golden English muffins with those iconic nooks and crannies. No overnight rise, no special equipment, just 2 hours from start to finish.
Most English muffin recipes ask you to wait overnight or wake up before dawn to get fresh muffins on the table. Not this one. This quick English muffin recipe uses a simple stretch-and-fold technique instead of kneading, comes together with just 7 pantry ingredients, and delivers that perfect chewy texture with crispy edges in the same time it takes to watch a movie.
I BETTER NOT CATCH YOU buying English muffins from the store when homemade ones are this easy!
Not sure which method is right for you? Here’s how they all compare.
Why This Quick English Muffin Recipe Works
Jump to:
- Not sure which method is right for you? Here’s how they all compare.
- Why This Quick English Muffin Recipe Works
- The Story Behind This Recipe
- Ingredients You’ll Need
- Essential Equipment
- Step-by-Step Instructions
- The Stretch-and-Fold Technique Explained
- Minoo’s Pro Tips for Perfect English Muffins
- How to Get Those Famous Nooks and Crannies
- Troubleshooting Common Issues
- Storage and Make-Ahead Tips
- Delicious Ways to Serve Your English Muffins
- Recipe Variations to Try
- More Homemade Bread Recipes You’ll Love
- Final Thoughts
- What’s Actually Happening During Those 2 Hours.
- Recipe Card
- Troubleshooting: If Something Went Wrong
- Frequently Asked Questions
This recipe has become my go-to for busy mornings, and here’s why it’ll become yours too:
Ready in 2 hours total. No overnight rising, no waiting around all day. Mix, rise, cook, done.
Just 7 simple ingredients. Milk, water, sugar, yeast, flour, salt, butter, and one egg. That’s it.
No special equipment needed. A mixing bowl and a skillet are all you need. No ring molds, no griddle, no stand mixer.
Perfect nooks and crannies every time. The stretch-and-fold technique creates those signature air pockets without kneading.
Freezer-friendly for meal prep. Make a batch on Sunday, freeze them, and toast straight from the freezer all week.
Better than store-bought. Fresh, no preservatives, and you control exactly what goes in them.
The Story Behind This Recipe
I was reading Ina Garten’s memoir where she talked about being friends with Jennifer Garner, one of my favorite actresses. Ina mentioned what a dedicated mom Jennifer is, even waking up at 5 am to make her kids fresh English muffins from scratch.
That got me thinking. I want to make fresh English muffins for my future kids someday, but waking up at 5 am? Not happening.
So I developed this quick English muffin recipe that delivers the same homemade goodness in just 2 hours, no early morning wake-up call required. When I was little, my mom would make us egg sandwiches with English muffins, an over-easy egg, and melted cheese on top. To us, it was the world’s greatest breakfast. Now I can recreate that magic for my kids any morning without the stress.
Ingredients You’ll Need
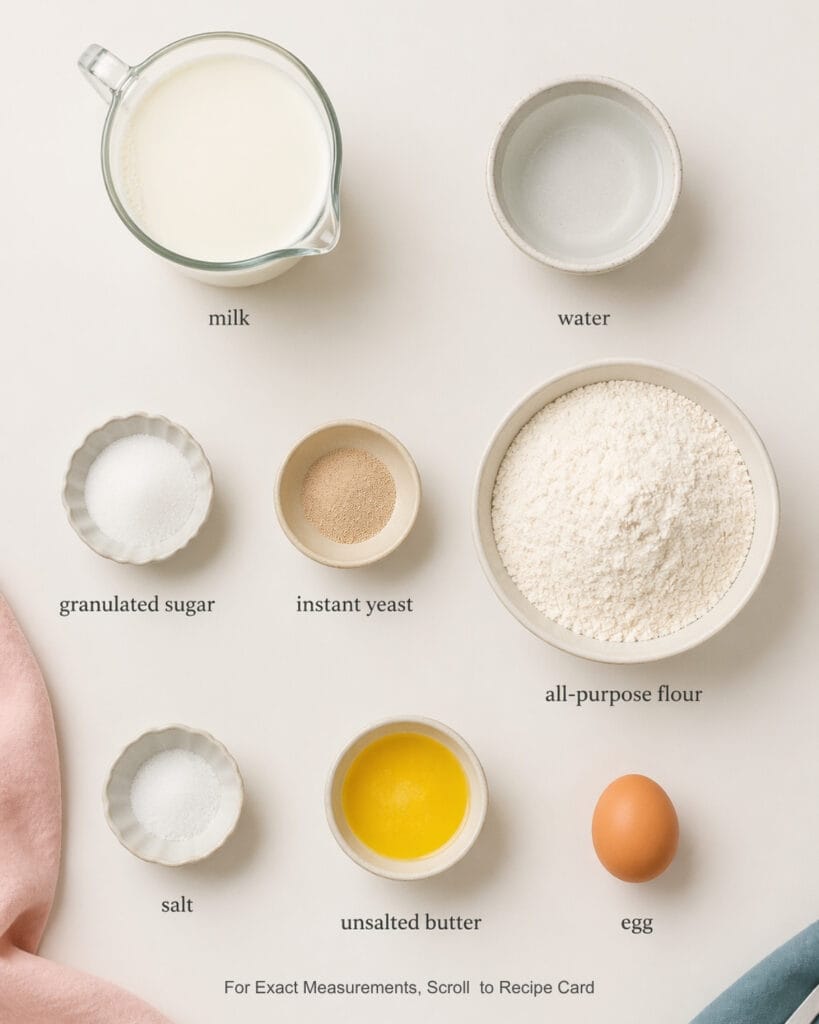
This recipe keeps things SIMPLE. Here’s what you need:
¾ cup milk provides richness and helps create a tender crumb. The proteins and sugars in milk also help with browning.
½ cup water keeps the dough hydrated without making it too rich. This balance creates those signature nooks and crannies.
2 tablespoons granulated sugar feeds the yeast and adds a subtle sweetness that balances the tangy flavor.
2¼ teaspoons instant yeast makes these muffins rise quickly without requiring an overnight proof.
3 cups all-purpose flour creates the perfect structure. You can use bread flour if you want extra chewiness, but all-purpose works beautifully.
1 teaspoon salt enhances every flavor in the dough and controls yeast activity.
3 tablespoons unsalted butter, melted adds richness and keeps the muffins soft for days.
1 large egg, room temperature provides structure and creates a tender texture.
All pantry staples. Nothing fancy, nothing you need to hunt down at specialty stores.
Minoo’s Pro Tip: Room temperature ingredients mix more evenly and help the yeast work more efficiently. Take your egg out of the fridge 30 minutes before starting.
Essential Equipment
You don’t need any special tools for this quick English muffin recipe. Here’s what I use:
- Large mixing bowl
- Whisk or spoon
- Measuring cups and spoons
- Plastic wrap or clean kitchen towel
- Large skillet with a lid
- 3-inch round cutter (or a drinking glass)
- Parchment paper
- Wire cooling rack
That’s it. No stand mixer, no ring molds, no griddle. Just basic kitchen tools you already own.
Step-by-Step Instructions
Step 1: Mix the dry ingredients. In a large mixing bowl, whisk together 3 cups all-purpose flour, 2¼ teaspoons instant yeast, and 1 teaspoon salt until well combined. This ensures the yeast distributes evenly throughout the flour.

Step 2: Prepare the wet ingredients. In a separate bowl, combine ¾ cup milk, ½ cup water, and 2 tablespoons granulated sugar. Warm this mixture to 110-115°F. It should feel warm but not hot when you touch it. Whisk in 3 tablespoons melted butter and 1 egg until the mixture is smooth and the egg is fully incorporated.
Step 3: Combine wet and dry ingredients. Pour the liquid mixture into the flour mixture and stir with a spoon until a shaggy dough forms. The dough will look rough and uneven at this stage, and that’s exactly what you want.

Step 4: Perform stretch-and-fold technique. This is where the magic happens. With wet hands, grab one side of the dough, stretch it up about 6-8 inches, then fold it over the center. Rotate your bowl 90 degrees and repeat. Continue this stretching and folding motion 8-12 times total, rotating the bowl each time. You’ll notice the dough transform from shaggy to smooth and elastic. This technique develops the gluten that creates those perfect nooks and crannies without traditional kneading.
Minoo’s Pro Tip: Keep your hands slightly wet during the stretch-and-fold process. This prevents sticking and makes the technique much easier.

Step 5: First rise. Place the dough in a lightly oiled bowl, cover with plastic wrap, and let it rise in a warm spot for 1 hour or until doubled in size. I like to place mine in the oven with just the light on (not the heat, just the light). The gentle warmth creates the perfect rising environment.

Step 6: Shape the dough. Turn the risen dough onto a lightly floured surface and gently press it into a ½-inch thick rectangle using your hands. Don’t use a rolling pin as this can deflate all those beautiful air bubbles you just created.

Step 7: Cut out the muffins. Using a 3-inch round cutter, cut out as many muffins as you can. Gently press the scraps together (don’t knead them), flatten to ½-inch thick, and cut out more muffins until all the dough is used. You should get 10-12 muffins total. Place them on a parchment-lined baking sheet.

Step 8: Second rise. Cover the shaped muffins loosely with plastic wrap and let them rise for 30 minutes until they look puffy and feel light when you gently touch them.

Step 9: Cook the muffins. Heat a large skillet over medium-low to low heat. This low and slow approach is critical. Cook the muffins in batches of 3-4 at a time, covering the skillet with a lid. Cook for 6-8 minutes per side. The muffins should be golden brown on both sides and sound hollow when you tap them. If they’re browning too quickly, lower your heat.
Minoo’s Pro Tip: Resist the urge to cook these on medium or high heat. Low and slow is the secret to golden exteriors with fully cooked, fluffy centers.

Step 10: Cool completely. Transfer the cooked muffins to a wire rack and let them cool completely before splitting. This is important! Hot muffins will be gummy inside if you cut into them too soon. Give them at least 15-20 minutes to set up properly.

The Stretch-and-Fold Technique Explained
If you’ve never heard of stretch-and-fold, don’t worry. It sounds fancy but it’s actually easier than traditional kneading.
Traditional kneading involves pushing and folding dough on a floured surface for 8-10 minutes. It’s messy, it’s a workout, and if you’re new to bread making, it can be intimidating.
Stretch-and-fold does the same job (developing gluten for structure and chewiness) but in a gentler, easier way. You literally just stretch the dough up and fold it over itself several times. The dough develops strength and elasticity without all that aggressive handling.
This technique is perfect for wetter doughs like this quick English muffin recipe. It creates an open, airy crumb structure with those signature nooks and crannies you see in store-bought English muffins.
Minoo’s Pro Tips for Perfect English Muffins

Use the fork-splitting method. This is CRITICAL and most people don’t know about it. When your muffins are completely cool, don’t slice them with a knife. Instead, take a fork and poke it all around the perimeter of the muffin, creating a dotted line. Then pull the two halves apart with your hands. This creates those iconic nooks and crannies. A knife gives you a smooth surface that won’t toast up crispy like authentic English muffins should.
Keep the heat low. I’ve tested this recipe at different temperatures, and I recommend cooking on medium-low to low heat. Too high and you’ll get burnt outsides with raw, gummy centers. These muffins need 6-8 minutes per side to cook through properly.
Let them cool before splitting. I know it’s tempting to split them right off the skillet, but the texture will be gummy and wet if you don’t let them cool for at least 15-20 minutes. The interior needs time to set up.
Don’t skip the second rise. That 30-minute rest after shaping is essential. It gives the muffins one last boost of air before cooking, which contributes to the light, fluffy texture.
How to Get Those Famous Nooks and Crannies
Everyone wants to know the secret to getting those deep pockets and rough texture that make English muffins perfect for catching butter and jam.
Here’s what creates them:
Proper hydration. The combination of milk, water, and egg in this quick English muffin recipe creates a dough that’s wet enough to form air pockets but not so wet it can’t hold its shape. This balance is key.
Gentle handling. When you press out the dough in Step 6, use your hands instead of a rolling pin. Rolling deflates those precious air bubbles. Gentle pressing preserves them.
The stretch-and-fold technique. This develops gluten strength that can capture and hold air bubbles during rising. Without proper gluten development, you get dense, bready muffins instead of light, airy ones.
Fork-splitting instead of knife-cutting. This is the final piece of the puzzle. Even if you do everything else right, using a knife will give you a smooth surface. The fork creates that rough, craggy texture that toasts up golden and crispy.
Troubleshooting Common Issues

My dough is too sticky to handle. This dough is meant to be slightly sticky! That’s what creates the open crumb. Use wet hands during the stretch-and-fold process and flour your surface generously when shaping. Don’t add extra flour to the dough itself or you’ll end up with dense muffins.
My muffins are browning too fast but the centers are raw. Your heat is too high. English muffins need low and slow cooking, around medium-low to low heat. Lower your temperature and give them the full 6-8 minutes per side.
My muffins are dense without air pockets. This usually happens when the dough hasn’t risen enough or you’ve deflated it during shaping. Make sure your yeast is fresh (check the expiration date), give the dough the full rising time until it’s truly doubled, and handle it gently when shaping.
My muffins are gummy inside. You either cut into them before they cooled completely or didn’t cook them long enough. Let them cool for at least 15-20 minutes before splitting, and make sure they sound hollow when tapped before removing from the skillet.
I don’t have those iconic nooks and crannies. Did you use a knife to cut them open? Always use the fork-splitting method I described above. This single change makes a huge difference.
Storage and Make-Ahead Tips
These English muffins store beautifully, which makes them perfect for meal prep.
Room temperature storage: Let the muffins cool completely, then store them in an airtight container or zip-top bag at room temperature for up to 3 days. Don’t refrigerate them as this dries them out.
Freezing method: This is my favorite way to store them. Let the muffins cool completely, then use a fork to split them open before freezing. Place the split halves in a freezer bag, pressing out as much air as possible. Freeze for up to 3 months. When you’re ready to eat them, pop them straight from the freezer into your toaster. No thawing needed!
Reheating: For the best texture, always toast English muffins before eating. The toasting brings back that crispy exterior and warm, fluffy interior. You can toast them in a regular toaster, toaster oven, or under the broiler for 2-3 minutes.
Minoo’s Pro Tip: Splitting the muffins before freezing makes weekday mornings so much easier. Just grab two halves from the freezer and pop them in the toaster while you make your coffee.
Delicious Ways to Serve Your English Muffins

Once you’ve mastered this quick English muffin recipe, here are some of my favorite ways to enjoy them:
Classic breakfast. Split, toast, and slather with butter and jam. Simple, perfect, and exactly what my mom used to make for us.
Eggs Benedict. These muffins are sturdy enough to hold up to poached eggs and hollandaise sauce without getting soggy. They’re my top choice for weekend brunch.
Breakfast sandwiches. Top with a fried egg, cheese, and bacon or sausage for a homemade breakfast sandwich that beats any fast food version.
Mini pizzas. Split, top with pizza sauce, cheese, and your favorite toppings, then broil until the cheese melts. My kids love these for after-school snacks.
With soup. Serve alongside tomato soup, chicken noodle soup, or any hearty stew. They’re perfect for dunking.
For a complete breakfast spread, pair these with my 4-Ingredient Ketchup and 4-Ingredient Strawberry Chia Seed Jam.
Recipe Variations to Try
Once you’ve nailed the basic quick English muffin recipe, experiment with these variations:
Whole wheat English muffins. Replace up to half of the all-purpose flour with whole wheat flour for a heartier, fiber-rich version. You may need to add an extra tablespoon or two of water as whole wheat flour absorbs more liquid.
Jalapeño cheddar English muffins. Mix ½ cup shredded sharp cheddar cheese and 2 tablespoons diced jalapeños into the dough after the stretch-and-fold process. These are incredible for breakfast sandwiches.
Blueberry English muffins. Gently fold ½ cup fresh or frozen blueberries into the dough after Step 4. These make an amazing sweet breakfast option.
Strawberry English muffins. Add ½ cup diced fresh strawberries and an extra tablespoon of sugar to the dough for a fruity twist.
Cinnamon raisin English muffins. Mix 1 teaspoon cinnamon into the dry ingredients and fold ½ cup raisins into the dough after stretching and folding.
More Homemade Bread Recipes You’ll Love
If you enjoyed this quick English muffin recipe, you’ll love these other bread recipes from my kitchen:
5-Ingredient Greek Pita Breads come together even faster than these muffins and are perfect for sandwiches and dips.
Easy Same-Day Pizza Dough Recipe uses a similar quick-rise technique and is ready in just a few hours.
4-Ingredient Bread Bowl Recipe is another time-saving bread option that’s perfect for serving soup.
No-Knead 5-Ingredient Bread Loaf uses the same stretch-and-fold technique and makes the perfect sandwich bread.
Copycat Pizza Hut Garlic Parmesan Breadsticks are another crowd-pleaser that comes together quickly.
5-Ingredient New York Style Bagels are perfect if you love this recipe and want to try another breakfast bread.
Final Thoughts

This quick English muffin recipe proves that homemade bread doesn’t have to be complicated or time-consuming. In the same 2 hours you’d spend running errands, you can have a batch of fresh, fluffy English muffins ready for the week.
The next time you’re about to grab a package of English muffins at the store, remember how simple this recipe is. Seven ingredients, one bowl, one skillet, and 2 hours is all it takes to make something infinitely better than anything you can buy.
Give this recipe a try this weekend and let me know how it turns out! Rate the recipe below and leave a comment telling me how you like to serve your English muffins. I’d love to hear from you!
What’s Actually Happening During Those 2 Hours.
Recipe Card

The Best Quick English Muffin Recipe for Busy Mornings
EMAIL THIS RECIPE
Enter your email and I’ll send this directly to you.
Plus you’ll get new recipes from me every week!
Ingredients
- ¾ cup milk
- ½ cup water
- 2 tablespoons granulated sugar
- 2¼ teaspoons instant yeast
- 3 cups all-purpose flour
- 1 teaspoon salt
- 3 tablespoons unsalted butter melted and slightly cooled
- 1 large egg room temperature
Instructions
- In a large mixing bowl, whisk together the flour, instant yeast, and salt until well combined.
- In a separate bowl, combine milk, water, and sugar. Warm the mixture to 110-115°F (ensuring it’s not too hot). Whisk the melted butter and egg into the liquid mixture.
- Pour the liquid ingredients into the flour mixture. Mix until a shaggy dough forms.
- Perform a series of stretch-and-fold techniques to develop gluten: Stretch one side of the dough up and fold it over the center. Then rotate the bowl 90 degrees. Repeat this process 8-12 times, turning the dough into a smooth, elastic ball
- Place the dough in a lightly oiled bowl, cover with plastic wrap, and let rise in a warm spot for 1 hour or until doubled in size.
- Turn the dough onto a lightly floured surface and press it into a ½-inch thick rectangle using your hands.
- Using a 3-inch round cutter, cut out muffins. Gently re-roll scraps and continue cutting until all dough is used. Place muffins on a parchment-lined baking sheet.
- Cover the muffins loosely with plastic wrap and let rise for 30 minutes until puffy.
- Heat a large skillet over medium-low to low heat. Cook muffins in batches of 3-4 at a time, covering the skillet and cooking for 6-8 minutes per side. The muffins should be golden brown and sound hollow when tapped. Adjust heat as needed to prevent burning while ensuring the center cooks through.
- Transfer cooked muffins to a wire rack to cool completely before serving.
Notes
Nutrition
Want To Save This Recipe?
Share your email & we'll send it over! PLUS, you'll get new recipes from us weekly
Troubleshooting: If Something Went Wrong
🥞 My muffins came out flat
- Yeast wasn’t active. Your yeast foam should appear within 5-10 minutes of mixing with warm liquid. No foam = dead yeast. Start with a fresh packet and check the expiry date.
- Dough was rolled too thin. Aim for ¾ inch thick. Most people roll to ½ inch by instinct - that’s too thin for a good rise during cooking.
- Second proof was skipped. After shaping, the muffins need 15-20 minutes to puff back up before they hit the skillet. Look for visible puffiness before cooking.
- Liquid was too hot. Aim for 100-110°F - like warm bathwater. Anything above 120°F kills the yeast before it can work.
🔥 Burnt outside, doughy inside
- Heat is too high. Medium-low is the right setting - around 3-4 out of 10. Muffins should take 6-8 minutes per side. If they’re browning in under 3 minutes, reduce the heat.
- Pan wasn’t covered. Always cook with a lid on. The trapped steam is what cooks the inside through - without it you get a crusty exterior and raw centre.
- This is a stovetop recipe, not an oven recipe. If you’ve been trying to bake these in the oven, that’s why they aren’t working. No oven required - just a skillet and a lid. If you really need the oven, use 350°F for 15-18 minutes, but the texture will be more like a soft roll than a classic English muffin.
🕳️ No nooks and crannies - muffins are too dense
- Too much flour was added. Sticky dough is intentional. Use a floured surface to prevent sticking, but don’t add flour to the dough itself - it closes up the crumb structure.
- Dough was overworked during shaping. Shape once, gently, with as few touches as possible. Every squeeze degasses a bubble that would have become a nook.
- Muffins were sliced instead of fork-split. Always use a fork to split English muffins - never a knife. A fork tears along the natural air pockets and opens up those jagged, butter-catching crannies. A knife just compresses them.
Frequently Asked Questions
Yes! Bread flour has more protein than all-purpose flour, which creates a chewier texture and can help capture air bubbles even better. If you use bread flour, you might need to add an extra tablespoon of water since it absorbs more liquid.
Absolutely. After shaping the muffins in Step 7, cover them tightly and refrigerate overnight instead of doing the 30-minute second rise. In the morning, let them sit at room temperature for 30-45 minutes before cooking. The slow overnight rise actually develops even more flavor.
This happens for two reasons: either you cut into them before they cooled completely, or your heat was too high and they didn’t cook through. Make sure to cook them on medium-low to low heat for the full 6-8 minutes per side, and always let them cool for at least 15-20 minutes before splitting.
Yes, but you’ll need to activate it first. Warm the milk and water mixture to 110°F, stir in the active dry yeast and sugar, and let it sit for 5-10 minutes until foamy before proceeding with the recipe.
The muffins should be golden brown on both sides and sound hollow when you tap them. If you’re unsure, you can insert a thermometer into the center. They’re done when they reach 190-200°F internally.
The milk adds richness, tenderness, and helps with browning, while the water keeps the dough from being too heavy or rich. This combination creates the perfect balance for light, fluffy English muffins with great flavor.
Yes! After shaping the muffins in Step 7, freeze them on a baking sheet until solid, then transfer to a freezer bag. When ready to use, let them thaw in the refrigerator overnight, then bring to room temperature and let rise for 30 minutes before cooking.
If you want those authentic nooks and crannies, yes! Using a knife gives you a smooth surface that won’t toast up with the same crispy, craggy texture. The fork creates all those little peaks and valleys that make English muffins special.
Technically, yes, but the texture won’t be the same. If you bake them in the oven at 350°F (175°C) for 15-18 minutes, you’ll get a fully cooked English muffin - but without the flat, crust-sealed top and bottom that the skillet creates, and without the steam-driven nooks that form on direct contact with a hot surface.
The stovetop is what makes English muffins English muffins. If stovetop cooking isn’t an option, the oven method will still taste great - but the texture will be closer to a small soft roll than a classic English muffin.
Flat muffins almost always come down to one of four things: dead yeast, dough that was rolled too thin, a second proof that was skipped, or liquid that was too hot and killed the yeast. Check the troubleshooting section above for a full walkthrough of each scenario.
The most common culprit for first-timers is the yeast. Always proof it first: mix with warm liquid and a pinch of sugar - if it doesn’t foam within 5-10 minutes, your yeast is dead and the batch can’t be saved.
No - this recipe doesn’t require ring molds. You cut the muffins from rolled dough using a round cutter, glass, or the rim of a large jar. The dough holds its shape during the second proof without a mold.
That said, if your muffins spread outward more than upward, lightly greased mason jar lids work as a budget alternative to specialty molds.
The same-day version (this recipe) uses a 2-hour rise at room temperature and is ready the same morning you start it. It has a clean, buttery flavor and excellent nooks - perfect for when you want fresh English muffins without planning ahead.
The overnight no-knead recipe uses a slow cold ferment of 12-18 hours in the refrigerator. That longer fermentation develops more complex, slightly tangy flavors - similar to what you’d expect from a bakery muffin. The nooks are slightly more pronounced. If you have the time, the overnight version is my personal favorite. But for busy mornings, this same-day recipe is the one I actually make most often.
Easy to make. If I’m in a hurry I just bake ’em. My wife loves them either way. So much better and cheaper than store bought!
Love that so much Briahn!! Your wife is lucky to have you.
What temp and how long with baking?
No baking made in skillet….its stated in recipe
Hi, what temperature did you bake them at and for how long?